
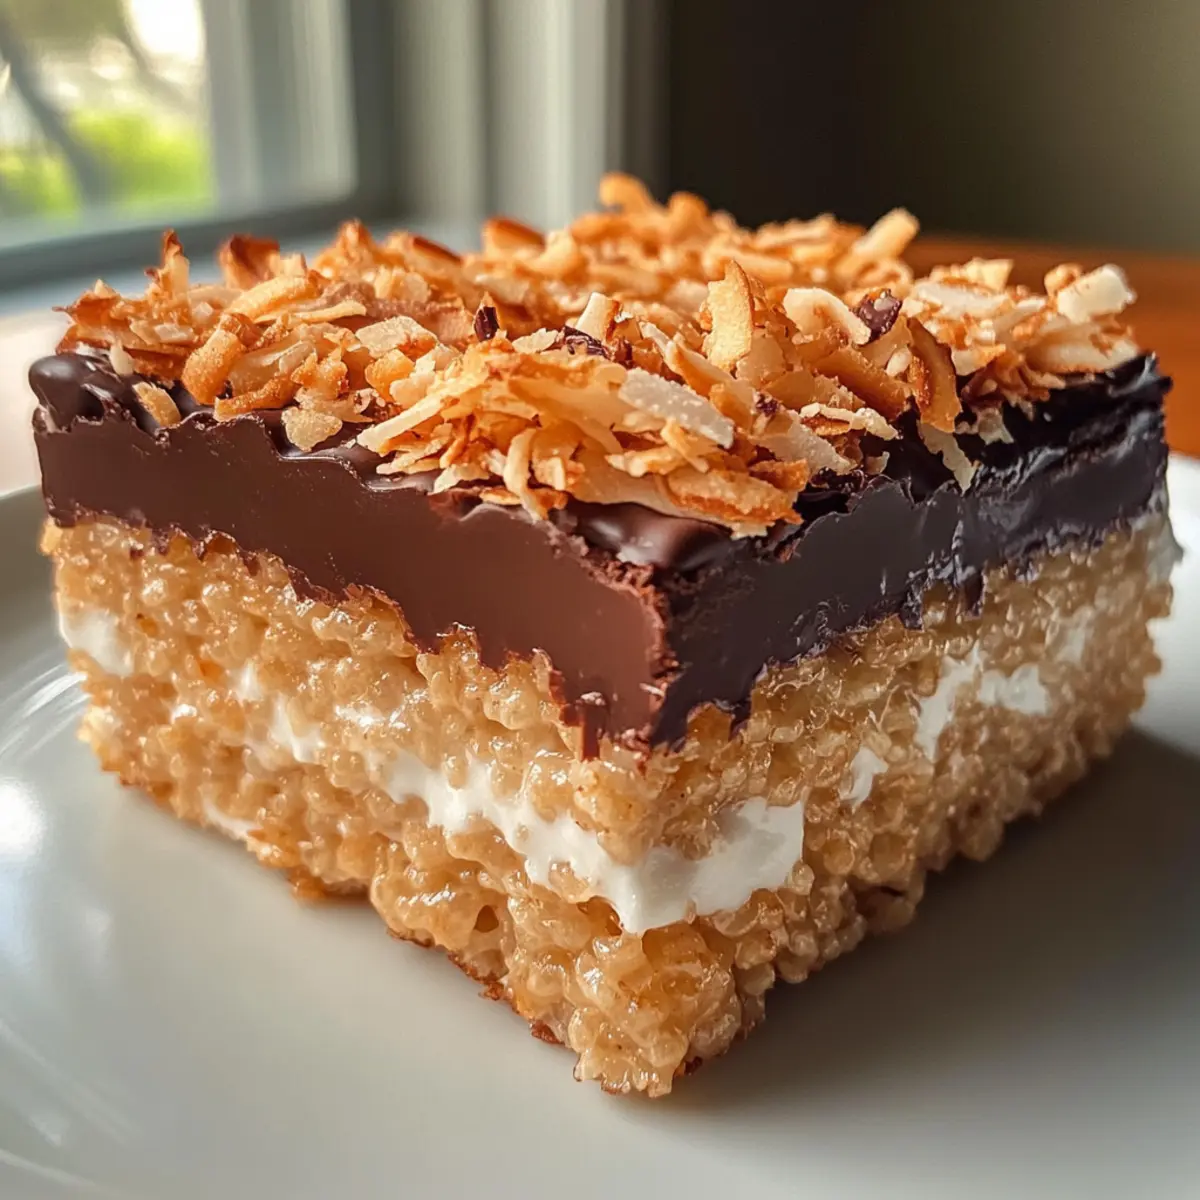
As I stood in my kitchen, the sweet aroma of toasting coconut filled the air, taking me back to carefree childhood days spent munching on Girl Scout cookies. Inspired by that blissful nostalgia, I couldn’t resist creating these Samoa Rice Krispie Treats, a delicious fusion of chewy marshmallow and crunchy cereal, draped in rich caramel and dotted with toasted coconut. Not only are these treats a breeze to whip up—perfect for those hectic afternoons—but they also make a fantastic centerpiece for family gatherings or snack attacks. With just a handful of ingredients and no baking required, you’ll find yourself reaching for seconds (and thirds!). Are you ready to elevate your treat game and bring a taste of childhood back to your kitchen?
Why are Samoa Rice Krispie Treats a must-try?
Deliciously Nostalgic: These treats capture the essence of Girl Scout Samoa cookies, evoking warm memories with every bite.
Effortless Preparation: With no baking required, you can enjoy a homemade treat in no time—perfect for busy days!
Family-Friendly Fun: Ideal for the whole family, these sweet delights are a hit at parties, snacks, or even dessert nights.
Customizable Layers: Feel free to experiment with your favorite ingredients, such as swapping marshmallows for a vegan version or adding nuts.
Texture Heaven: Enjoy the delightful contrast of chewy marshmallows, crispy cereal, and a luscious caramel topping.
Treat yourself to these Samoa Rice Krispie Treats, and if you’re looking for more sweet inspirations, check out Beetlejuice Mini Trifles for another delicious idea!
Samoa Rice Krispie Treats Ingredients
For the Treats
• Mini Marshmallows – Essential for that sweet chewy texture, binding the ingredients together.
• Butter – Adds richness and helps in melting the marshmallows smoothly.
• Rice Krispie Cereal – The crucial element that brings the light crunch that you love in Rice Krispie treats.
• Sweetened Shredded Coconut – Adds lovely toasty flavor; you can use unsweetened if you prefer a less sweet bite.
For the Caramel Layer
• Milk – Helps thin the dulce de leche for easy mixing; feel free to use any milk variety you have on hand.
• Dulce de Leche – This will bring that rich caramel flavor; homemade caramel sauce works as a delightful substitute.
For the Chocolate Topping
• Semisweet Chocolate – Melts beautifully for a luscious finish; consider using dark or milk chocolate for a different twist.
Get ready to enjoy these Samoa Rice Krispie Treats, transforming your kitchen into a nostalgic sweet haven!
Step‑by‑Step Instructions for Samoa Rice Krispie Treats
Step 1: Toast Coconut
In a large skillet, over medium-high heat, toast the sweetened shredded coconut. Stir constantly for about 3–5 minutes, until the coconut is golden brown and fragrant. Remove from heat immediately to prevent burning and allow it to cool completely on a plate while you prepare the caramel layer.
Step 2: Prepare Caramel Mixture
In a microwave-safe bowl, combine the dulce de leche with a splash of milk. Microwave for 1.5 minutes, stirring every 30 seconds until smooth and creamy. Once mixed, fold in half of the cooled toasted coconut to create a luscious caramel layer that brings the Samoa Rice Krispie Treats to life.
Step 3: Melt Marshmallows
In another microwave-safe bowl, add the butter and mini marshmallows. Microwave on high for about 1.5–2 minutes, pausing to stir halfway through. Once melted and smooth, give the mixture a good stir to ensure it is well combined, creating a sticky base for your treats.
Step 4: Combine with Cereal
Add the Rice Krispie cereal into the melted marshmallow mixture. Using a spatula, mix until the cereal is thoroughly coated and evenly combined with the marshmallow delight. This step is crucial for ensuring that every bite of the Samoa Rice Krispie Treats is perfectly balanced.
Step 5: Layer Treats
In a greased 8×12 pan, press half of the Rice Krispie mixture into the bottom firmly with greased hands to create an even layer. Pour the caramel coconut mixture over this base, spreading it gently but evenly. Then, top with the remaining Rice Krispie mixture, pressing down firmly to form a cohesive treat.
Step 6: Add Chocolate Topping
Melt the semisweet chocolate in a microwave-safe bowl, heating in 30-second increments and stirring until smooth. Pour the melted chocolate over the top layer of your treats, using a spatula to spread it evenly. Sprinkle the remaining toasted coconut on top, enhancing the visual appeal and flavor of your Samoa Rice Krispie Treats.
Step 7: Cool and Serve
Allow the treats to cool at room temperature until the chocolate hardens, which typically takes about 30 minutes. Once set, slice into squares and serve your delectable Samoa Rice Krispie Treats, ready to be enjoyed by family and friends.

Make Ahead Options
These Samoa Rice Krispie Treats are perfect for meal prep, allowing you to enjoy delicious treats without the last-minute rush. You can prepare the toasted coconut and dulce de leche mixture up to 3 days in advance. Simply store the toasted coconut in an airtight container at room temperature to keep its crunch and refrigerate the caramel mixture until you’re ready to assemble. When you’re ready to make the treats, melt the marshmallows and mix with the Rice Krispie cereal, layering as instructed, then add chocolate. This way, you’ll create the same mouthwatering results with considerably less effort—ideal for busy weeknights or spontaneous gatherings!
What to Serve with Samoa Rice Krispie Treats
As you prepare to enjoy these indulgent treats, consider complementing their rich flavors with delightful side dishes that balance sweetness and texture.
-
Vanilla Ice Cream: A scoop of creamy vanilla ice cream adds a cool contrast to the chewy treats, creating a lovely harmony with each bite.
-
Fresh Berries: The tartness of strawberries or raspberries provides a refreshing burst of flavor, perfect for cutting through the sweetness.
-
Chocolate Dipping Sauce: Elevate the experience with a warm chocolate sauce for dipping, enhancing the flavor while indulging your sweet tooth.
For a fun twist, serve Coconut Milk Smoothies alongside; their light, tropical essence echoes the toasted coconut in your treats. This pairing can transport you to a sunny beach with each sip.
-
Nutty Trail Mix: A handful of crunchy trail mix brings a delightful texture, providing a perfect contrast to the softness of the Samoa Rice Krispie Treats.
-
Cold Brew Coffee: Enjoy with a side of iced coffee for a pick-me-up; the bold flavors beautifully complement the sweet treats, making for a delightful afternoon snack!
Samoa Rice Krispie Treats Variations
Feel free to put your own spin on these Samoa Rice Krispie Treats; the possibilities are as delightful as the treats themselves!
- Dairy-Free: Substitute mini marshmallows with vegan marshmallows for a dairy-free delight full of flavor.
- Nutty Crunch: Add chopped pecans or almonds to the cereal mixture for an exciting crunch and a different texture that compliments the sweetness beautifully.
- Chocolate Variations: Experiment with different chocolates, using white chocolate for a creamy twist or even flavored chocolate for an adventurous bite. Imagine the richness of dark chocolate paired with roasted coconut!
- Syrup Swap: Instead of dulce de leche, use homemade caramel sauce for a fresher taste that can elevate the overall experience. Homemade always adds a personal touch!
- Flavor Boost: Mix in vanilla or coconut extract for a heightened flavor that will create a delicious aroma and deepen the coconut taste.
- Fruit Addition: For a fruity twist, sprinkle in some dried pineapple or sliced bananas for a chewy texture that pairs well with the caramel and coconut.
- No-Bake Layering: Try layering with a thin spread of peanut butter or almond butter in between the rice crispy layers for an added creaminess and nutty flavor profile.
- Sweet & Salty: Drizzle a bit of sea salt over the chocolate topping to bring out the sweetness, creating a scrumptious contrast that truly makes these treats unforgettable.
Once you’ve made your delightful Samoa Rice Krispie Treats, why not explore a few more sweet options? Check out Halloween Mini Pizzas for a fun snack or take a look at Peruvian Chicken Rice for a savory twist. Enjoy the journey in your kitchen!
How to Store and Freeze Samoa Rice Krispie Treats
Airtight Container: Store your Samoa Rice Krispie Treats in an airtight container at room temperature for up to 1 week. This keeps them fresh without altering their delightful texture.
Freezer: For longer storage, you can freeze the treats. Wrap them individually in plastic wrap and place in a freezer-safe container for up to 3 months.
Thawing: To enjoy your frozen Samoa Rice Krispie Treats, thaw them in the fridge overnight or leave them at room temperature for a couple of hours.
Reheating: If you’d like to soften them slightly, pop them in the microwave for a few seconds before serving, but be careful not to overheat!
Expert Tips for Samoa Rice Krispie Treats
-
Watch the Coconut: Toast coconut until golden but keep a close eye; it can burn quickly, ruining the flavor of your Samoa Rice Krispie Treats.
-
Grease Everything: Use cooking spray on your hands and the pan to prevent sticking when layering the cereal mixture and pressing it in.
-
Smooth Caramel Mixture: Ensure the dulce de leche is fully melted and smooth before mixing with the coconut; a chunkier mixture can lead to uneven layering.
-
Mix Thoroughly: When combining marshmallows with Rice Krispie cereal, be diligent about coating every piece evenly for a well-balanced treat.
-
Chill Before Cutting: Let the treats set at room temperature to harden properly; chilling in the fridge might change the texture and make them too firm to cut.
Samoa Rice Krispie Treats Recipe FAQs
What is the best way to select coconut for my Samoa Rice Krispie Treats?
Absolutely! When choosing coconut, look for the sweetened shredded variety that has a bright white color without dark spots, which can indicate staleness. If you prefer a less sweet alternative, unsweetened shredded coconut works beautifully too but may alter the overall sweetness of your treats.
How should I store my Samoa Rice Krispie Treats?
For optimal freshness, store your treats in an airtight container at room temperature for up to 1 week. This keeps them soft and chewy. Avoid refrigerating, as the cold can change the texture, making them hard.
Can I freeze Samoa Rice Krispie Treats?
Yes, you can! To freeze, wrap each treat individually in plastic wrap and place them in a freezer-safe container or a resealable bag. They’ll stay fresh in the freezer for up to 3 months. When you’re ready to enjoy, simply thaw them in the refrigerator overnight or at room temperature for a couple of hours.
What should I do if my treats are too sticky?
If your Samoa Rice Krispie Treats are too sticky while preparing, it might be due to the marshmallow mixture being too warm or the cereal not being mixed in thoroughly. To troubleshoot, ensure your marshmallow mixture is cool enough to handle and mix the Rice Krispie cereal in quickly but gently to coat each piece evenly. If you find they’re too sticky after being packed, lightly grease your hands with butter or cooking spray to help with portioning.
Are these treats safe for people with nut allergies?
Very! These Samoa Rice Krispie Treats are nut-free as long as you use ingredients that don’t contain nuts. However, always check labels carefully to ensure no cross-contamination occurs, especially if you’re serving people with allergies. If you’d like to add nuts for a delightful twist, make sure to use nuts that are added to the recipe in a way that is safe for those allergic.
Can I use alternatives for ingredients if I have dietary restrictions?
Of course! If you’re looking for dairy-free options, you can substitute the butter with coconut oil and use vegan marshmallows to keep the recipe deliciously cruelty-free. If you would like a gluten-free version, check to ensure the cereal is labeled gluten-free as well. There are plenty of options to tweak these Samoa Rice Krispie Treats while keeping their delightful flavors intact!
Samoa Rice Krispie Treats That Bring Cookie Magic Home
Ingredients
Equipment
Method
- In a large skillet, toast the sweetened shredded coconut over medium-high heat for 3-5 minutes until golden brown.
- In a microwave-safe bowl, combine the dulce de leche with a splash of milk and microwave for 1.5 minutes until smooth.
- In another bowl, melt the butter and mini marshmallows in the microwave for 1.5-2 minutes, stirring halfway.
- Stir in the Rice Krispie cereal until well coated in the melted marshmallow mixture.
- Press half of the mixture into a greased 8x12 pan, pour the caramel layer on top, then add the rest of the mixture.
- Melt the semisweet chocolate and pour it over the top, spreading evenly and sprinkling with remaining toasted coconut.
- Let cool at room temperature for about 30 minutes, then slice into squares to serve.
Leave a Reply