
As the aroma of freshly baked bread fills my kitchen, I can’t help but feel transported to a quaint café in Rome. It’s here that I first discovered the joy of Homemade Italian Chocolate Maritozzi Buns—those light, fluffy delights that seem to capture the essence of sweetness in every bite. What sets these buns apart is their creamy filling, making them not only a delicious breakfast indulgence but also an elegant dessert option that’s surprisingly easy to make. Whether it’s a cozy family gathering or a special occasion, these buns are sure to impress and become an instant favorite. Are you ready to bring a touch of Italian charm to your kitchen with this delightful recipe?
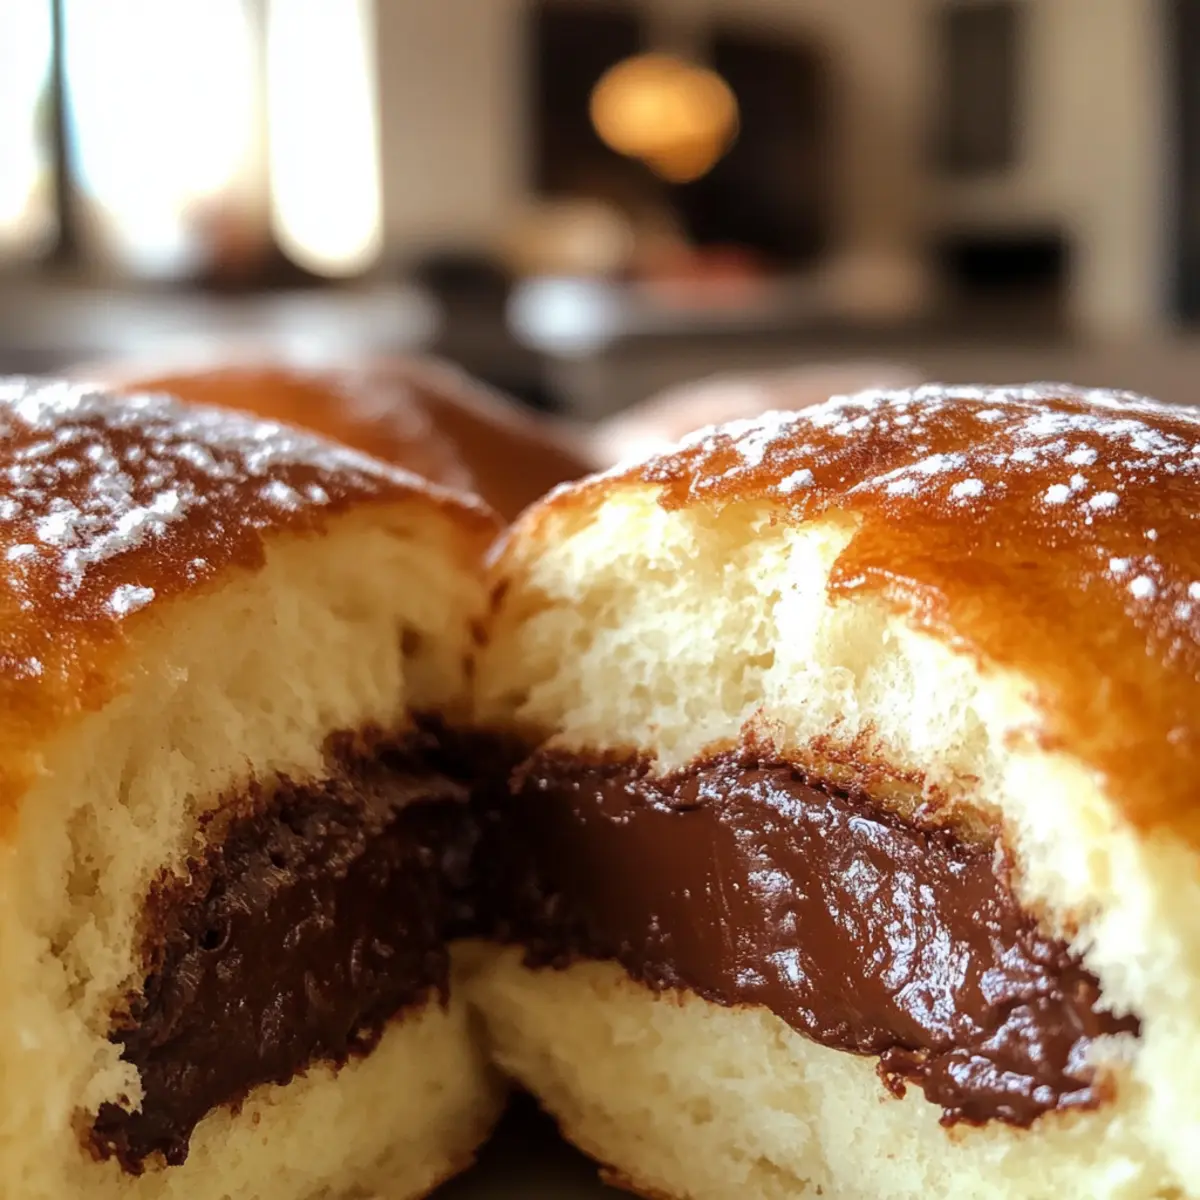
Why are Maritozzi Buns the ultimate treat?
Irresistible Softness: The airy texture of these Homemade Italian Chocolate Maritozzi Buns combines perfectly with their creamy filling, creating a dreamy bite. Effortless Baking: With straightforward steps, even beginner bakers can master this recipe, making it easy to enjoy a slice of Italy at home. Versatile Enjoyment: They shine as breakfast delights or elegant desserts, perfect for any occasion. Pair them with a cup of coffee or tea, and they’ll quickly become your new favorite treat. For more quick baking ideas, check out my Chocolate Espresso Banana Bread—another crowd-pleaser!
Italian Chocolate Maritozzi Buns Ingredients
Get ready to bake the fluffiest and creamiest Italian Chocolate Maritozzi Buns!
For the Dough
- All-purpose flour – Provides structure and texture; use bread flour for a chewier bun.
- Granulated sugar – Adds sweetness to the dough; honey or maple syrup can be substituted.
- Active dry yeast – Causes the buns to rise and become fluffy; instant yeast can speed up the rising process.
- Whole milk – Contributes moisture and richness to the dough; dairy-free alternatives like almond or oat milk work well too.
- Butter – Enhances flavor; substitute with coconut oil for a dairy-free option.
- Salt – Balances sweetness and enhances flavor; no substitutions are recommended.
- Eggs – Adds richness and helps with leavening; aquafaba is a great egg replacement for vegan versions.
For the Cream Filling
- Heavy cream – Ideal for whipping into a delightfully thick filling; coconut cream can be used for a dairy-free treat.
- Dark chocolate or cocoa powder – Imparts that rich chocolate flavor; milk chocolate is a sweeter alternative.
These Italian Chocolate Maritozzi Buns are simple to make and will bring a touch of Italian charm right into your home!
Step‑by‑Step Instructions for Italian Chocolate Maritozzi Buns
Step 1: Prepare the Dough
In a large mixing bowl, combine 4 cups of all-purpose flour, ½ cup of granulated sugar, 1 teaspoon of salt, and 2 teaspoons of active dry yeast. Pour in 1 cup of warm milk (about 110°F), followed by ¼ cup of melted butter and 2 beaten eggs. Mix until a cohesive dough forms, ensuring all dry ingredients are fully incorporated.
Step 2: Knead the Dough
Transfer the dough to a lightly floured surface and knead for approximately 10 minutes until it becomes smooth and elastic. You should achieve a soft texture that springs back when pressed. Once kneaded, place the dough in a lightly greased bowl, cover it with a damp cloth, and let it rise in a warm place until it doubles in size, which should take about 1 hour.
Step 3: Shape the Buns
After the dough has risen, punch it down gently to release the air, then divide it into 10 equal portions. Roll each portion into a smooth ball and place them on a baking sheet lined with parchment paper, spacing them about 2 inches apart. Cover the shaped buns with a cloth and allow them to rise until puffy, about 30 to 45 minutes.
Step 4: Bake the Buns
Preheat your oven to 375°F (190°C). Once the buns have risen, transfer them to the oven and bake for 15 to 20 minutes until they turn golden brown. Keep an eye on them, as the perfect color will signify that your Italian Chocolate Maritozzi Buns are ready to be enjoyed. Allow them to cool on a wire rack.
Step 5: Prepare the Filling
While the buns are cooling, whip 1 cup of heavy cream in a medium bowl until soft peaks form, which should take about 3-5 minutes using an electric mixer. This creamy filling will elevate your Italian Chocolate Maritozzi Buns, so make sure to achieve the right consistency before moving on to the next step.
Step 6: Fill the Buns
Once the buns have completely cooled, cut a slit in the top of each bun, creating a pocket for the filling. Generously fill each bun with the whipped cream using a piping bag or a spoon. For an extra touch of indulgence, sprinkle some dark chocolate shavings or cocoa powder on top before serving.
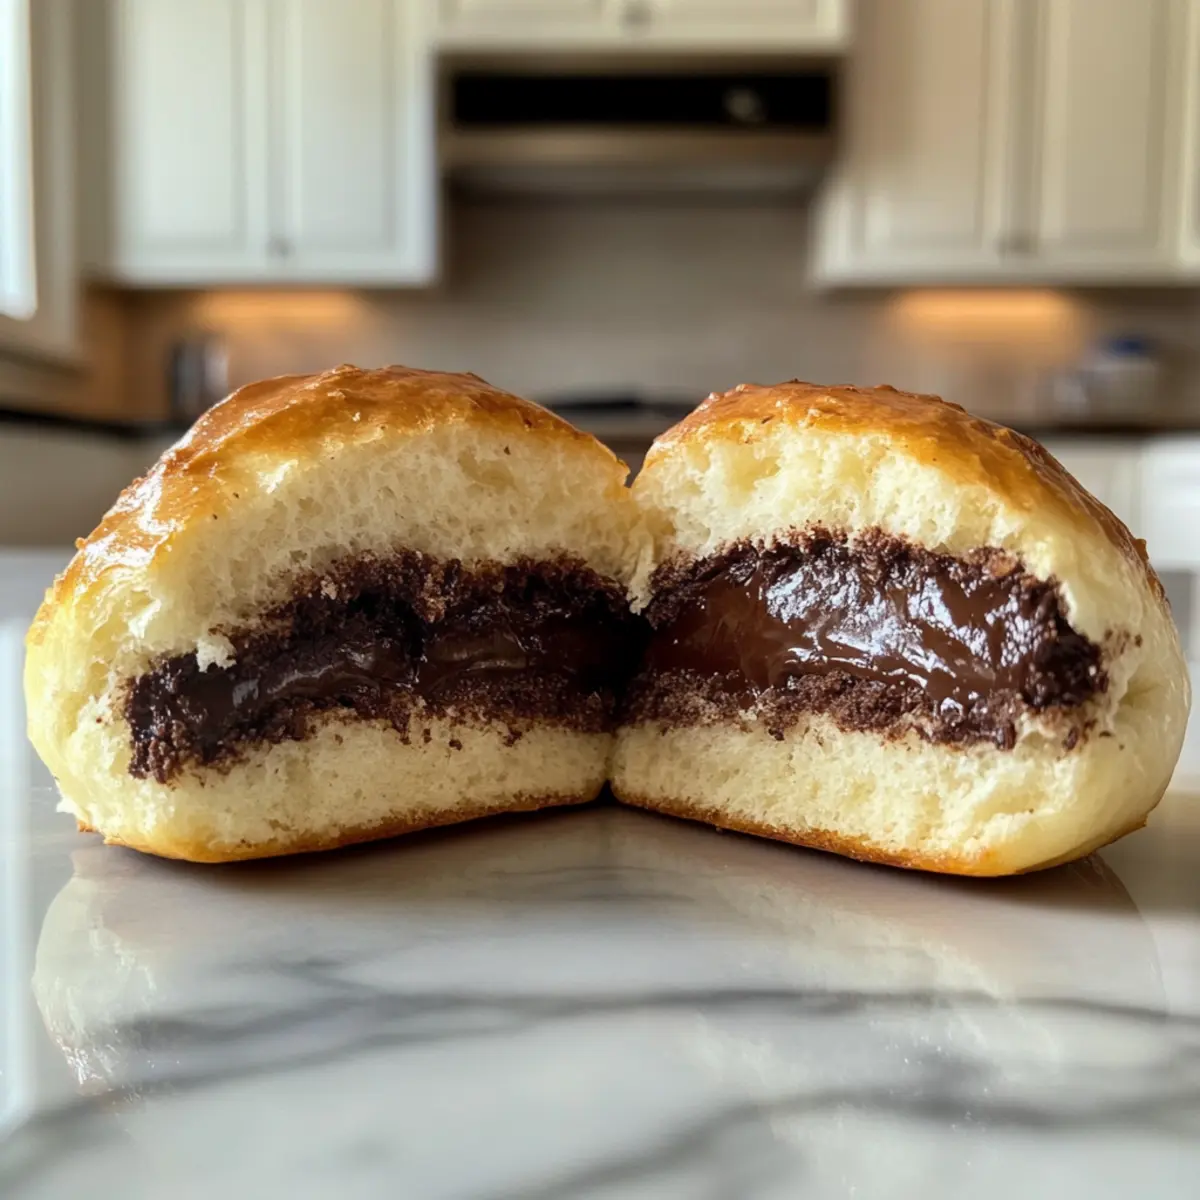
Storage Tips for Italian Chocolate Maritozzi Buns
Room Temperature: Keep the buns in a covered container at room temperature for up to 1 day. Consume them quickly to enjoy their fresh softness.
Fridge: Store in an airtight container in the fridge for up to 3 days. Make sure they are completely cooled before refrigerating to maintain their texture.
Freezer: Freeze unbaked dough balls for up to 1 month. Place them in a freezer-safe bag, allowing for easy thawing and baking whenever you’re ready.
Reheating: Warm the buns in a microwave for about 10-15 seconds or in an oven at low heat to revive their fluffy texture before serving. Enjoy your delightful Italian Chocolate Maritozzi Buns!
Make Ahead Options
Preparing Italian Chocolate Maritozzi Buns ahead of time is a game-changer for busy home cooks! You can mix and knead the dough up to 24 hours in advance and let it rise overnight in the refrigerator to develop extra flavor. Simply shape the buns and allow them to rise for about 30-45 minutes before baking them fresh the next day. Additionally, the baked buns can be stored in an airtight container for up to 3 days at room temperature, ensuring they stay soft. When ready to serve, just whip the cream filling and fill the cooled buns, making your delightful treats just as delicious and impressive without the last-minute rush!
Helpful Tricks for Italian Chocolate Maritozzi Buns
- Yeast Care: Ensure the milk is warm, not hot, to activate the yeast without killing it. This is crucial for that fluffy texture.
- Knead Well: Knead the dough thoroughly for about 10 minutes; it should be smooth and elastic. Avoid under-kneading, as this can lead to dense buns.
- Cooling Time: Allow the buns to cool completely before filling them with cream. This helps maintain the cream’s delightful texture and prevents it from melting.
- Baking Check: Bake until golden brown but not overly done. Check around 15 minutes to ensure they stay soft and delicious. Overbaking can lead to dryness.
- Storing Tips: Keep leftovers in an airtight container in the fridge for up to 3 days. Reheat gently before serving for that fresh-out-of-the-oven taste.
Italian Chocolate Maritozzi Buns Variations
Feel free to let your creativity shine and personalize these buns with delightful twists that will tantalize your taste buds!
-
Cheese Filling: Swap the cream filling for a blend of ricotta and lemon zest for a refreshing change. It’ll add a lovely tang to each bite.
-
Nutty Bliss: Fold in chopped hazelnuts or almonds into the creamy filling for a delightful crunch. The nuttiness complements the chocolate beautifully!
-
Spiced Up: Add a pinch of cinnamon or nutmeg to the dough for a warm, cozy flavor. It’ll elevate the classic taste and give your buns a delicious twist.
-
Fruit Flavors: Mix in pureed strawberries or raspberries into the cream filling for a fruity surprise. Fresh fruit flavors bring a burst of summer to each bite!
-
Vegan Delight: Use almond or oat milk, coconut oil instead of butter, and aquafaba for a fully vegan dessert. You’ll still enjoy every heavenly bite without any animal products!
-
Flavored Cream: Infuse the heavy cream filling with vanilla or almond extract for an elegant flavor enhancement. A simple change that adds an extra depth!
-
Cocoa Twist: For an extra chocolatey bun, incorporate cocoa powder into the dough. This will deepen the chocolate flavor and tempt chocolate lovers even more!
For more baking inspiration, you might enjoy my Creamy White Chocolate Orange Mousse or the decadent Chocolate Espresso Banana Bread. Embrace the art of customization!
What to Serve with Homemade Italian Chocolate Maritozzi Buns
Pairing these delightful treats with the right accompaniments will elevate your baking experience to new heights!
-
Rich Coffee: The deep flavors of freshly brewed coffee perfectly balance the sweetness of the buns, enhancing every bite.
-
Creamy Mascarpone: A dollop of mascarpone on the side adds a luxurious, creamy element that complements the chocolate filling beautifully.
-
Fresh Berries: Juicy strawberries or raspberries provide a refreshing tartness, cutting through the richness and offering a burst of color.
-
Sweet Sparkling Wine: A glass of Prosecco adds a festive touch, marrying the Italian origins of the buns with effervescence and fun.
-
Velvety Hot Chocolate: Pairing with hot chocolate creates a chocolate lover’s dream, making for an indulgent treat perfect for cozy gatherings.
-
Lemon Zest Icing: Drizzle a light lemon icing atop these buns for a zesty twist, enhancing flavor and adding a sophisticated touch.
-
Chilled Gelato: Serve alongside a scoop of refreshing gelato, the cool creaminess contrasting beautifully with the soft, warm buns.
-
Herbal Tea: A fragrant herbal tea offers a warm, calming beverage that complements the sweet flavors without overwhelming them.
Enjoy these pairings to elevate your Homemade Italian Chocolate Maritozzi Buns into a full, satisfying meal!

Italian Chocolate Maritozzi Buns Recipe FAQs
What is the best way to choose ripe ingredients for my Italian Chocolate Maritozzi Buns?
Absolutely! For the best results, especially with the milk, ensuring it’s warm (around 110°F) is crucial for activating the yeast. Always choose ingredients like eggs and butter that are fresh and at room temperature for easier mixing. Look for flour with good protein content, and when selecting chocolate, choose high-quality dark chocolate for a rich flavor.
How should I store my Italian Chocolate Maritozzi Buns?
Very! Store your delicious buns in an airtight container. At room temperature, they will stay fresh for up to 1 day. If you’re keeping them longer, pop them in the fridge for up to 3 days. Make sure they are completely cool before storing to maintain their lovely texture.
Can I freeze the dough or the baked buns?
Yes, indeed! You can freeze the unbaked dough balls by placing them in a freezer-safe bag for up to 1 month. Just let them thaw in the fridge overnight before baking. If you have baked buns you want to save, wrap them tightly or store them in an airtight container and freeze them for the same amount of time. Reheat them in a warm oven for that fresh-out-of-the-oven taste!
What if my buns come out dry or dense?
It happens, but no worries! Dense buns usually stem from insufficient kneading or too much flour. Ensure you knead the dough for about 10 minutes to develop the gluten properly. If they are dry, check your baking time—golden brown means they are ready, but overbaking will lead to dryness. If you face these issues often, don’t hesitate to adjust your flour measurements slightly next time.
Are there any dietary considerations for my Italian Chocolate Maritozzi Buns?
Absolutely! If you’re making these for guests with dietary restrictions, there are options! Swap regular milk for almond or oat milk for a dairy-free treat, use coconut oil instead of butter, and choose aquafaba for an egg replacement to make them vegan. Keep in mind, though, the filling will require a dairy-free alternative like coconut cream if you’re aiming for a fully vegan version.

Heavenly Italian Chocolate Maritozzi Buns for a Cozy Treat
Ingredients
Equipment
Method
- Combine 4 cups of all-purpose flour, ½ cup of granulated sugar, 1 teaspoon of salt, and 2 teaspoons of active dry yeast in a mixing bowl. Add 1 cup of warm milk, ¼ cup of melted butter, and 2 beaten eggs.
- Mix until a cohesive dough forms, ensuring all dry ingredients are fully incorporated.
- Transfer the dough to a lightly floured surface and knead for approximately 10 minutes until it becomes smooth and elastic.
- Place the dough in a greased bowl, cover with a damp cloth, and let it rise in a warm place until it doubles in size, about 1 hour.
- Punch down the dough, divide it into 10 portions, and roll each into a smooth ball. Place them on a baking sheet lined with parchment paper.
- Cover and allow them to rise until puffy, about 30 to 45 minutes.
- Preheat the oven to 375°F (190°C). Bake the buns for 15 to 20 minutes until golden brown.
- Let them cool on a wire rack.
- Whip 1 cup of heavy cream until soft peaks form, about 3-5 minutes.
- Cut a slit in the top of each bun and fill with whipped cream using a piping bag or spoon. Top with chocolate shavings or cocoa powder.
Leave a Reply