
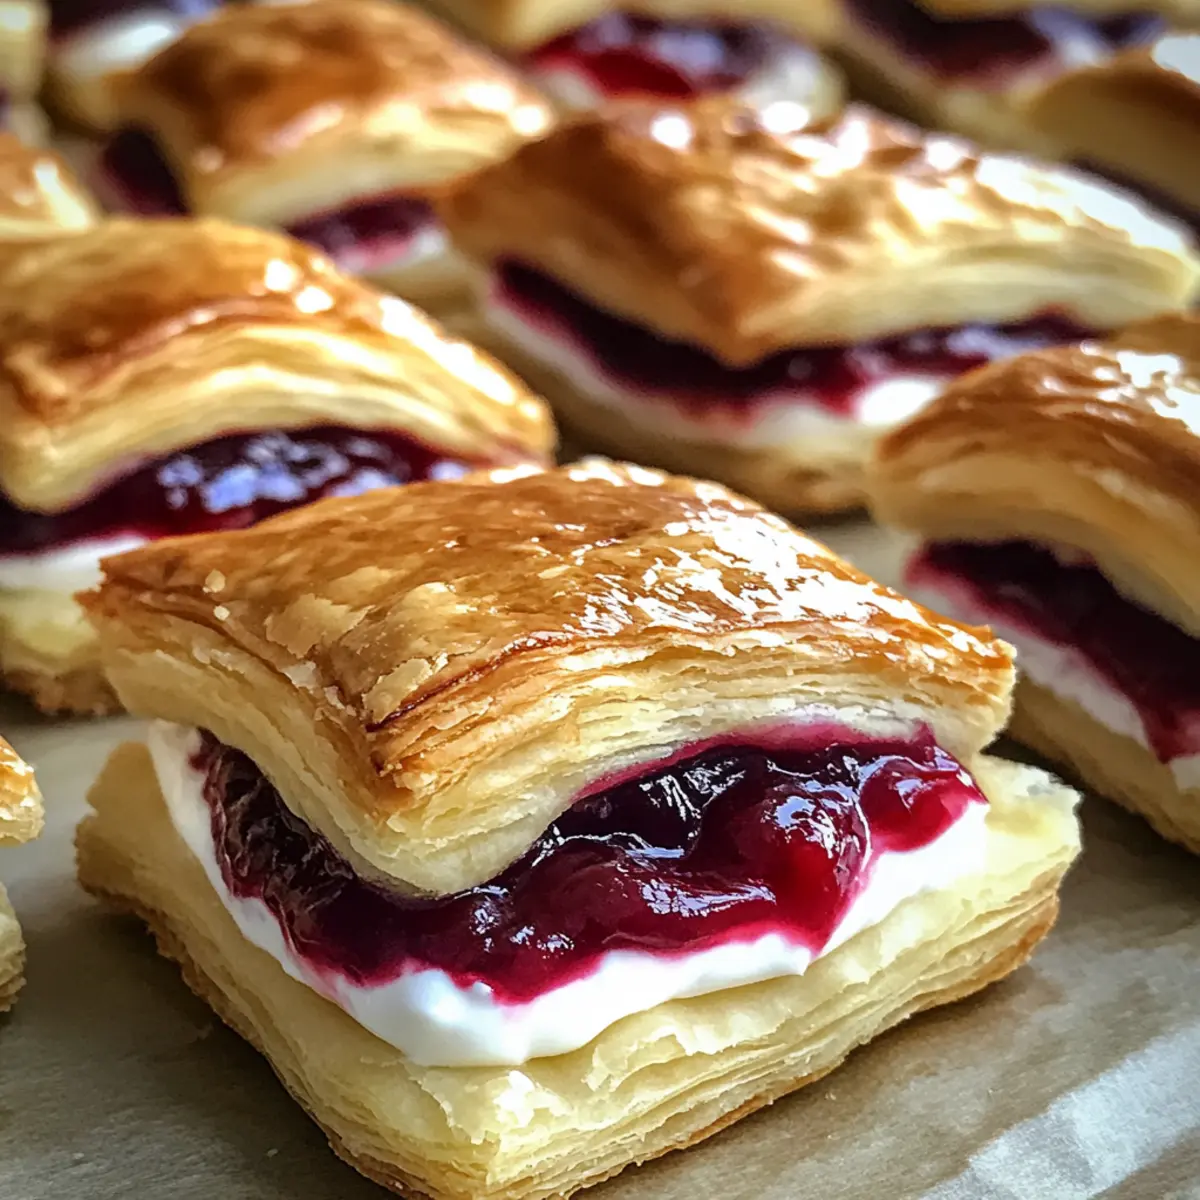
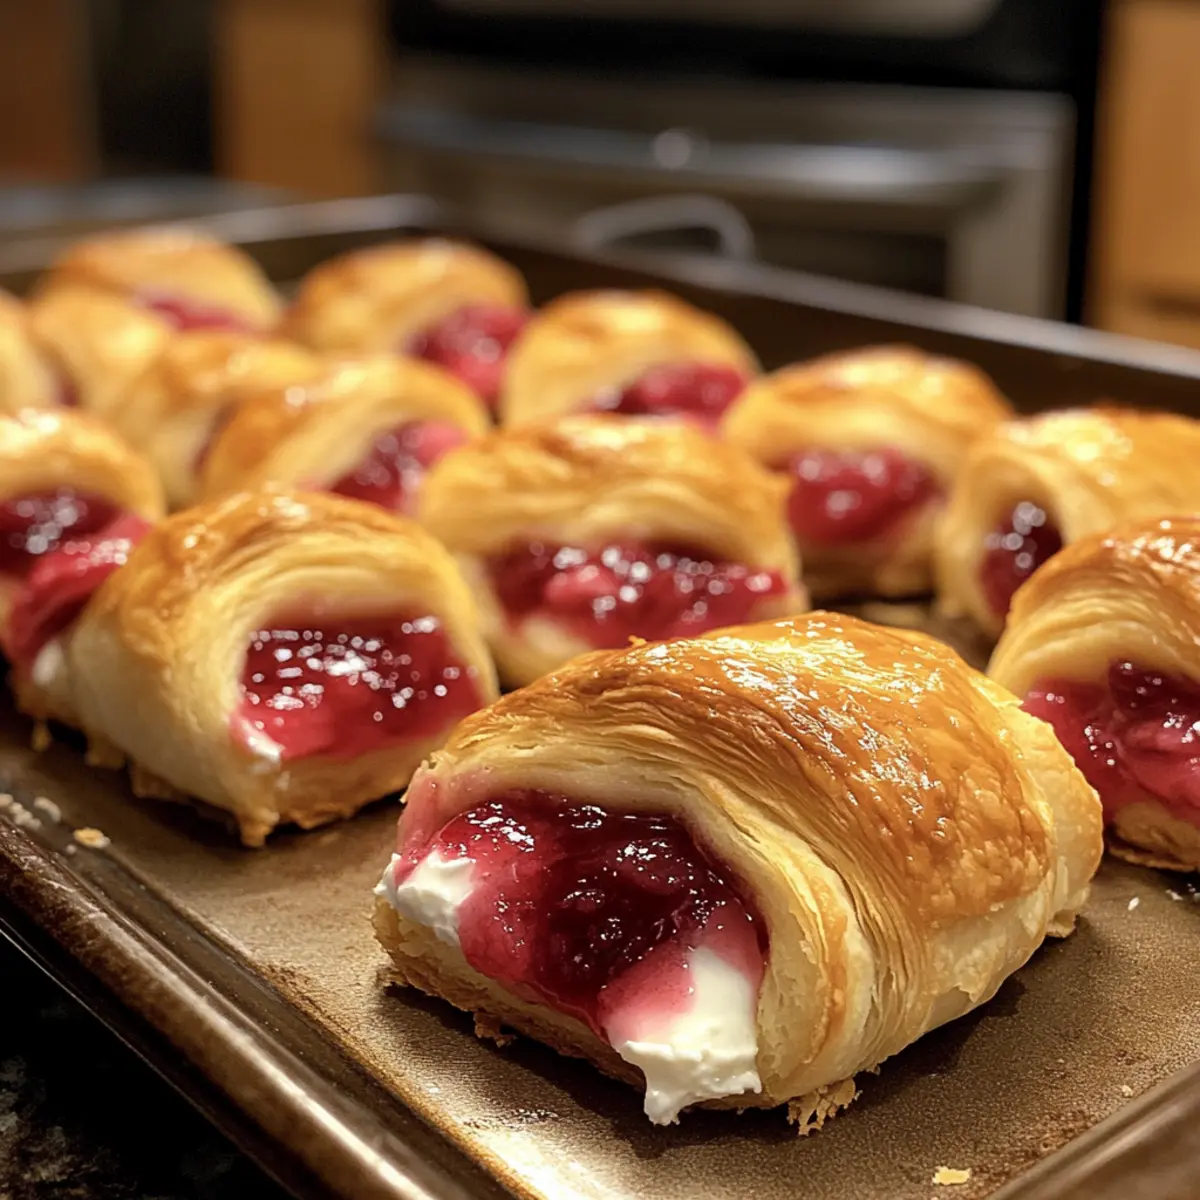
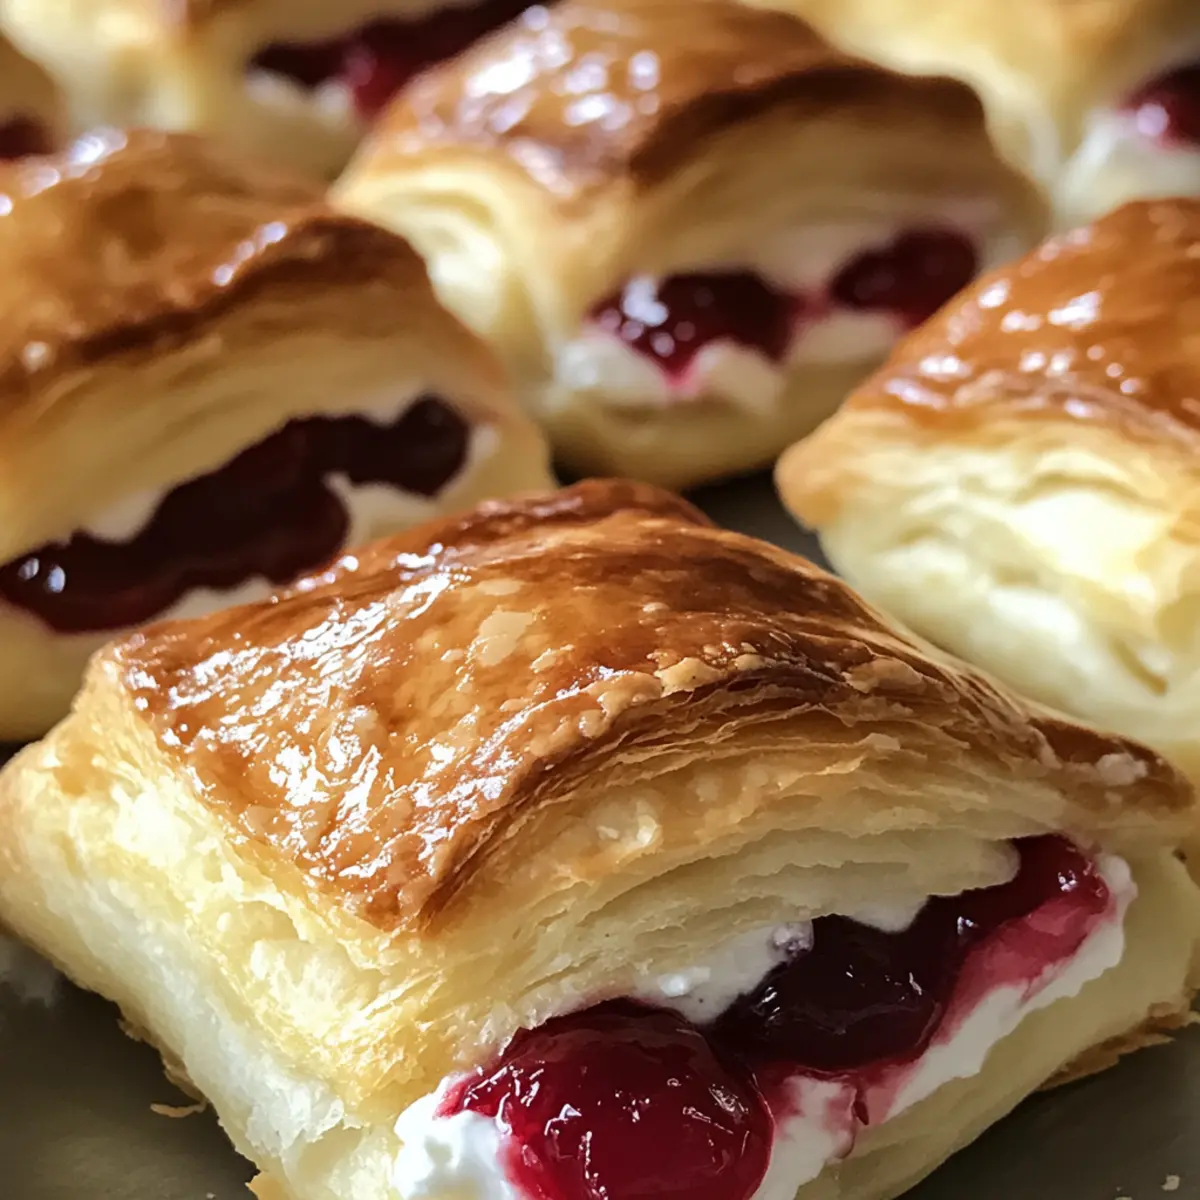
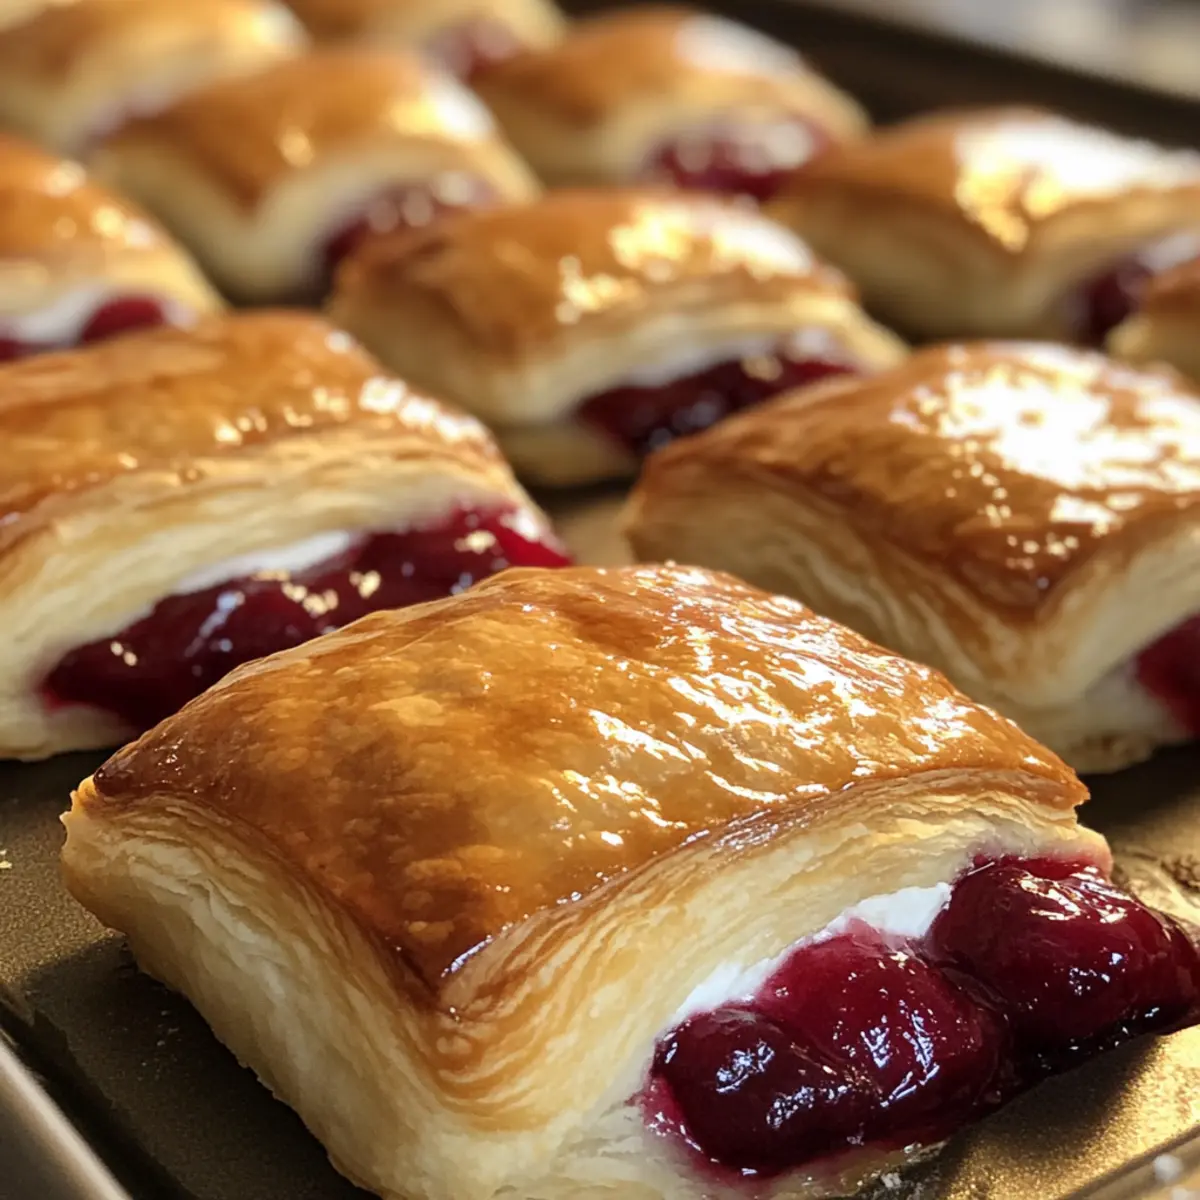
As I stood in my kitchen, the warm aroma of buttery pastry danced around me, instantly evoking memories of my grandmother’s cherry pies cooling on the windowsill. It inspired me to create these Quick and Easy Cherry Pie Bites, a delightful twist on that nostalgic classic. With a flaky crust made from crescent roll dough and a luscious cherry filling, you can whip up this easy dessert in under 30 minutes. These cherry pie bites are not only a budget-friendly option, but their fun, handheld size makes them a hit at parties or a perfect sweet treat after a busy weeknight dinner. Who can resist those warm, gooey bites oozing with flavor? Ready to bring a taste of childhood back to your table? Let’s dive into the recipe and make some magic happen in your kitchen!
Why Are These Cherry Pie Bites Irresistible?
Nostalgic Flavors: Each bite is like a warm hug from the past, capturing the essence of grandma’s cherry pie.
Quick and Simple: Whip these up in under 30 minutes, perfect for those hectic weeknights or unexpected guests.
Versatile Options: Use different pie fillings like apple or blueberry for a fun twist—creativity knows no bounds!
Budget-Friendly: Affordable ingredients make this dessert a win without breaking the bank.
Crowd-Pleasing Treat: Perfect for any gathering, these bites will have your friends and family coming back for more! Enjoy them warm with a cup of coffee or tea, just like our beloved Apple Cider Whoopie or after indulging in a delicious Pumpkin Mascarpone Pie.
Cherry Pie Bites Ingredients
• Create your cherry pie bites with these essential ingredients.
For the Crust
- Crescent Roll Dough – A quick substitute for traditional pie dough that yields a flaky, buttery crust.
For the Filling
- Cherry Pie Filling – The heart of the dish, bringing that sweet-tart flavor; homemade is preferred for a richer taste.
- Cream Cheese (optional) – Adds a rich, creamy base to the filling for added depth of flavor.
- Powdered Sugar – Sweetens the cream cheese mixture, enhancing the overall taste of the bites.
- Vanilla Extract – Brightens up the filling with its aromatic sweetness.
For Baking and Topping
- Butter (melted) – Gives the bites a golden finish when brushed on top before baking.
- Coarse Sugar (optional) – Adds a delightful crunch and extra sweetness to the surface of the bites.
- Powdered Sugar (for glaze, optional) – Mix with milk for a sweet drizzle on top, enhancing both taste and presentation.
These Cherry Pie Bites are destined to become a cherished recipe in your kitchen!
Step‑by‑Step Instructions for Cherry Pie Bites
Step 1: Preheat the Oven
Begin by preheating your oven to 375°F (190°C). This ensures that your Cherry Pie Bites will bake evenly and achieve that golden, flaky crust. While the oven warms up, take a moment to line a large baking sheet with parchment paper to prevent sticking and make cleanup a breeze.
Step 2: Prepare the Cream Cheese Filling
In a medium bowl, mix together 4 ounces of softened cream cheese, ½ cup of powdered sugar, and 1 teaspoon of vanilla extract. Use a hand mixer or a whisk to achieve a smooth and creamy texture, which will serve as the base for your cherry filling. Set this mixture aside while you get the crescent rolls ready.
Step 3: Assemble the Bites
Unroll the crescent roll dough and separate it into triangles on a clean work surface. Place about ½ teaspoon of the prepared cream cheese mixture at the center of each triangle, then add 1–2 cherries from your cherry pie filling on top. Carefully fold the corners of the dough over the filling, pinching the edges tightly to seal each bite securely.
Step 4: Bake the Bites
Arrange your sealed Cherry Pie Bites on the lined baking sheet, ensuring they have some space between them to allow for expansion. Brush the tops generously with melted butter for that beautiful golden color, and if desired, sprinkle some coarse sugar on top for added texture. Bake in the preheated oven for 10–12 minutes until puffed and golden brown.
Step 5: Optional Glaze
While your Cherry Pie Bites are cooling slightly, you can prepare an optional glaze. In a small bowl, mix ½ cup of powdered sugar with a few drops of milk until you reach a drizzle-worthy consistency. Once the bites are warm but not hot, drizzle the glaze over them for an extra touch of sweetness and a gorgeous finish.
Make Ahead Options
These Cherry Pie Bites are an excellent choice for meal prep, allowing you to enjoy fresh, warm treats with minimal effort. You can prepare the cream cheese filling and assemble the bites up to 24 hours in advance; simply store them in an airtight container in the refrigerator. To maintain their flaky texture, avoid baking them until just before serving. When you’re ready to enjoy these delightful bites, preheat your oven to 375°F (190°C) and bake for 10–12 minutes until golden brown. This way, you can savor the taste of homemade Cherry Pie Bites without the hassle on busy days!
Expert Tips for Cherry Pie Bites
- Filling Amount: Avoid overfilling the bites to prevent them from bursting during baking; around 1 teaspoon of filling works perfectly.
- Sealing Technique: Ensure a proper seal by pinching the edges tightly or crimping with a fork to avoid any leaks.
- Gluten-Free Option: For those with dietary restrictions, try using gluten-free crescent dough to enjoy these delightful Cherry Pie Bites.
- Reheating: To keep the bites crispy, reheat any leftovers in the oven instead of the microwave, maintaining their flaky texture.
- Experiment with Flavors: Feel free to swap cherry filling for other flavors like blueberry or apple to create unique variations of these bites!
What to Serve with Cherry Pie Bites?
Indulging in warm, cherry-filled pastries is just the beginning of a delightful meal experience waiting to unfold.
- Vanilla Ice Cream: A scoop of creamy vanilla adds a luscious contrast to the warm, flaky bites, enhancing their comforting appeal.
- Whipped Cream: Light and fluffy, this adds a delightful sweetness atop the bites, making every mouthful even more indulgent.
- Coffee or Tea: Serve alongside your favorite brew to balance the sweetness of the bites with a warm, comforting beverage.
- Chocolate Sauce: Drizzling rich chocolate sauce over the bites creates a mouthwatering combination of flavors that dessert lovers will crave.
Pairing a fresh salad can complement the dessert effectively.
- Mixed Green Salad: Toss together seasonal greens with a light vinaigrette for a fresh, crisp element that offsets the richness of the bites.
- Sparkling Lemonade: A refreshing, tangy drink that cuts through the sweetness, making every bite a refreshing experience.
- Fruit Salad: Combining seasonal fruits adds a vibrant, fresh flavor that pairs beautifully with the cherry filling and rounds out your meal.
- Cheese Platter: Offering assorted cheeses, such as brie and sharp cheddar, provides a savory contrast to the sweet bites, creating a delightful flavor profile.
Cherry Pie Bites Variations & Substitutions
Feel free to explore these fun variations to put a personal twist on your Cherry Pie Bites, creating a custom treat that suits your taste!
-
Different Pie Fillings: Swap out the cherry filling for blueberry, apple, or peach to reinvent this classic. The sweetness of ripe blueberries can bring a burst of summer flavor into your kitchen.
-
Chocolate-Cherry Twist: Add a handful of chocolate chips to the cherry filling for a delightful chocolate-cherry combination. This rich variation is perfect for those who love a touch of decadence!
-
Almond-Cherry Flavor: Sprinkle sliced almonds on top of the cream cheese filling before baking for a nutty crunch. This not only elevates the taste but also adds an appealing texture to each bite.
-
Savory Version: For a twist, use brie cheese and cranberry sauce instead of cherry filling. This savory option is perfect as an appetizer and is sure to impress at any gathering.
-
Seasonal Spin: Drizzle melted white chocolate over the baked bites and add festive sprinkles for a delightful holiday treat. It’s a charming way to celebrate special occasions!
-
Mini Cheesecake Bites: Swap the cherry filling for a cheesecake mixture (cream cheese, sugar, and a splash of lemon juice) for dessert bites that are creamy and delicious. These mini cheesecakes are truly irresistible!
-
Lemon Zest Boost: Add lemon zest to the cream cheese mixture for a refreshing citrusy kick. This subtle addition brightens the flavors and is especially lovely in spring or summer.
-
Gluten-Free Option: Use gluten-free crescent dough to make these bites suitable for gluten-sensitive guests. They can enjoy that same flaky goodness without worry!
Don’t forget to also check out how to make delightful Apple Fritter Bites or indulge in some creamy Pumpkin Pie as you explore more delicious recipes!
How to Store and Freeze Cherry Pie Bites
Room Temperature: Store the bites in an airtight container for up to 2 days to maintain their delicious flavor and texture.
Fridge: Cherry Pie Bites will stay fresh for up to 5 days in the refrigerator. For optimal taste, reheat them before serving.
Freezer: You can freeze baked or unbaked bites for up to 2 months. To enjoy, reheat baked bites directly from frozen at 350°F for 10–12 minutes.
Reheating: For the crispiest results, always opt for the oven instead of the microwave when reheating any leftover Cherry Pie Bites.
Cherry Pie Bites Recipe FAQs
How do I choose ripe cherries for my pie filling?
Absolutely! When selecting cherries, look for fruit that is plump, firm, and has a vibrant red color. Avoid cherries with dark spots or blemishes, as these can indicate overripeness or decay. If you’re using fresh cherries, try to use them within 3 to 5 days of purchase for the best flavor!
What’s the best way to store leftover Cherry Pie Bites?
Very! To maintain their delightful flavor and flaky texture, store any leftover Cherry Pie Bites in an airtight container at room temperature for up to 2 days. For longer storage, place them in the refrigerator where they can last up to 5 days. Always reheat before serving for optimal enjoyment!
Can I freeze Cherry Pie Bites? How should I do it?
Yes, indeed! To freeze Cherry Pie Bites, you can do so either baked or unbaked. If unbaked, simply arrange the assembled bites on a baking sheet, freeze until solid, then transfer them to a freezer-safe container to avoid sticking. They can be frozen for up to 2 months. When ready to bake, you can cook them straight from frozen, adding an extra minute or two to the baking time. If reheating baked bites, just pop them in the oven at 350°F for 10–12 minutes for perfect crispness.
What if my Cherry Pie Bites are leaking filling during baking?
Not to worry! If your bites are bursting, this typically means they were overfilled. To prevent this, stick to about 1 teaspoon of filling per bite. Also, ensure that the edges are pinched tightly or crimped with a fork to create a strong seal. This method will help keep your flavorful filling contained!
Can I make these Cherry Pie Bites gluten-free?
Absolutely! For a delicious gluten-free option, substitute traditional crescent roll dough with a gluten-free dough variety available at your local grocery store. Just follow the directions as you would with regular dough, ensuring it’s well sealed for baking. Enjoy those delightful bites without the worry!
Are there any dietary considerations for pets or allergies?
Very! These Cherry Pie Bites are not suitable for pets, especially if they contain certain sweeteners or ingredients that are harmful to them, such as chocolate. If you have allergies to dairy, consider substituting cream cheese with a dairy-free alternative, and always check the crescent roll package for any common allergens.
Cherry Pie Bites that Whisk You Back to Sweet Nostalgia
Ingredients
Equipment
Method
- Preheat your oven to 375°F (190°C) and line a baking sheet with parchment paper.
- In a medium bowl, mix together cream cheese, powdered sugar, and vanilla extract until smooth.
- Unroll the crescent roll dough and place about ½ teaspoon of cream cheese mixture at the center of each triangle, then add 1–2 cherries on top.
- Fold the corners of the dough over the filling and pinch the edges to seal each bite.
- Place the sealed bites on the baking sheet, brush tops with melted butter, and sprinkle with coarse sugar if desired. Bake for 10–12 minutes.
- Optional: For glaze, mix powdered sugar with milk until smooth and drizzle over warm bites.
Leave a Reply