
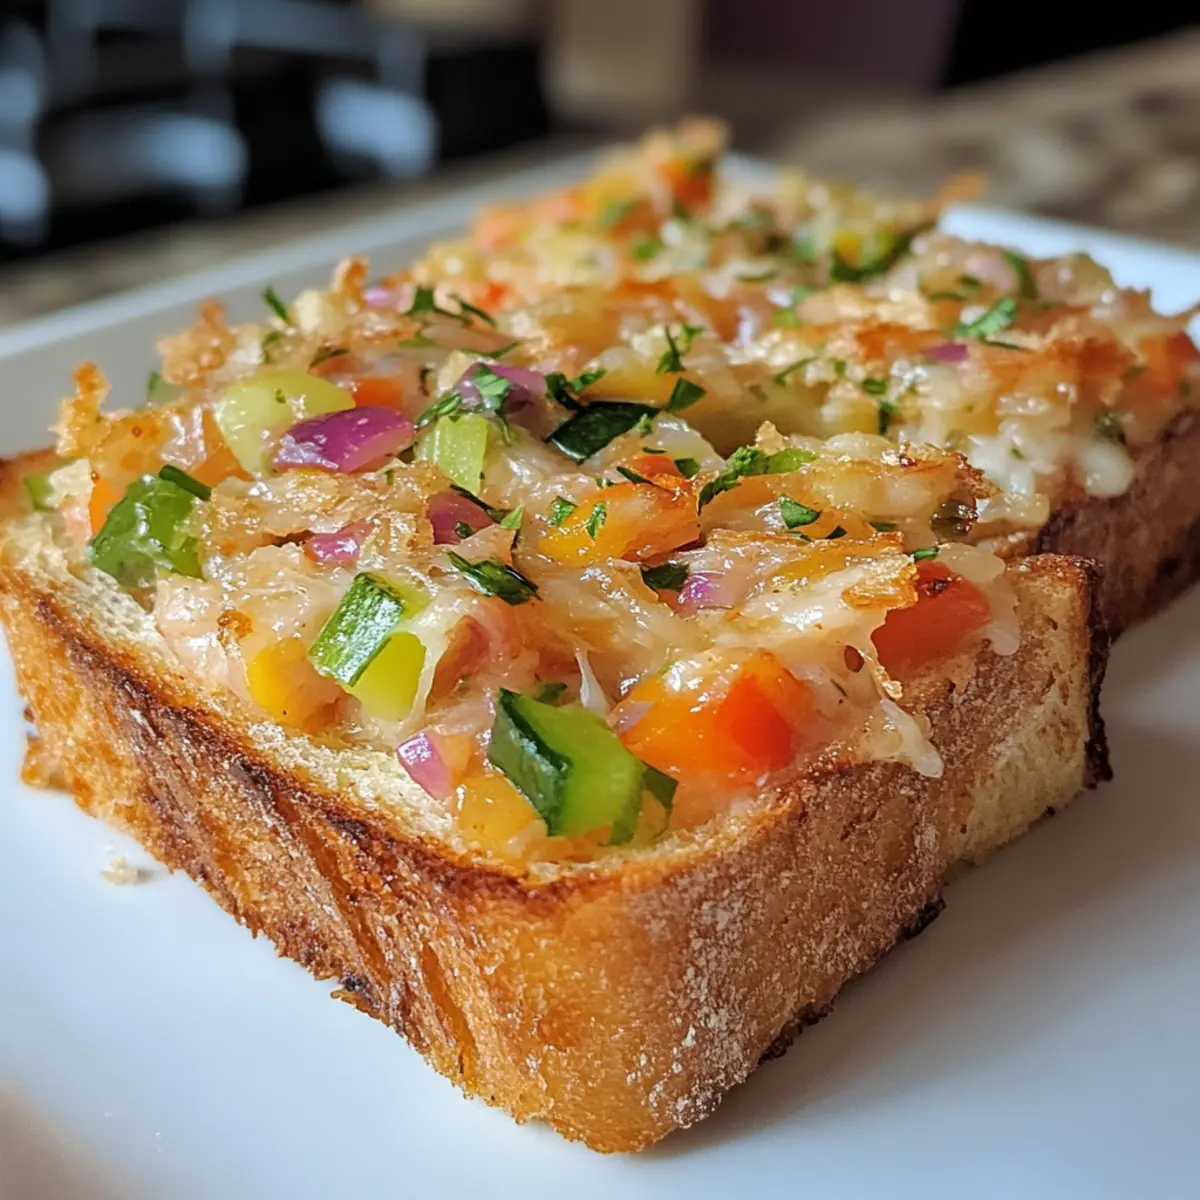
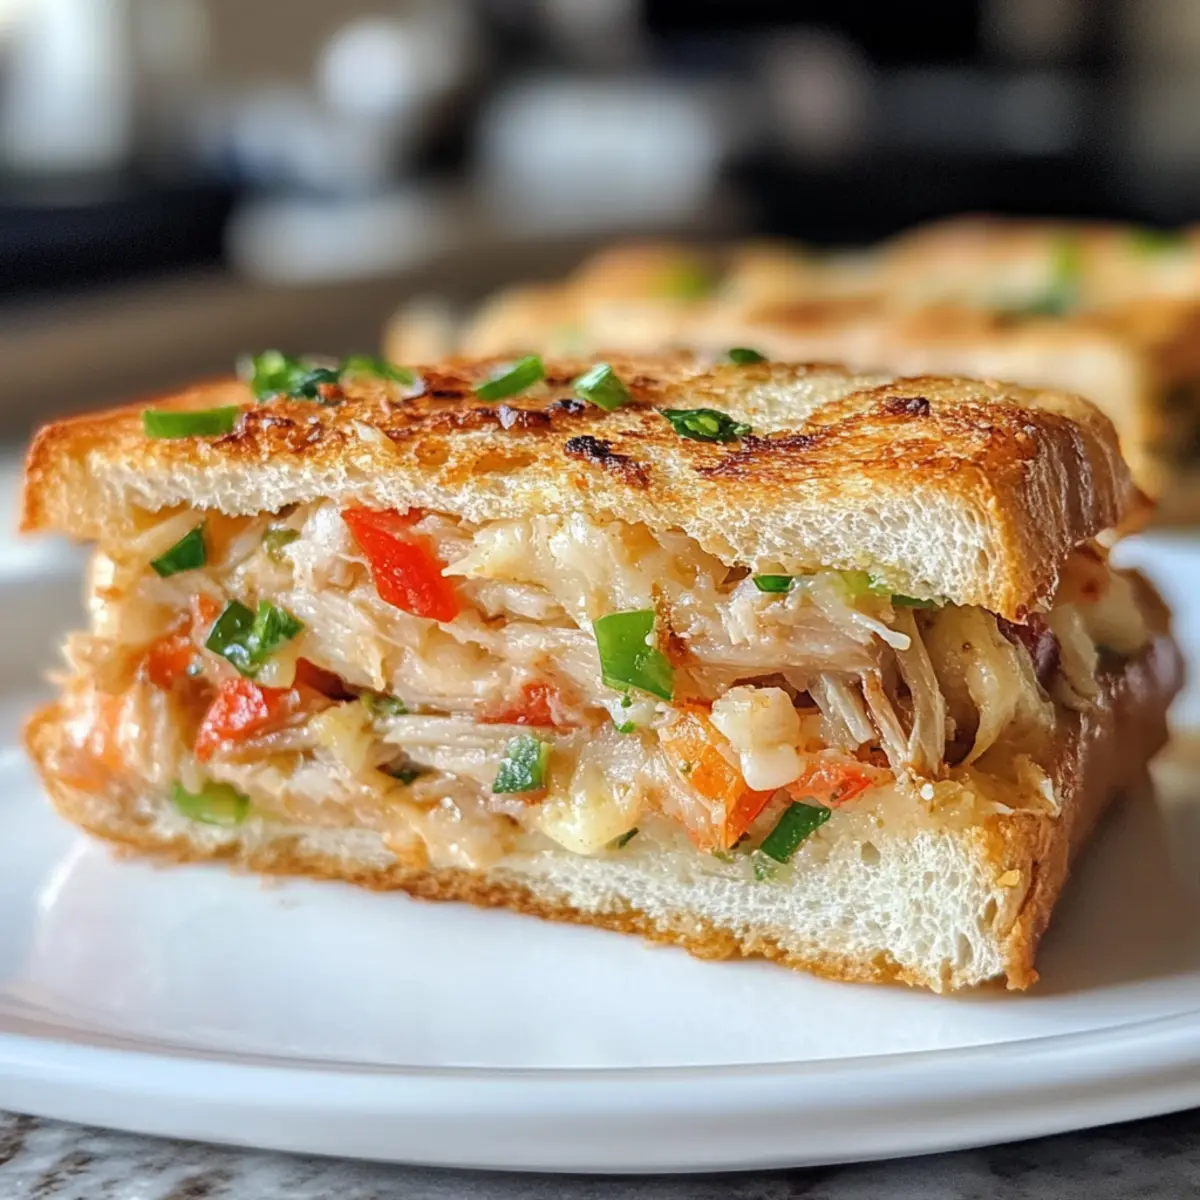
There’s something magical about the first bite of a cheesy tuna melt. The moment you sink your teeth into that crispy, golden crust, a medley of flavors dances on your palate, enveloping you in warmth and comfort. My recipe for Cheesy Tuna Melts with Secret Sauce and Crunchy Veggies takes this classic dish to new heights, featuring a special dough that promises a delightful crunch. What I love most is how quick it is to prepare, making it a perfect solution for busy weeknights or when you just need a cozy meal. Plus, with endless variations—from spicy twists to plant-based options—there’s something for everyone. Are you ready to elevate your dinner game? Let’s dive in!
Why Are Cheesy Tuna Melts Irresistible?
Comforting Crunch: The crisp, golden exterior wraps around a soft, gooey center that’s simply addictive.
Quick & Easy: Don’t spend hours in the kitchen! This recipe is straightforward and perfect for busy evenings.
Versatile Variations: Want a kick? Add jalapeños, or go Mediterranean with sun-dried tomatoes. You can even experiment with a BBQ chicken melt!
Secret Sauce Magic: The unique secret sauce brings together flavors harmoniously, transforming ordinary into extraordinary.
Crowd-Pleaser: Perfect for family dinners or casual get-togethers, everyone will adore these melts, making them a go-to for entertaining.
Make Ahead Option: Prep them beforehand for a speedy bake when time is of the essence. Why not pair with a side salad or crispy chips for an amazing meal? Check out my recipe for Zucchini Ricotta Melts for another delightful option!
Cheesy Tuna Melts Ingredients
• Discover the tasty essentials for perfect cheesy tuna melts!
For the Dough
- Patent Flour – Provides structure and absorbs flavors without becoming soggy; substitute with 100% bread flour for a chewy texture.
- Warm Water – Activates the dough; ensures a soft and pliable mixture.
- Baking Powder – A pinch helps the dough rise beautifully for that perfect crunch.
For the Filling
- Canned Tuna in Sunflower Oil – Keeps the tuna moist and adds a nutty flavor; for a lighter version, use tuna packed in water.
- Sharp Cheddar Cheese – Adds bold flavor, but can be swapped for a milder cheese if desired.
- Gouda Cheese – Offers a creamy, buttery texture; feel free to replace it with Monterey Jack for a different taste.
- Diced Pickles – Provides a tangy crunch; substitute with olives or jalapeños for an added twist.
- Corn – Introduces great texture; for a Mediterranean flair, consider sun-dried tomatoes instead.
- Diced Red Onion – Adds sweetness; choose your favorite veggies for a personal touch.
- Diced Bell Pepper – Brings a crunchy sweetness to the mix; any preferred bell pepper will do.
- Honey – Adds a hint of sweetness; maple syrup can act as a delicious alternative.
For Assembly
- Olive Oil – Helps keep the melts moist; consider flavored oils for an extra kick.
- Cornmeal (optional) – A tiny pinch on the dough can create a delightful crunch when baked.
These essential ingredients come together to create mouthwatering cheesy tuna melts, perfect for any occasion!
Step‑by‑Step Instructions for Cheesy Tuna Melts
Step 1: Prepare the Dough
In a large mixing bowl, combine patent flour with warm water and stir until a dough forms. Allow the dough to rest for about 15 minutes, letting the gluten develop. Add a pinch of baking powder during this time to enhance the dough’s rise, ensuring a delightful crunch for your Cheesy Tuna Melts.
Step 2: Make the Filling
In a separate bowl, mix together the canned tuna in sunflower oil, diced pickles, corn, red onion, bell pepper, and both cheeses. Ensure everything is well combined for a cohesive mixture. Drizzle in honey to add a hint of sweetness, balancing the robust flavors of the filling.
Step 3: Assemble the Melts
Roll out the rested dough on a lightly floured surface until it’s about a quarter-inch thick, making sure it’s manageable. Place a generous scoop of the tuna filling in the center of each piece of dough, folding it over to create a sealed pocket. Make sure to press down the edges to keep the flavors inside.
Step 4: Bake
Preheat your oven to 200°C (390°F) while you finish assembling the melts. Place the stuffed dough on a lined baking sheet. Bake in the preheated oven for approximately 20 minutes or until they are golden and bubbly. Keep an eye on them towards the end to prevent burning.
Step 5: Cool and Serve
Once out of the oven, allow the Cheesy Tuna Melts to cool for about five minutes. This resting period helps the cheese set while ensuring they’re easy to handle. Serve warm, drizzling each melt with balsamic vinegar for an added depth of flavor.

How to Store and Freeze Cheesy Tuna Melts
Airtight Container: Store leftover Cheesy Tuna Melts in an airtight container in the fridge for up to 3 days to preserve freshness and texture.
Freezer-Friendly: If freezing, wrap each melt individually in plastic wrap and place them in a freezer-safe bag. They’ll last up to 2 months!
Reheating: To reheat, bake from frozen at 190°C (375°F) for 15-20 minutes or until heated through, ensuring they remain crispy and delicious.
Make Ahead: Assemble your Cheesy Tuna Melts in advance and refrigerate for up to one day before baking for a quick meal solution on busy nights.
What to Serve with Cheesy Tuna Melts?
Imagine pairing your warm, gooey cheesy tuna melts with delightful sides that enhance their deliciousness and create a cozy meal experience.
- Crispy Potato Chips: The crunchiness balances the soft texture of the melts, adding a fun snack element to your meal.
- Fresh Garden Salad: A light salad with mixed greens and a tangy vinaigrette adds freshness and a palate-cleansing contrast.
- Creamy Coleslaw: The creamy, tangy flavors play beautifully with the savory tuna melts, providing a satisfying crunch.
- Grilled Corn on the Cob: Charred kernels enhance the sweetness and texture, making it a perfect summery side. The combination is both sweet and hearty!
- Tomato Soup: A classic accompaniment, this warm soup complements the flavors of the melts while adding comforting warmth. Dip those melts in—it’s heavenly!
- Garlic Bread: The buttery, herby flavor of garlic bread pairs perfectly with the cheesy richness, creating an indulgent and satisfying bite.
- Roasted Vegetables: Seasoned and oven-roasted veggies provide a deliciously healthy contrast, adding color and nutrition.
- Iced Lemonade: A refreshing drink, it cuts through the richness, making each bite of cheesy tuna melts utterly delightful.
- Chocolate Chip Cookies: End on a sweet note! The combination of warm melts and a classic dessert rounds out this lovely meal experience.
Cheesy Tuna Melts Variations & Substitutions
Feel free to explore and personalize these cheesy tuna melts to suit your taste and dietary preferences! Each variation brings a unique twist that can make your meal even more exciting.
-
Spicy Kick: Add diced jalapeños and a splash of your favorite hot sauce to the filling for an electrifying heat that tantalizes your taste buds.
-
Mediterranean Delight: Swap corn for sun-dried tomatoes and add olives, then serve with a refreshing tzatziki sauce. This combination offers a taste of the Mediterranean anytime.
-
BBQ Flavor: Transform this melt by replacing the tuna with shredded chicken tossed in BBQ sauce. The smoky flavor adds a deliciously rich twist while retaining that comfort food appeal.
-
Vegan Alternative: Use plant-based tuna and vegan cheeses, combined with vegan mayo for moisture. Embrace a lighter, cruelty-free version without skimping on flavor!
-
Breakfast Bliss: Elevate your melt by placing a poached or fried egg on top just before baking. This breakfast-style treat adds sumptuous richness that’s perfect for brunch.
-
Sweet and Savory: For a delightful contrast, mix in diced apples for a sweet crunch among the creamy, savory elements. It’s a surprising addition that creates a perfect balance of flavors.
-
Crunchy Veggie Boost: You could enhance texture by incorporating crunchy bell peppers, zucchini, or even shredded carrots. These additions not only add flavor but also bring in extra nutrients. Consider adding some crispy diced cucumbers for a refreshing touch.
-
Herb Infusion: Fresh herbs like dill, cilantro, or parsley can be incorporated into the filling to add a burst of freshness and vibrant flavor. This simple addition can elevate your cheesy tuna melts!
If you’re looking for more delicious recipes to try alongside these variations, I highly recommend checking out my Tennessee Onions Cheesy dish for an indulgent treat! For another cheesy delight with a twist, my recipe for Zucchini Ricotta Melts is a fun option!
Expert Tips for Cheesy Tuna Melts
- Dough Consistency: Ensure your dough is not too sticky; add a touch more flour if necessary to achieve the right texture for great cheesy tuna melts.
- Moisture Control: Avoid soggy melts by using low-moisture tuna and patting any excess liquid from your vegetables.
- Grate the Cheese: For a melty texture, grate your cheese instead of using slices; it blends better into the filling.
- Bake for Crunch: Keep an eye on the baking time; each oven is different, and a few extra minutes can achieve that perfect golden, crispy outer layer.
- Resting Time: Allowing the melts to rest a few minutes before serving helps prevent cheese from oozing out too much when cut.
- Flavor Boost: Experiment with different cheeses like pepper jack or add herbs to the filling for an extra flavor explosion in your cheesy tuna melts!
Make Ahead Options
These Cheesy Tuna Melts are a fantastic choice for meal prep, saving you precious time on busy weeknights! You can assemble the melts up to 24 hours in advance; simply wrap them tightly in plastic wrap and store in the refrigerator to keep them fresh. For optimal flavor, prepare the filling (tuna, veggies, and cheeses) 3 days ahead and refrigerate; this allows the flavors to meld beautifully. When you’re ready to enjoy, simply bake them directly from the fridge for about 20 minutes at 200°C (390°F) until they’re golden and bubbly. This way, your cheesy tuna melts will be just as delicious, offering you a comforting meal with minimal effort!
Cheesy Tuna Melts Recipe FAQs
What kind of tuna should I use for these melts?
I recommend using canned tuna in sunflower oil for its nutty flavor and moisture. If you prefer a lighter option, you can substitute it with tuna packed in water, just be sure to add a drizzle of olive oil to maintain moisture.
How long do I need to store leftover Cheesy Tuna Melts?
Store any leftovers in an airtight container in the fridge for up to 3 days. To maintain their crispy edges, I suggest reheating them in the oven rather than the microwave.
Can I freeze Cheesy Tuna Melts? How do I do it properly?
Absolutely! To freeze, wrap each cooled Cheesy Tuna Melt individually in plastic wrap and place them in a freezer-safe bag. They can be stored for up to 2 months. When you’re ready to enjoy them, bake directly from frozen at 190°C (375°F) for 15-20 minutes or until heated through and crispy.
What if my dough is too sticky or dry?
If you find your dough too sticky, sprinkle in a bit more flour to achieve the right consistency. It should be soft but not tacky. Conversely, if it feels dry, add a teaspoon of warm water gradually until it comes together nicely.
Can I make these melts vegan or vegetarian?
Very! For a vegan version, substitute canned tuna with plant-based tuna alternatives and use vegan cheese. You can also add more vegetables like diced zucchini or mushrooms to enhance the filling for a vegetarian adaptation.
What vegetables can I substitute in the filling?
Feel free to get creative! If you’re not a fan of pickles, try olives or even diced jalapeños for a kick. For a different crunch, consider adding chopped artichokes or bell peppers, tailoring it to your taste!

Ultimate Cheesy Tuna Melts for Comfort Food Lovers
Ingredients
Equipment
Method
- In a large mixing bowl, combine patent flour with warm water and stir until a dough forms. Allow the dough to rest for about 15 minutes, adding a pinch of baking powder to enhance the rise.
- In a separate bowl, mix together the canned tuna, diced pickles, corn, red onion, bell pepper, and both cheeses. Drizzle in honey and mix well.
- Roll out the rested dough until it’s about a quarter-inch thick. Place a generous scoop of the tuna filling in the center of each piece of dough, folding it over to seal.
- Preheat your oven to 200°C (390°F). Place the stuffed dough on a lined baking sheet and bake for approximately 20 minutes or until golden and bubbly.
- Allow the Cheesy Tuna Melts to cool for about five minutes before serving. Drizzle with balsamic vinegar for added flavor.
Leave a Reply