
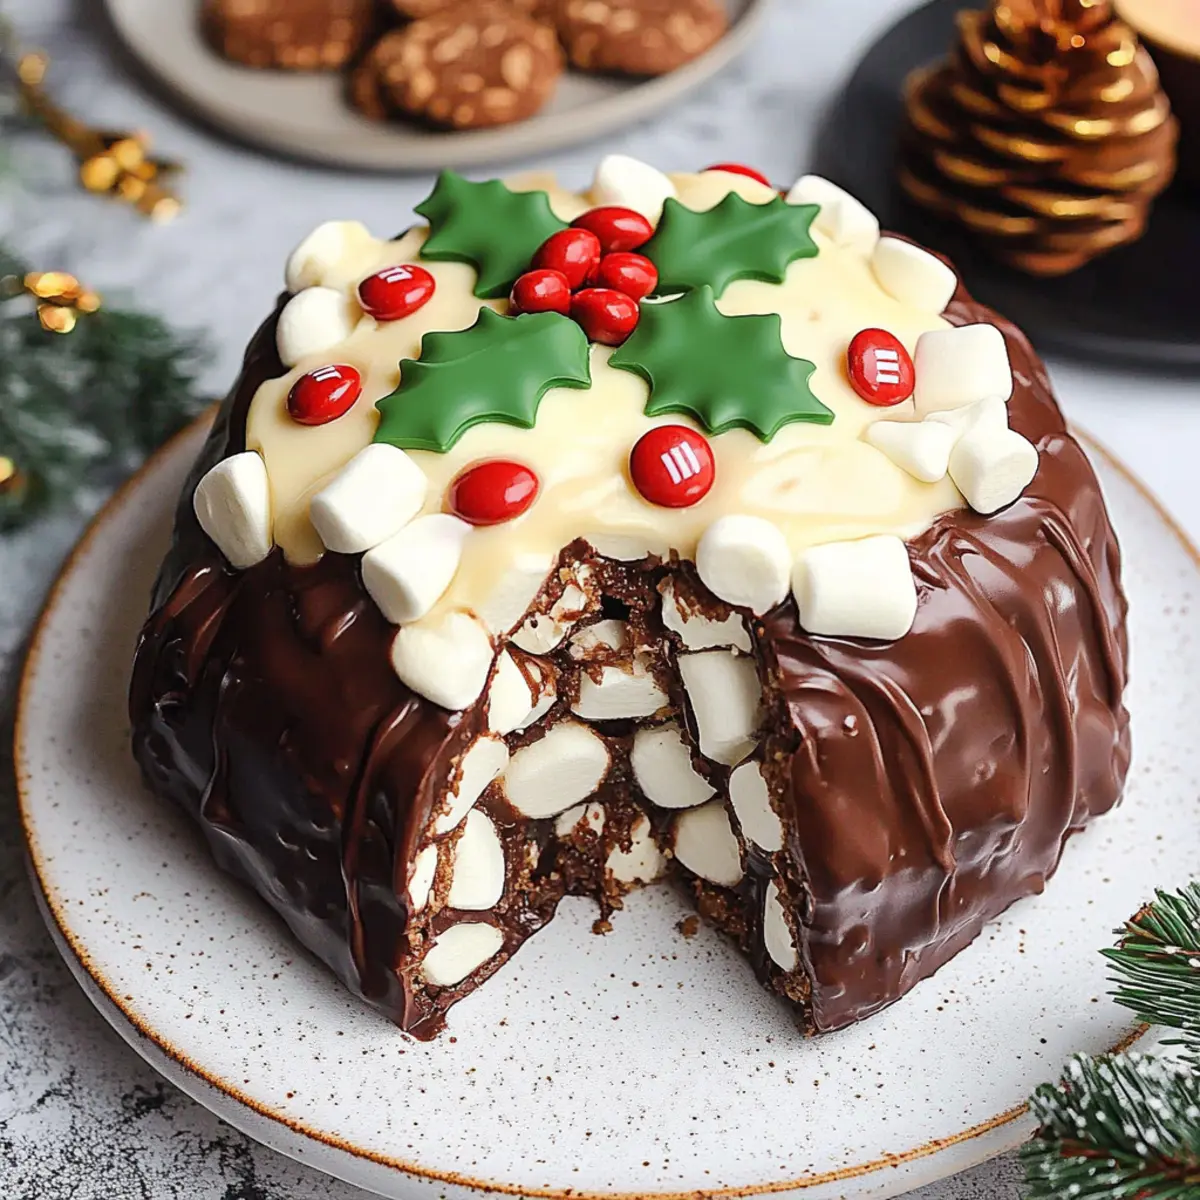
As I stood in the kitchen surrounded by the comforting aroma of melting chocolate, I couldn’t help but feel the festive spirit washing over me. This No-Bake Chocolate Rocky Road Christmas Pudding is my delightful twist on traditional holiday desserts, offering a sweet escape from the usual fare. Perfect for those cozy gatherings or a quiet evening indulgence, this recipe combines crunchy biscuits, fluffy marshmallows, and rich chocolate into a spectacular treat. Imagine the joy of creating a stunning dessert without turning on the oven—what could be better? With a straightforward preparation and endless customization options, you can tailor it to your taste and impress guests effortlessly. Ready to bring a touch of chocolatey cheer to your holiday table? Let’s dive into this festive delight!
Why is Rocky Road Christmas Pudding a Must-Try?
Irresistible Combination: The blend of rich chocolate, crunchy biscuits, and fluffy marshmallows creates an unforgettable dessert experience that delights every palate.
No-Bake Ease: With a simple preparation that requires no baking, you can craft this festive pudding quickly—a total game-changer during the holiday rush!
Customize Your Way: Feel free to personalize with your favorite mix-ins—try adding nuts, dried fruits, or flavored chocolates for a unique twist!
Crowd-Pleasing Delight: This stunning dessert is sure to be the star of any gathering, impressing guests, and adding a cheerful touch to your holiday celebrations.
Make-Ahead Friendly: Prepare your Rocky Road Christmas Pudding in advance and save time for yourself—just pull it out of the fridge when it’s time to serve! Discover more about these holiday treats and simplify your menu!
Rocky Road Christmas Pudding Ingredients
-
For the Pudding Base
-
Golden Syrup – A liquid sweetener that adds stickiness and depth; you can substitute this with honey if desired.
-
Unsalted Butter – Provides richness and binds ingredients; make sure it’s fully melted for proper mixing.
-
Milk Chocolate – This ingredient adds sweetness and creaminess; feel free to swap for dark chocolate for a richer flavor.
-
Dark Chocolate – Contributes depth and balance to the overall sweetness; it’s optional if you prefer to stick with one type of chocolate.
-
Mini Marshmallows – They offer a chewy texture and sweetness; other candies can be substituted if you wish!
-
Digestives/Biscuit Base – This will give structure and crunch; use any preferred biscuits, but avoid using fine crumbs.
-
Amaretti Biscuits – They add a hint of almond flavor and extra crunch; simply replace with a nut-free biscuit if allergies are a concern.
-
For the Festive Additions
-
Glacé Cherries – These add a fruity flair and festive touch; you can omit them if not a fan and use dried fruits instead.
-
Raisins – They contribute moisture and sweetness; feel free to adjust by using chopped dates or leaving them out entirely.
-
For Decoration
-
White Chocolate – Used for a decorative topping providing a sweet contrast; you can substitute with colored candy melts for added fun.
-
Icing Sugar – Sweetens and thickens the buttercream for decoration; adjust the amount to your desired sweetness level.
-
Green Food Colouring – Adds a festive tint to the buttercream; this is optional—any food coloring works!
-
Red M&Ms – These function as decorative “berries” on your pudding; feel free to swap with any red candies you like.
Take note of these ingredients to make your Rocky Road Christmas Pudding a delightful centerpiece for your holiday table!
Step‑by‑Step Instructions for Rocky Road Christmas Pudding!
Step 1: Prepare Mould
Begin by lining a small to medium bowl with clingfilm, ensuring it fits snugly against the sides and is fully covered. This will enable easy removal of your No-Bake Chocolate Rocky Road Christmas Pudding later. Use a bowl that allows enough space for the pudding to set properly.
Step 2: Chop Chocolate
Finely chop both milk and dark chocolate into small pieces and set them aside in separate bowls. This preparation will ensure they melt evenly and smoothly when combined with the other ingredients, adding a rich depth to your Rocky Road Christmas Pudding.
Step 3: Mix Biscuit Filling
In a large mixing bowl, chop the digestive and amaretti biscuits into chunks, leaving a mix of sizes for added texture. Stir in the mini marshmallows, glacé cherries, and raisins, mixing until all ingredients are well combined and coated enough to stay together once combined with the chocolate mixture.
Step 4: Melt Mixture
In a medium saucepan over low heat, combine the unsalted butter and golden syrup, stirring until fully melted and smooth—this should take about 3-4 minutes. Once melted, remove from heat and add the chopped chocolate, stirring continuously until the mixture is glossy and all chocolate is fully melted.
Step 5: Combine
Carefully pour the melted chocolate mixture into the bowl of biscuit filling and use a spatula to fold everything gently together. Make sure all biscuit chunks, marshmallows, and dried fruits are evenly coated with the chocolate to ensure each bite of your Rocky Road Christmas Pudding is deliciously chocolaty.
Step 6: Set Pudding
Transfer the combined mixture into the prepared bowl lined with clingfilm. Press down firmly with the back of a spoon or your hands to compact it. Cover the top with excess clingfilm, and refrigerate for at least 2 hours, or overnight if possible, to allow the pudding to set completely.
Step 7: Decorate
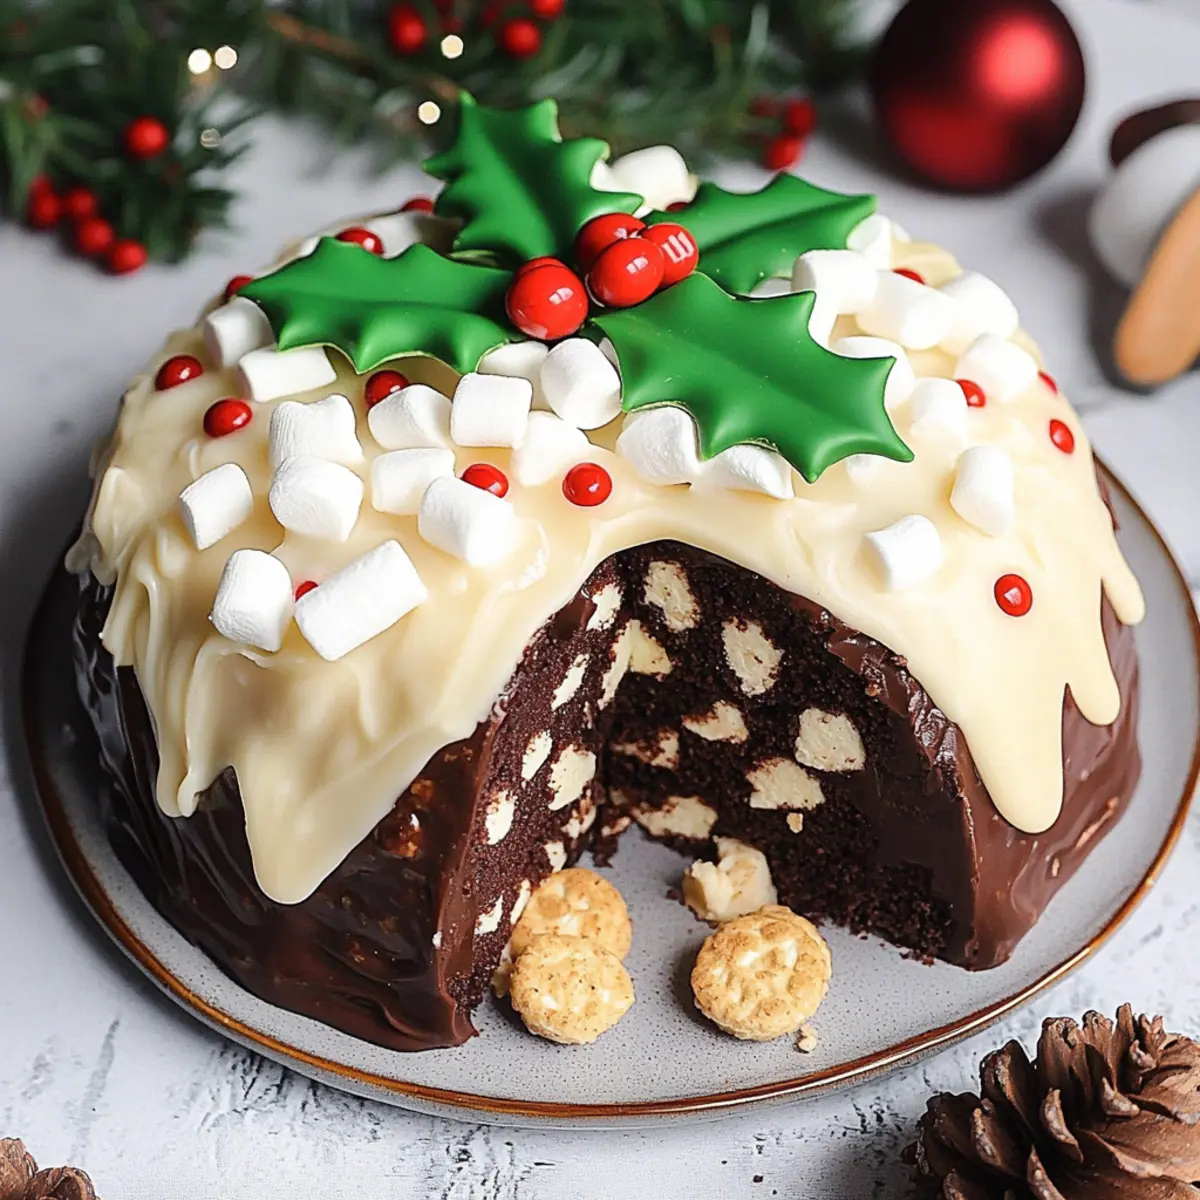
Melt the white chocolate in a microwave-safe bowl in 20-second increments, stirring until smooth. Pour the melted white chocolate over the set pudding, letting it drizzle slightly down the sides for a decorative effect. For the festive touch, prepare green buttercream, pipe out holly leaves, and top with red M&Ms as “berries.” Let it fully set before serving.

Make Ahead Options
These No-Bake Chocolate Rocky Road Christmas Puddings are perfect for meal prep, allowing you to save precious time during the bustling holiday season! You can prepare the pudding mixture up to 24 hours in advance—simply follow the steps to mix the biscuits, marshmallows, and chocolate, then pack it tightly into the lined bowl. Cover it securely with clingfilm and refrigerate it to maintain its quality. When you’re ready to serve, just complete the decoration by melting the white chocolate and piping the festive buttercream—this will allow for a beautiful presentation and delicious results that are just as delightful as if freshly made!
Expert Tips for Rocky Road Christmas Pudding
- Firmly Pack: Press the mixture firmly into the mold to ensure it holds together nicely after setting. A well-packed pudding slices more cleanly!
- Cooling Chocolate: Allow the melted white chocolate to cool slightly before pouring it on top. This helps to prevent it from running excessively down the sides.
- Timing is Key: Wait for the pudding to chill completely before slicing. This makes for smoother cuts and more attractive portions of your Rocky Road Christmas Pudding.
- Custom Mix-ins: Feel free to get creative with your mix-ins—try adding festive nuts or a splash of your favorite extract for a personal touch!
- Easy Removal: Using clingfilm in the mold not only eases the removal but also prevents sticking—making presenting your dessert a breeze!
Rocky Road Christmas Pudding: Customization Awaits!
Feel free to add your twist to this delightful treat with various adaptations that match your taste and dietary needs.
- Vegan Version: Replace butter with coconut oil and use plant-based chocolate; this way, you keep all the deliciousness animal-free!
- Nutty Addition: Toss in chopped nuts like walnuts or almonds for an added crunch—this will bring a lovely, nutty flavor to your pudding. Nuts can introduce a great texture contrast and elevate the eating experience!
- Dried Fruit: Swap in chopped dried figs or apricots in place of raisins for a more unique flavor or to accommodate your guests’ preferences. Feel free to experiment with different fruits to keep things exciting!
- Spiced Up: Add a pinch of cinnamon or nutmeg to the chocolate mix for a warm spice kick that perfectly complements the holiday theme. The fragrance will evoke holiday memories as you prepare it!
- Extravagant Flavors: Try using salted caramel chocolate or cookie butter for a twist that takes this pudding to new levels of indulgence. Every slice will feel like a little slice of heaven!
- Mini Treats: Create bite-sized versions in muffin tins or silicone molds, making them perfect for parties and gatherings. These smaller bites have a fun presentation and are easy to share!
- White Chocolate Switch: For a creative spin, use colored candy melts instead of white chocolate for decoration, adding flair and a personal touch to the pudding’s appearance. The vibrant colors will surely grab attention!
With these variations, your Rocky Road Christmas Pudding can be as unique as your festive spirit! Interested in more sweet ideas? Explore our collection of holiday treats to sweeten your celebrations!
What to Serve with Rocky Road Christmas Pudding?
Indulging in a slice of this festive dessert is just the beginning of your culinary celebration. Let’s build a delightful meal around it!
-
Creamy Vanilla Ice Cream: A scoop of smooth and rich vanilla ice cream beautifully contrasts the dense texture of the pudding, enhancing its sweetness.
-
Fresh Berries Medley: A mix of strawberries, raspberries, and blueberries adds a tart freshness that balances the chocolate’s richness, creating a colorful plate.
-
Warm Chocolate Sauce: Drizzling warm chocolate sauce over the pudding intensifies the chocolate experience! It invites a gooey allure that’ll have everyone reaching for seconds.
-
Festive Peppermint Bark: Crushed peppermint bark offers a refreshing crunch that complements the pudding’s chewy texture while adding a splash of festive color.
-
Lightly Whipped Cream: A dollop of airy whipped cream lightens up each slice, making it feel pleasantly indulgent without overpowering the flavors.
-
Hot Chocolate: For an extra cozy touch, serving a warm mug of hot chocolate elevates the chocolate experience and creates a delightful snug atmosphere.
-
Gingerbread Cookies: The spiced warmth of freshly baked gingerbread cookies brings a festive crunch that pairs wonderfully with the rich flavors of the pudding.
-
Spiced Apple Cider: This warm beverage adds a delightful aroma and hint of spice, perfect for cutting through the sweetness of the pudding and creating a comforting vibe.
Surround your Rocky Road Christmas Pudding with these delightful accompaniments, and watch the evening transform into a memorable feast!
How to Store and Freeze Rocky Road Christmas Pudding
Room Temperature: Store at room temperature for up to 1 week in an airtight container, keeping it cool and dry to maintain freshness.
Fridge: If you prefer a firmer texture, keep the pudding in the fridge for up to 1 week, tightly wrapped in clingfilm or placed in an airtight container.
Freezer: For long-term storage, freeze the un-decorated Rocky Road Christmas Pudding for up to 3 months. Wrap it tightly in plastic wrap, followed by aluminum foil to prevent freezer burn.
Thawing: When ready to enjoy, simply thaw in the fridge overnight and then decorate as desired before serving.
Rocky Road Christmas Pudding Recipe FAQs
How do I choose the right chocolate for my pudding?
When selecting chocolate, look for high-quality brands with a cocoa butter content of at least 30%. Milk chocolate offers a sweeter flavor, while dark chocolate provides a richer, more intense taste—feel free to use a combination to balance sweetness and depth. For an extra layer of flavor, try experimenting with flavored chocolates like mint or orange.
How should I store my Rocky Road Christmas Pudding?
You can keep your pudding at room temperature for up to 1 week in an airtight container, ensuring it’s stored in a cool, dry place. If you prefer a firmer texture, refrigerate it for the same duration, tightly wrapped in clingfilm or an airtight container to maintain freshness.
Can I freeze Rocky Road Christmas Pudding?
Absolutely! You can freeze the un-decorated pudding for up to 3 months. Make sure to wrap it tightly in plastic wrap, followed by aluminum foil to prevent freezer burn. When you’re ready to enjoy it, thaw in the fridge overnight, then feel free to decorate as desired before serving.
What if my pudding doesn’t set properly?
If your pudding isn’t setting, it may need a firmer packing before refrigeration. Make sure to press the mixture down tightly when transferring it to the mold. If it’s still soft after chilling, consider putting it back in the refrigerator for a few more hours or even overnight to firm up completely before serving.
Are there any dietary considerations I should keep in mind?
For those with allergies or dietary restrictions, you can easily adapt this recipe! Substitute the amaretti biscuits with nut-free options, and check the chocolate for any allergens. If you’re making it for kids or pets, be sure to avoid ingredients like chocolate that could be harmful. Always read labels to ensure the candies and chocolates you use are allergy-friendly.
What can I do with leftover Rocky Road Christmas Pudding?
If you happen to have some pudding left over, slice it into small squares and serve as delightful sweet treats at your next gathering. You can also crumble it over ice cream or yogurt for a decadent twist! The options are as endless as your creativity!

Rocky Road Christmas Pudding: Easy No-Bake Delight for Any Feast
Ingredients
Equipment
Method
- Prepare Mould: Line a small to medium bowl with clingfilm.
- Chop Chocolate: Finely chop both milk and dark chocolate.
- Mix Biscuit Filling: Chop biscuits and mix in mini marshmallows, glacé cherries, and raisins.
- Melt Mixture: Melt butter and golden syrup, then add chopped chocolate.
- Combine: Fold the melted chocolate mixture into the biscuit filling.
- Set Pudding: Transfer the mixture into the prepared bowl, compact it, and refrigerate.
- Decorate: Melt white chocolate for topping and decorate with buttercream and red M&Ms.
Leave a Reply