
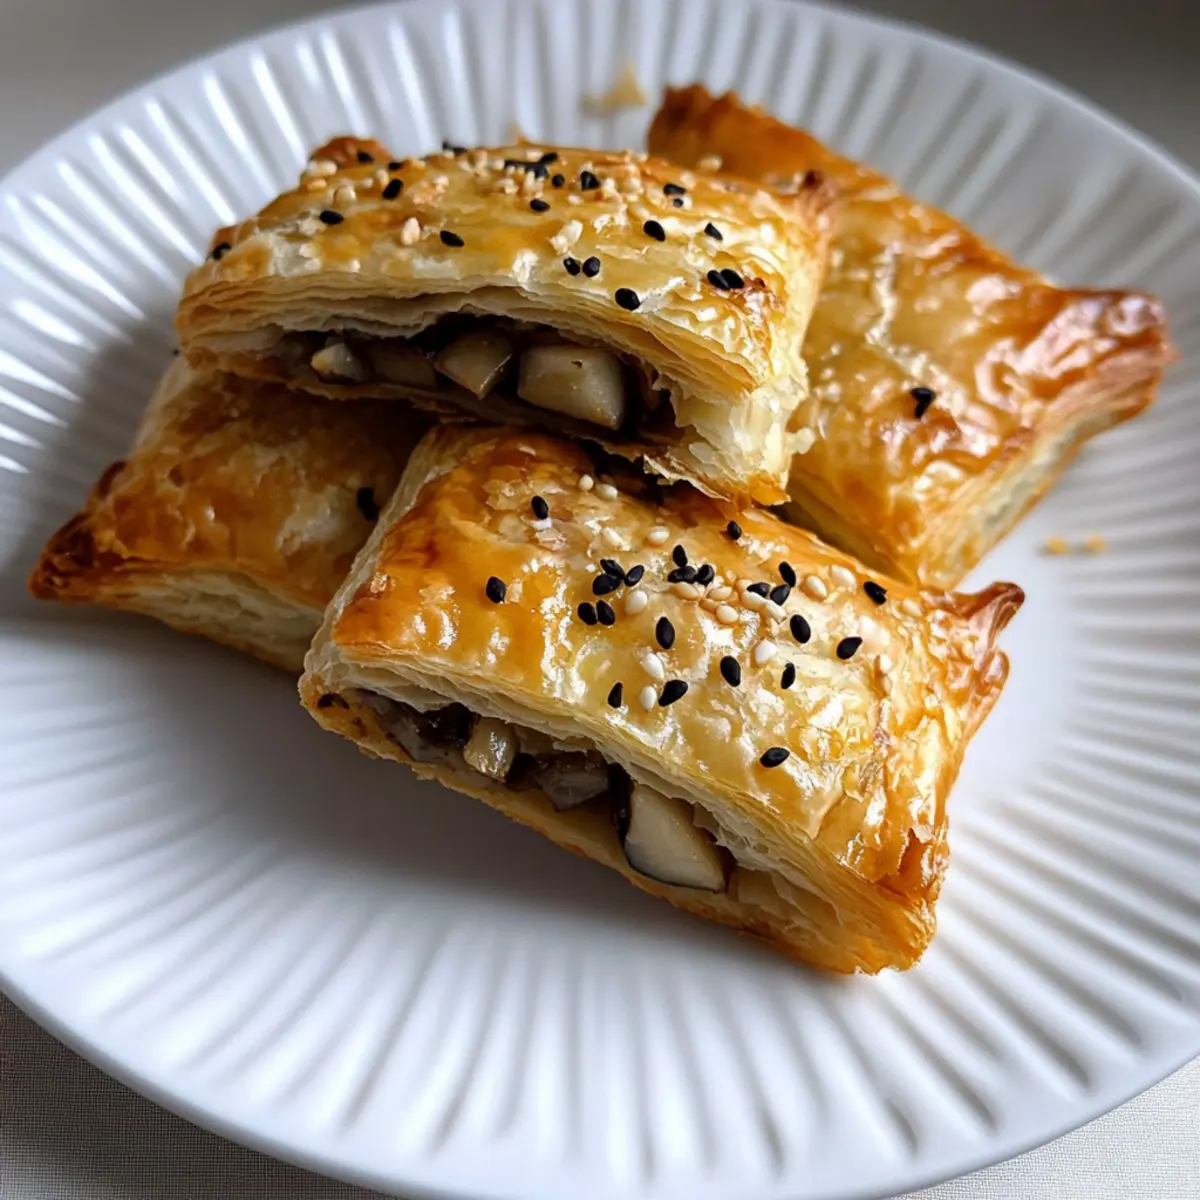
The enticing aroma of sizzling garlic and mushrooms instantly transports me back to cozy evenings spent in my grandmother’s kitchen. That nostalgia inspired me to create these delightful Mushroom Puffs, an appetizer that’s not only incredibly easy but also bursting with savory goodness. With a flaky, golden crust thanks to convenient store-bought puff pastry, you can whip up these little gems in no time, making them perfect for unexpected guests or a cozy night in. Plus, they’re versatile enough to impress any crowd, whether you’re hosting a lavish dinner party or simply treating yourself to a gourmet snack. What’s your favorite way to elevate a simple dish? Let’s dive into creating these irresistible Mushroom Puffs together!
Why Are Mushroom Puffs So Irresistible?
Delicious Flavor Explosion: These savory Mushroom Puffs are filled with a mouthwatering blend of garlic, onions, and mushrooms, creating an irresistible taste that will leave your guests begging for more.
Quick to Prepare: With just a few simple steps, you can create this gourmet appetizer that appears complex but is incredibly easy, perfect for busy home cooks.
Versatile Filling Options: Feel free to mix in your favorite cheeses or herbs; the possibility for customization makes these puffs an exciting culinary adventure. You can even try variations like Garden Stuffed Mushrooms for more delightful options!
Crowd-Pleasing Goodness: Whether at parties or cozy gatherings, these Mushroom Puffs are sure to be the star of the show, bursting with flavor and delighting every palate.
Make Ahead Convenience: Bake them in advance, store in the fridge, and simply reheat for quick snacks or appetizers. Perfect for those spontaneous get-togethers!
Mushroom Puff Ingredients
For the Filling
• Mushrooms – Choose any variety, such as cremini or button, to add a rich umami flavor to your dish.
• Onions – Use yellow or sweet onions for a touch of sweetness; shallots provide a milder alternative.
• Garlic – Freshly minced garlic delivers the best flavor; garlic powder can substitute in a pinch.
• Butter – This adds richness when sautéing; for a dairy-free version, opt for olive oil.
• Pepper – Season to taste; a pinch of chili flakes can kick up the heat if desired.
For the Pastry
• Puff Pastry – Utilizing store-bought pastry makes prep a breeze, ensuring that delicious flakiness in every bite.
• Egg (for wash) – This gives your Mushroom Puffs a beautiful golden finish; you can use milk as a vegan substitute.
For Garnishing
• Sesame Seeds – Sprinkle on top for a delightful crunch and nutty flavor; consider poppy seeds as a fun alternative.
Step‑by‑Step Instructions for Mushroom Puffs
Step 1: Prepare the Filling
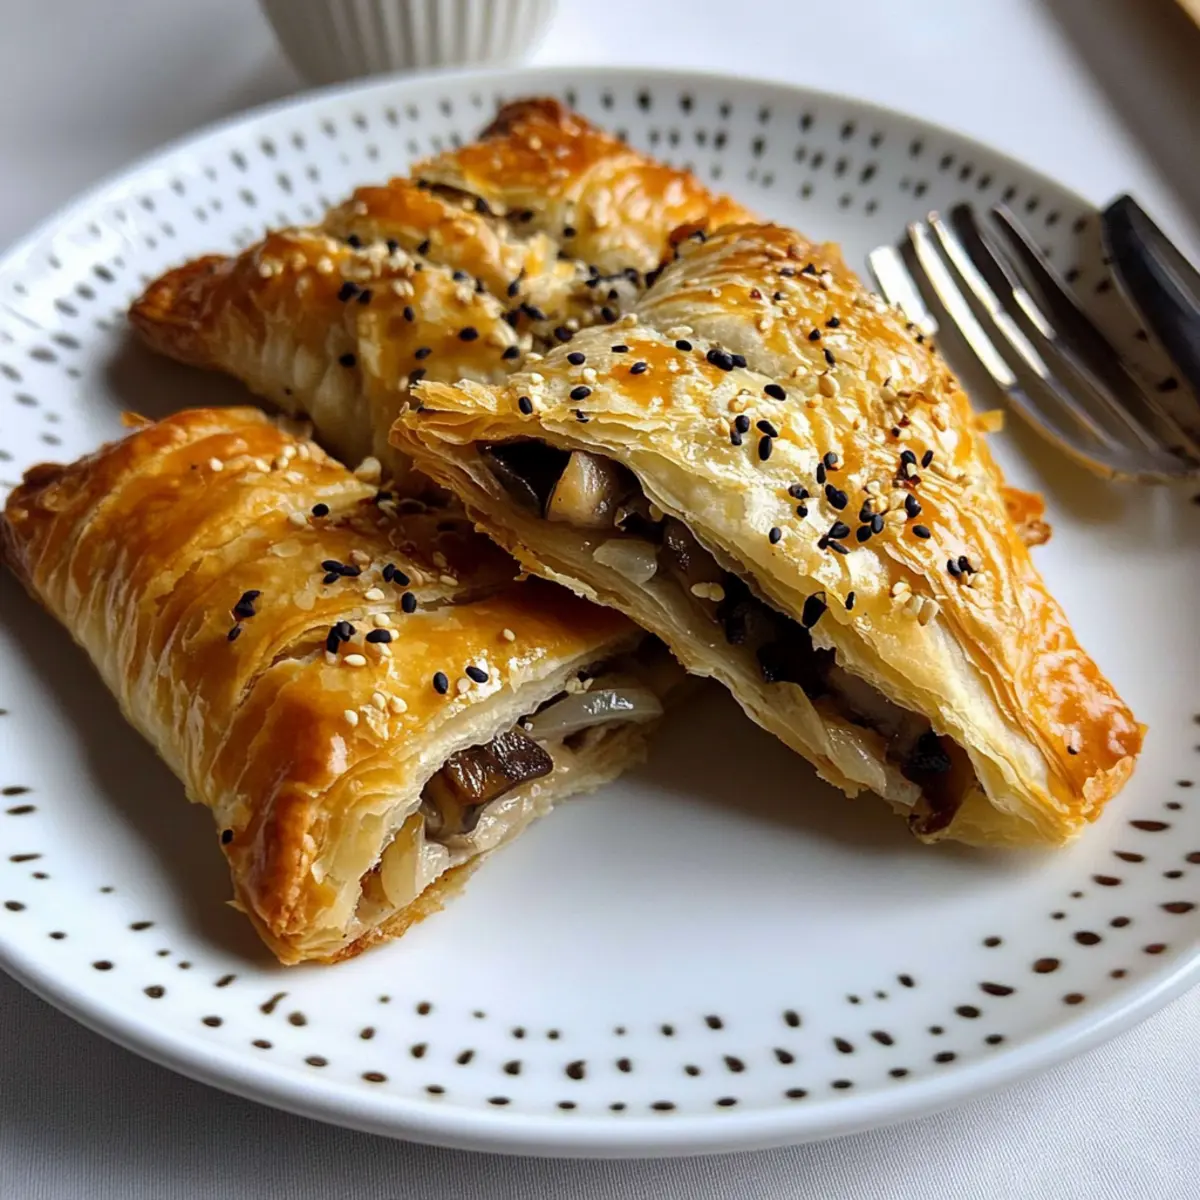
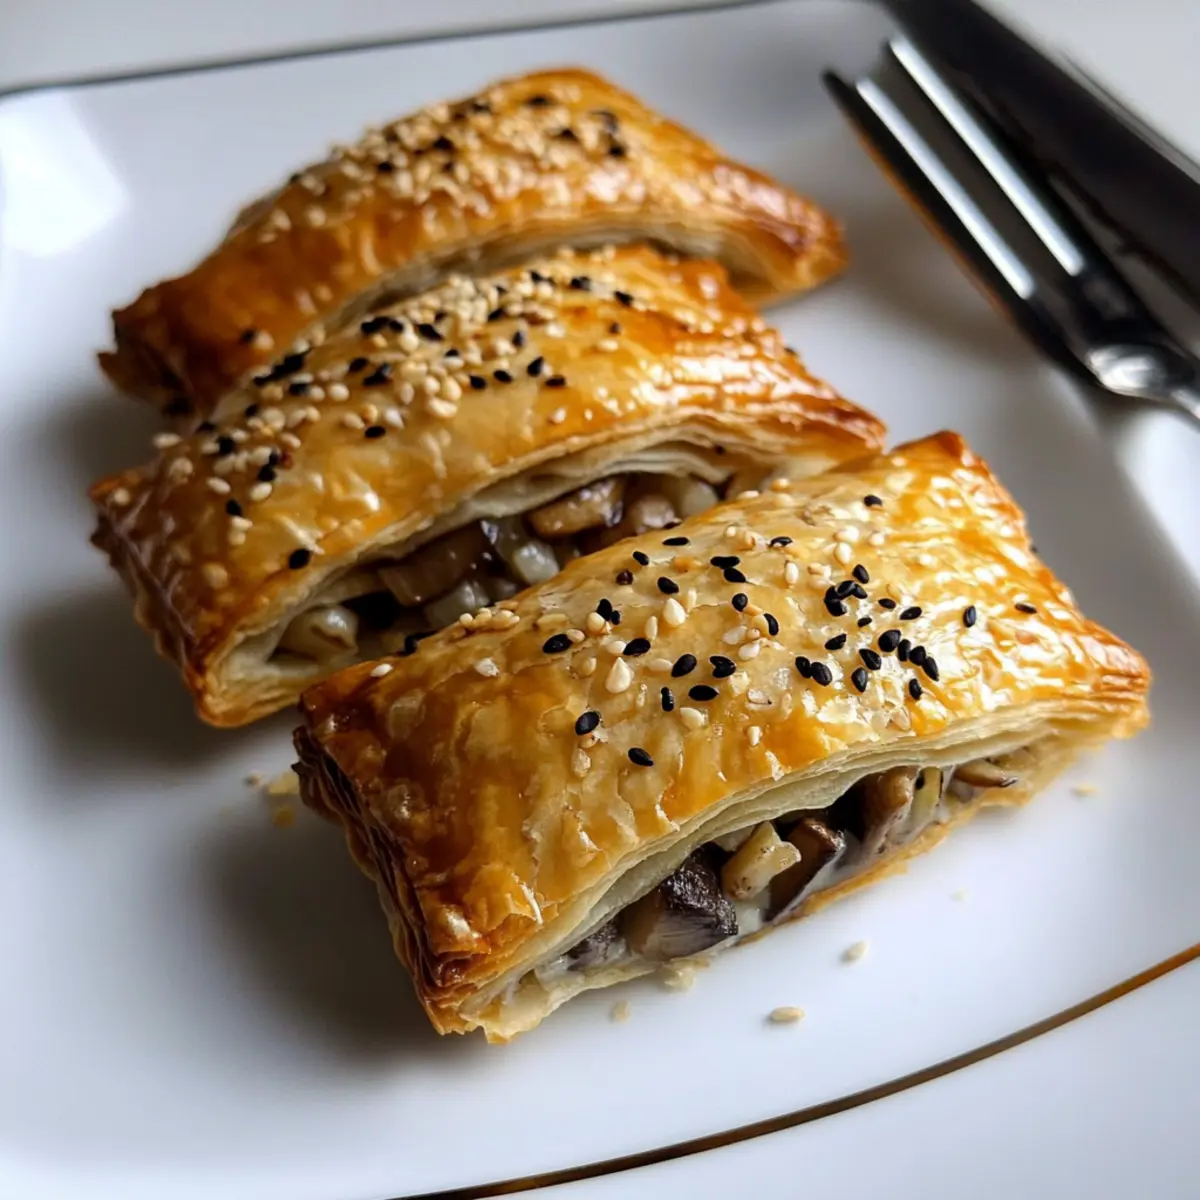
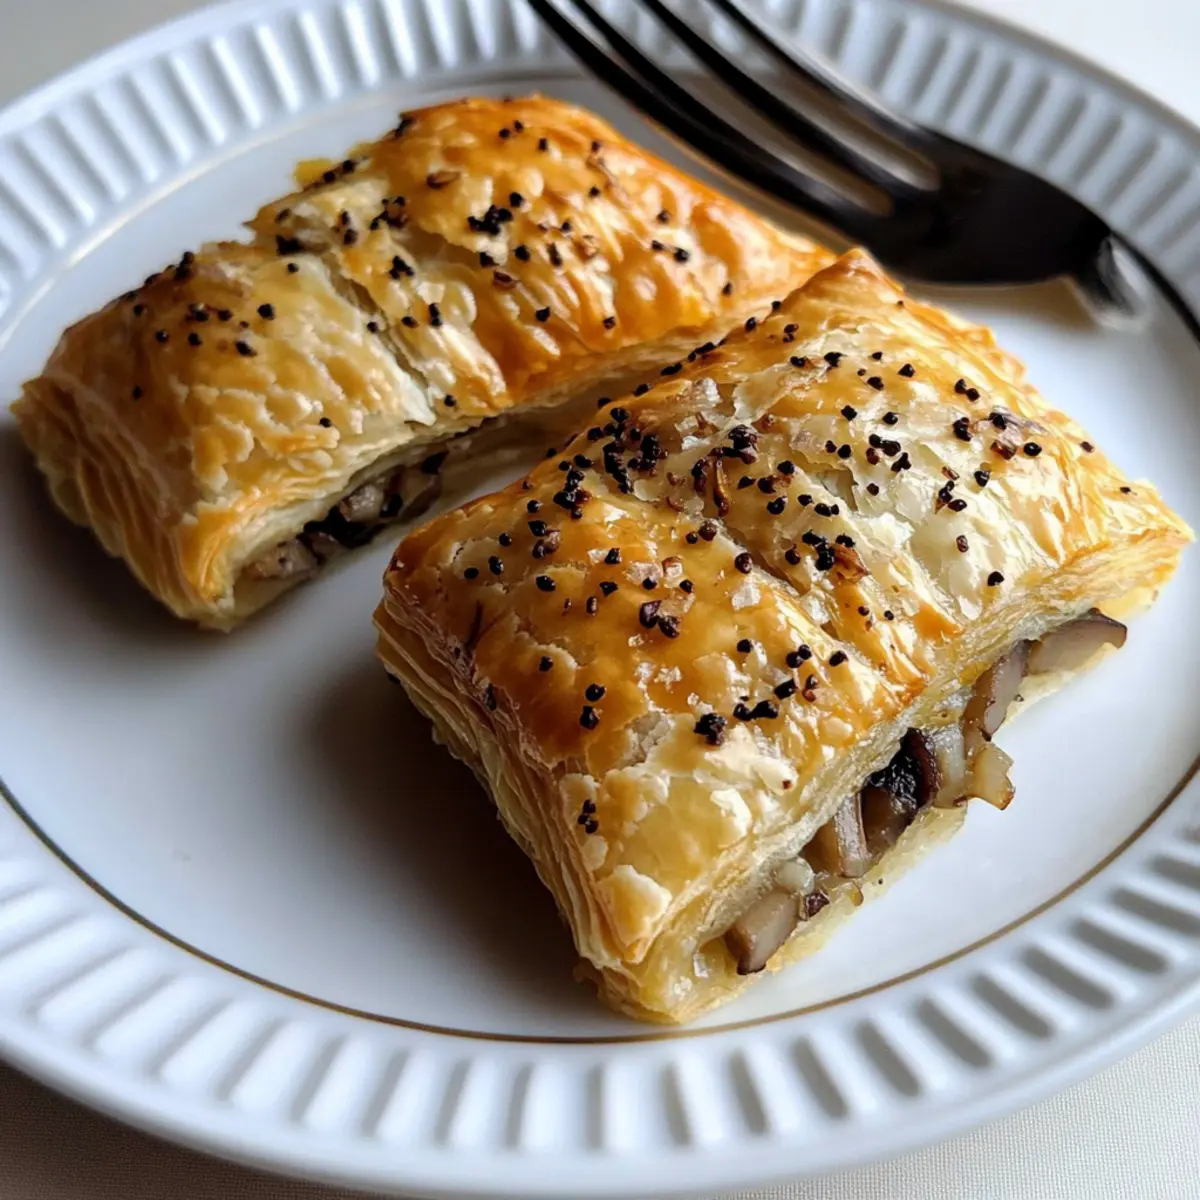
Begin by finely chopping the mushrooms and onions, aiming for uniform pieces to ensure even cooking. In a skillet over medium heat, melt some butter and add the chopped onions. Sauté for about 3-4 minutes until translucent, then add the mushrooms. Continue cooking for another 5-7 minutes until they soften and most of the moisture evaporates. Stir in minced garlic and a pinch of pepper, cooking for an additional minute until fragrant.
Step 2: Assemble the Puffs
Preheat your oven to 400°F (200°C) and line a baking sheet with parchment paper. Roll out the thawed puff pastry on a lightly floured surface to avoid sticking. Cut the pastry into your desired shapes, such as squares or circles. Spoon a generous amount of the mushroom filling onto one half of each pastry piece. Carefully fold the other half over the filling and press the edges firmly with a fork to seal tightly, ensuring no filling escapes during baking.
Step 3: Bake the Puffs
Place the assembled Mushroom Puffs on the prepared baking sheet, ensuring they are spaced apart. In a small bowl, beat an egg to create an egg wash, then brush it generously over the tops of the puffs for a shiny, golden finish. If desired, sprinkle sesame seeds on top for added texture. Bake in the preheated oven for 20-25 minutes, or until the pastry is puffed and beautifully golden brown.
Step 4: Cool and Serve
Once baked, remove the Mushroom Puffs from the oven and let them cool for a few minutes on the baking sheet. This will allow the filling to set slightly while keeping the pastry crisp. Serve your warm Mushroom Puffs immediately for the best taste, perhaps with a dipping sauce such as garlic aioli to elevate this delightful appetizer experience.
Mushroom Puffs Variations & Substitutions
Feel free to let your creativity shine as you customize these delightful Mushroom Puffs to suit your taste.
-
Cheese Lover’s Delight: Add crumbled feta or mozzarella for a creamy twist that complements the mushrooms beautifully.
-
Fresh Herb Infusion: Incorporate fresh herbs like thyme or parsley to add a burst of freshness that perfectly brightens the savory filling.
-
Spinach Surprise: Replace some of the mushroom filling with sautéed spinach for a vibrant color and additional nutrients in every bite.
-
Spicy Kick: If you love a bit of heat, include diced jalapeños or a dash of hot sauce for a delightful flavor contrast. Each bite will pack an extra punch!
-
Mixed Vegetable Medley: Experiment with other vegetables like bell peppers or zucchini to create a colorful, textured filling that’s brimming with goodness.
-
Nutty Crunch: Toss in some chopped walnuts or pecans into the filling for a nutty flavor and a delightful crunch that enhances every mouthful.
-
Sweet & Savory: Add a touch of sweetness by mixing in some caramelized onions to balance the umami of the mushrooms.
-
Alternate Pastry: Use phyllo dough instead of puff pastry for a lighter texture and a unique crispness that changes the game. Want to take it another step? Try a recipe like Hungarian Mushroom Soup for a warming twist on flavors!
Remember, the possibilities are endless, so don’t hesitate to make these Mushroom Puffs your own!
Storage Tips for Mushroom Puffs
Room Temperature: Store freshly baked Mushroom Puffs at room temperature for up to 2 hours. Keep them covered with a clean kitchen towel to maintain crispness.
Fridge: If you have leftovers, place cooled Mushroom Puffs in an airtight container in the fridge for up to 3-4 days. This keeps them from drying out while stored.
Freezer: For longer storage, freeze unbaked Mushroom Puffs before cooking. Wrap each individually in plastic wrap, then place in a freezer-safe bag for up to 2 months.
Reheating: When ready to enjoy, reheat in the oven at 350°F (175°C) for 10-15 minutes to regain that flaky texture, avoiding microwaving which can make them soggy.
What to Serve with Flaky Mushroom Puffs?
Indulging in the delightful crunch of mushroom puffs opens up a world of delicious pairing options that can elevate your meal experience.
- Creamy Garlic Mashed Potatoes: These rich, buttery potatoes provide a silky contrast to the crispy puffs, making each bite a harmonious blend of textures.
- Mixed Greens Salad: A refreshing salad with a light vinaigrette adds a burst of freshness, perfectly balancing the savory flavors of the puffs.
- Savory Tomato Basil Soup: The warm, comforting soup complements the mushroom filling beautifully, creating a cozy dining experience that feels like a warm hug.
- Roasted Vegetable Medley: A colorful mix of seasonal vegetables enhances the earthiness of mushrooms, enriching your meal’s flavor profile and nutrition.
- Herb Dip: Pair with a zesty herb dip or a tangy garlic aioli, as it brightens up the rich flavors, making each puff feel gourmet.
- Sparkling Wine: A chilled sparkling wine adds an elegant bubbly touch to your appetizer spread, enhancing the flavors of the mushroom puffs while offering a celebratory feel.
- Stuffed Peppers: For a heartier option, consider serving alongside stuffed peppers filled with grains and cheese, creating a filling and exciting table spread.
- Chocolate Fondue: For a sweet finish, a simple chocolate fondue paired with fruits or marshmallows can create a delightful contrast to the savory bites, leaving guests satisfied.
Expert Tips for Mushroom Puffs
- Chill the Pastry: Keep puff pastry cold before handling for the ultimate flakiness; warm dough will not puff as high or crispy.
- Don’t Overfill: Be mindful of portioning the filling; too much can cause the puffs to burst open while baking, wasting your delicious mushroom filling.
- Bake on Parchment: Use parchment paper on the baking sheet to prevent sticking and ensure even browning for your Mushroom Puffs.
- Watch the Oven: Every oven is different, so start checking your puffs a few minutes before the recommended time to avoid burning.
- Serve Fresh: Enjoy these puffs hot from the oven; if you prep ahead, reheat in the oven for a crispy texture instead of the microwave.
Make Ahead Options
These Mushroom Puffs are perfect for busy weeknights or impromptu gatherings! You can prepare the filling (sautéed mushrooms, onions, garlic, and seasoning) up to 3 days in advance and refrigerate it in an airtight container. The assembled puffs can also be prepared and frozen for up to 24 hours; simply store them on a baking sheet in the freezer until firm, then transfer to a freezer bag. When you’re ready to bake, brush with egg wash (or milk for a vegan option) and bake directly from the freezer, adding a few extra minutes to the baking time. This way, you’ll enjoy just as delicious results with minimal last-minute effort!
Mushroom Puffs Recipe FAQs
What type of mushrooms should I use for Mushroom Puffs?
Absolutely! For the best flavor in your Mushroom Puffs, I recommend using cremini or button mushrooms. Both varieties provide a delicious umami taste that complements the dish beautifully. Feel free to experiment with wild mushrooms like shiitake or oyster for a unique twist.
How should I store leftover Mushroom Puffs?
For optimal freshness, place any leftover Mushroom Puffs in an airtight container and store them in the refrigerator. They will last for about 3-4 days. To maintain their delightful crispness, reheat them in the oven at 350°F (175°C) for about 10-15 minutes instead of using the microwave.
Can I freeze uncooked Mushroom Puffs?
Yes, you can! To freeze your Mushroom Puffs, first assemble them but do not bake. Wrap each puff tightly in plastic wrap, then place them in a freezer-safe bag. They can stay in the freezer for up to 2 months. When you’re ready to enjoy, bake them straight from the freezer, adding an extra few minutes to the baking time.
What if my puff pastry doesn’t rise properly?
Very! This can usually be attributed to the puff pastry being warm or overworked. Ensure that you keep the pastry cold before baking and handle it gently. If you’re using fridge-stored puff pastry, allow it to chill for about 30 minutes before baking to ensure that it rises to fluffy perfection.
Are Mushroom Puffs suitable for those with dietary restrictions?
Yes, Mushroom Puffs can be adapted for various dietary needs! To make them dairy-free, opt for olive oil instead of butter and substitute the egg wash with plant-based milk. They are vegetarian-friendly, so anyone looking for tasty meat-free appetizers will love them! Always check for specific allergies related to mushrooms and other ingredients.
Can I make these puffs in advance for a party?
Absolutely! You can prepare the Mushroom Puffs ahead of time. Assemble them and refrigerate unbaked puffs for up to a day. Just remember to cover them with plastic wrap to prevent drying. When you’re ready to serve, simply pop them in the oven to bake! This way, you can enjoy your time with guests without scrambling in the kitchen.
Savory Mushroom Puffs for Flaky Flavor Bliss
Ingredients
Equipment
Method
- Prepare the Filling: Finely chop the mushrooms and onions. In a skillet over medium heat, melt butter and sauté onions for 3-4 minutes. Add mushrooms and cook for 5-7 minutes. Stir in minced garlic and pepper for 1 more minute.
- Assemble the Puffs: Preheat oven to 400°F. Roll out puff pastry and cut into desired shapes. Place mushroom filling on one half, fold and seal edges with a fork.
- Bake the Puffs: Place on a baking sheet and brush with egg wash. Sprinkle sesame seeds if desired. Bake for 20-25 minutes until golden brown.
- Cool and Serve: Let cool for a few minutes, then serve warm with a dipping sauce.
Leave a Reply