
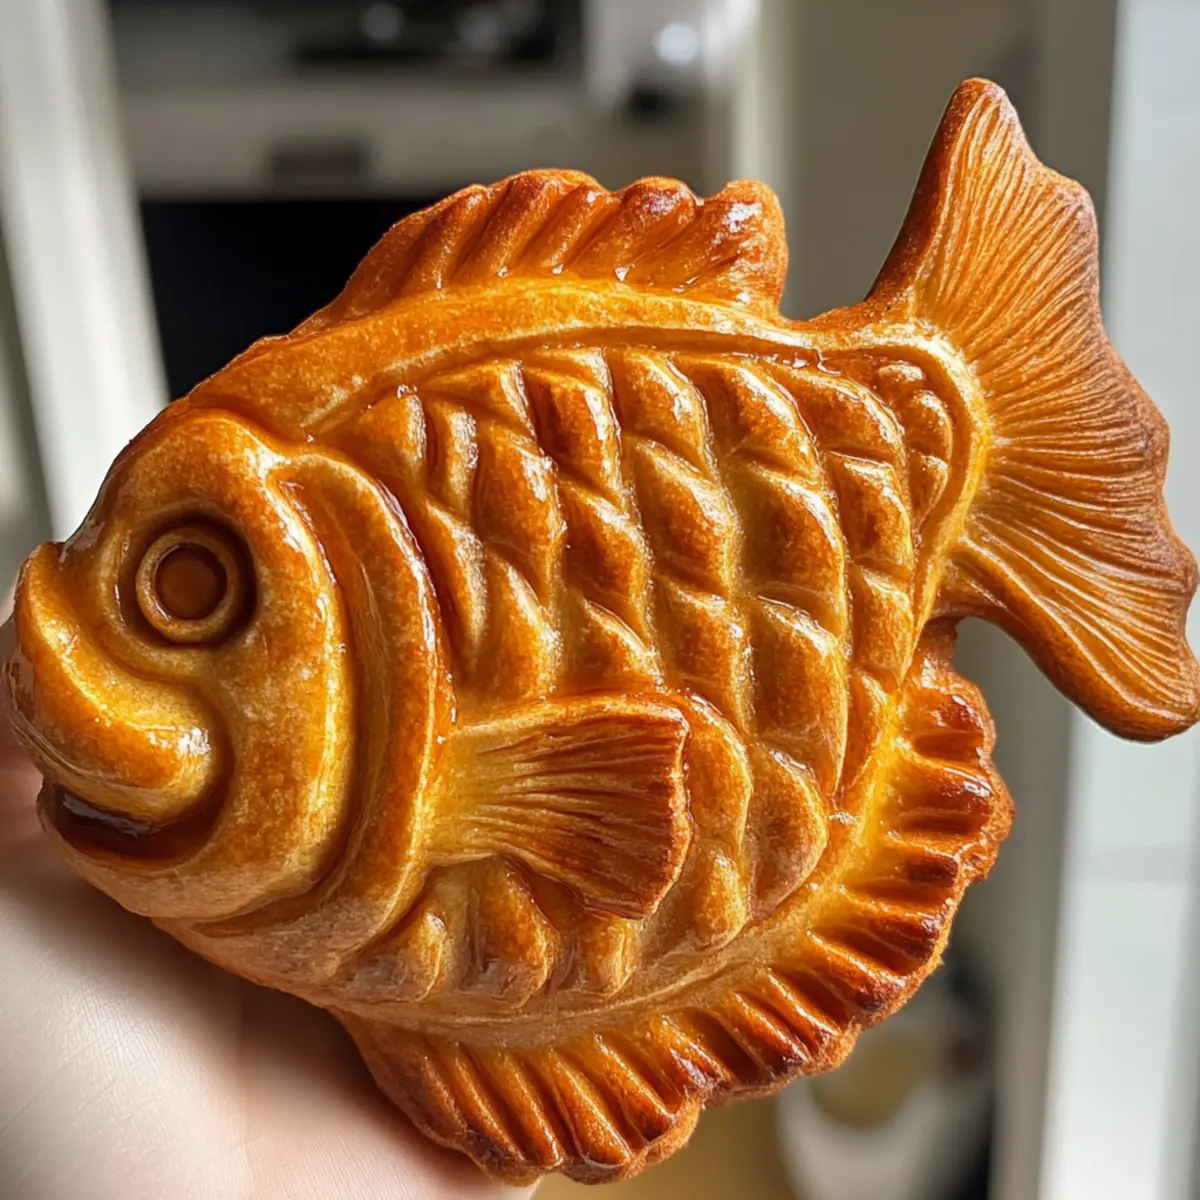
While flipping through a travel magazine, I stumbled upon a captivating image of Taiyaki, a delightful Japanese fish-shaped dessert. My curiosity bubbled over, prompting me to create my own version at home. This homemade Taiyaki recipe offers a deliciously warm, crispy exterior that gives way to a soft, fluffy center, all wrapped around your favorite filling. Whether you prefer traditional red bean paste or the modern twist of Nutella, creating this Japanese fish dessert is not only straightforward but also an amazing way to personalize your baking. You’ll find joy in gathering your friends or family to indulge in this fun, shareable treat, all while skipping the mundane fast-food options lurking in the drive-thrus. How about diving into this culinary adventure and discovering which filling brings out the chef in you?
Why Try This Irresistible Fish Dessert?
Customization at Its Best: Taiyaki is not just any dessert; it’s a blank canvas ready for your creative fillings! From traditional red bean paste to gooey chocolate ganache, every bite is tailored to your taste.
Fun Cooking Experience: Making Taiyaki is a delightful project, perfect for cooking with family or friends. Gather your loved ones and enjoy a wonderful evening crafting these adorable fish-shaped treats together.
Perfect for Any Occasion: Whether it’s a casual dessert night or a festive gathering, this Japanese fish dessert is bound to impress your guests and become a crowd favorite.
Quick and Easy: With straightforward steps and common ingredients, you’ll whip up these tasty treats without a hitch. Check out tips for making the perfect batter and achieving that crispy exterior!
A Flavorful Adventure: Dive into a world of flavors! Experiment with fillings like sweet potato or matcha for a unique twist that will surprise and delight your taste buds. You can also explore more inspiration with our delicious Pistachio Milk Cake for your dessert table!
Japanese Fish Dessert Ingredients
• For the Batter
- Cake Flour – Provides structure and a light texture for the pastry, ensuring your Japanese fish dessert has that perfect balance.
- Granulated Sugar – Adds sweetness to the batter, creating a harmonious flavor profile.
- Baking Powder – Essential for helping the batter rise, giving your Taiyaki a fluffy interior.
- Baking Soda – Helps achieve that beautiful golden-brown color on the outside while cooking.
- Salt – Enhances the overall flavor, balancing the sweetness perfectly.
- Large Egg – Binds the ingredients and assists with leavening, ensuring a tender texture.
- Whole Milk – Adds moisture and richness to the batter, making each bite delightful.
- Vegetable Oil – Keeps the batter moist and tender for a lovely, soft interior.
- Vanilla Extract – Provides a subtle yet warm depth of flavor to the dessert.
• For the Filling
- Filling Options (like red bean paste, Nutella, custard, cheese) – Customize to your liking, enhancing the sweetness or richness with your favorite flavors!
Step‑by‑Step Instructions for Homemade Taiyaki: Versatile Japanese Fish-Shaped Dessert
Step 1: Prepare the Batter
Begin by sifting together the cake flour, granulated sugar, baking powder, baking soda, and salt in a large bowl. In another bowl, whisk the large egg, whole milk, vegetable oil, and vanilla extract until smooth. Gently combine the wet ingredients with the dry ingredients, stirring until just mixed. Be careful not to overmix; a few clumps are fine. Cover the bowl and refrigerate the batter for about 1 hour to thicken.
Step 2: Preheat the Pan
While the batter rests, preheat your taiyaki pan over medium-low heat. Lightly grease the molds with vegetable oil to prevent sticking. Allow the pan to heat up for 5 minutes until it’s warm to the touch. This step is crucial for achieving that delightful crispy exterior on your Japanese fish dessert, so be patient and ensure it’s adequately heated before pouring in the batter.
Step 3: Fill the Molds
Once your taiyaki pan is ready, take the chilled batter out of the refrigerator. Pour enough batter into each mold to fill it about 60% full, using approximately 2 tablespoons per side. Place about 1 tablespoon of your preferred filling—be it red bean paste, Nutella, or any other delicious option—into the center of the batter. Carefully cover with more batter, ensuring the filling isn’t exposed.
Step 4: Cook to Perfection
Close the taiyaki mold and flip it over using tongs or a spatula. Cook for 2-3 minutes on each side, keeping an eye on the color. You’re aiming for a beautiful golden brown to indicate that your taiyaki is just right. If needed, adjust the heat to ensure that the batter cooks evenly without burning. Listen for that gentle sizzle—it’s music to your ears!
Step 5: Serve Warm
Once cooked, open the taiyaki mold and gently release your fish-shaped creations, allowing them to cool slightly on a wire rack. These delightful Japanese fish desserts are best enjoyed warm, so gather your friends or family and serve immediately. The crispy exterior combined with the warm, gooey filling will create an unforgettable treat that everyone will love!
What to Serve with Homemade Taiyaki: Versatile Japanese Fish-Shaped Dessert
Pair your delightful taiyaki with these accompaniment ideas to elevate your dessert experience and create a memorable meal.
-
Whipped Cream: A dollop of airy whipped cream adds a rich creaminess that complements the sweet fillings beautifully.
-
Fresh Berries: Juicy strawberries or blueberries offer a burst of freshness, balancing the sweetness of your taiyaki. Their tartness enhances every bite!
-
Matcha Green Tea: The earthy flavor of matcha provides a lovely contrast to the sweet dessert. Sipping on this traditional Japanese tea creates an authentic experience.
-
Chocolate Sauce: Drizzling warm chocolate sauce over your taiyaki can add an indulgent touch, especially if you’re using Nutella or chocolate ganache as a filling.
-
Coconut Sorbet: This refreshing dessert provides a cool contrast to the warm taiyaki and can highlight tropical flavors that complement the sweet pastries perfectly.
-
Custard Dip: Serve a small bowl of vanilla custard for a delightful and creamy dipping option that pairs well with any filling choice you make.
-
Sweetened Condensed Milk: Drizzle this thick, rich syrup for a decadent addition that enhances the sweetness and keeps the treat creamy.
-
Sesame Mochi: For an added textural twist, these chewy treats are a wonderful pairing that incorporates traditional Japanese flavors alongside the fish dessert.
How to Store and Freeze Taiyaki
Fridge: Store leftover Taiyaki in an airtight container for up to 3 days to maintain freshness. Reheat in a warm oven to restore its crispy texture.
Freezer: Freeze individual Taiyaki by wrapping them tightly in plastic wrap and placing them in a freezer-safe bag for up to 3 months.
Defrosting: When ready to enjoy, defrost Taiyaki in the fridge overnight. Reheat in the oven at 350°F (175°C) for a few minutes for best results.
Reheating: For a crispy exterior, reheat Taiyaki in a toaster oven instead of the microwave, which can make them soggy. Enjoy this delightful Japanese fish dessert warm!
Expert Tips for the Best Taiyaki
• Don’t Overmix the Batter: A few lumps are okay. Overmixing can lead to tough Taiyaki instead of the soft, fluffy Japanese fish dessert you desire.
• Preheat Correctly: Ensure your taiyaki pan is well-preheated for a crispy shell. A too-cool pan can result in soggy edges, ruining the texture.
• Perfect Filling Amount: Avoid overloading with filling. One tablespoon in the center works best to prevent overflow while cooking, ensuring a beautiful presentation.
• Watch Your Timing: Cooking times may vary based on heat source. Keep a close eye to achieve that gorgeous golden brown on both sides.
• Practice Makes Perfect: Don’t worry if your first batch isn’t perfect! Adjust the batter amount and cooking time based on your first results to perfect your technique.
Japanese Fish Dessert Variations
Feel free to get creative and add your personal twist to this dessert that delights the senses!
-
Nutella Delight: Swap the traditional red bean paste for warm, gooey Nutella for a chocolate lover’s dream.
-
Cheesy Surprise: Use a creamy cheese filling for a savory contrast that pairs beautifully with the sweet batter. It’s an unexpected flavor journey!
-
Sweet Potato Magic: Mashed sweet potato makes for a nutritious and unique filling that adds a lovely sweetness.
-
Matcha Twist: Incorporate matcha powder into the batter for a green tea flavor that not only tastes great but looks stunning too.
-
Fruit Bomb: Fill with fresh fruit like strawberries or blueberries, and add a touch of sugar for a refreshing burst of flavor.
-
Cinnamon Sugar: Mix cinnamon into your sugar for the batter and sprinkle extra on top post-cooking, bringing a cozy warmth to every bite.
-
Chocolate Ganache: For a decadent touch, use velvety chocolate ganache as a filling, making your Taiyaki a true indulgent treat.
-
Baked Version: If you’re looking for a healthier option, try baking the Taiyaki in a muffin tin for a lighter approach that still satisfies your craving.
Explore these delightful variations and create your family favorites! And if you’re looking for more sweet inspiration, consider a delightful Pistachio Milk Cake for an extraordinary dessert experience.
Make Ahead Options
These delightful Homemade Taiyaki are perfect for meal prep, allowing you to enjoy a delicious treat in no time! You can prepare the batter up to 24 hours in advance by mixing the dry and wet ingredients separately and then combining them just before cooking. Refrigerate the batter in an airtight container to maintain its fluffy texture. If you’d like, you can also fill the molds with your chosen filling (like red bean paste or Nutella) and freeze them for up to 3 months; this way, you’ll have ready-to-cook taiyaki on hand! When it’s time to serve, simply cook the taiyaki from frozen, adjusting the cooking time slightly to ensure they heat through while still achieving that crispy exterior. Enjoy tasty Homemade Taiyaki with less hassle on busy nights!
Homemade Taiyaki (Japanese Fish Dessert) Recipe FAQs
What should I look for when selecting ingredients for Taiyaki?
Absolutely! When choosing your ingredients, particularly the flour, look for cake flour as it provides the best texture for Taiyaki. This type of flour ensures a light and fluffy result. Also, opt for fresh eggs and whole milk for the richest flavor, and consider the quality of your filling—organic red bean paste or gourmet chocolate can elevate your dessert immensely!
How should I store leftover Taiyaki?
Very! After enjoying your Taiyaki, store any leftovers in an airtight container in the fridge for up to 3 days. To retain their lovely texture, reheat them in a warm oven rather than the microwave, which can make them soggy. Aim for around 5-7 minutes at 350°F (175°C) for the best results.
Can I freeze Taiyaki for later?
Of course! Freezing Taiyaki is a great way to enjoy them later. First, let them cool completely, then wrap each piece tightly in plastic wrap and place them in a freezer-safe bag. They can be frozen for up to 3 months. When you’re ready to eat, defrost them in the fridge overnight, then reheat to restore that crispy goodness!
What if my batter is too runny or thick?
Don’t worry if you encounter this! If your batter is too runny, you might need to add a bit more cake flour—start with a tablespoon at a time until it reaches a smooth yet thick consistency. Conversely, if it’s too thick, gently mix in a little milk until it loosens to the right pouring consistency. Remember, a well-balanced batter is key to that fluffy, heavenly texture!
Is Taiyaki safe for people with dietary restrictions?
Definitely! If you’re catering to specific dietary needs, you can easily replace the cake flour with a gluten-free alternative, like almond or coconut flour, but be aware this may affect texture. Additionally, choose fillings that are nut-free or dairy-free if allergies are a concern, and always check ingredient labels. Taiyaki can be a flexible dessert, allowing everyone to join in on the fun!
Savor Homemade Japanese Fish Dessert with Irresistible Fillings
Ingredients
Equipment
Method
- Sift together the cake flour, granulated sugar, baking powder, baking soda, and salt. In another bowl, whisk the egg, milk, vegetable oil, and vanilla extract until smooth. Combine wet and dry ingredients.
- Preheat the taiyaki pan over medium-low heat and lightly grease the molds with vegetable oil.
- Pour enough batter into each mold to fill it about 60% full. Add 1 tablespoon of filling into the center and cover with more batter.
- Close the mold and cook for 2-3 minutes on each side until golden brown.
- Release the cooked taiyaki and serve warm. Enjoy the crispy exterior and warm filling.
Leave a Reply