
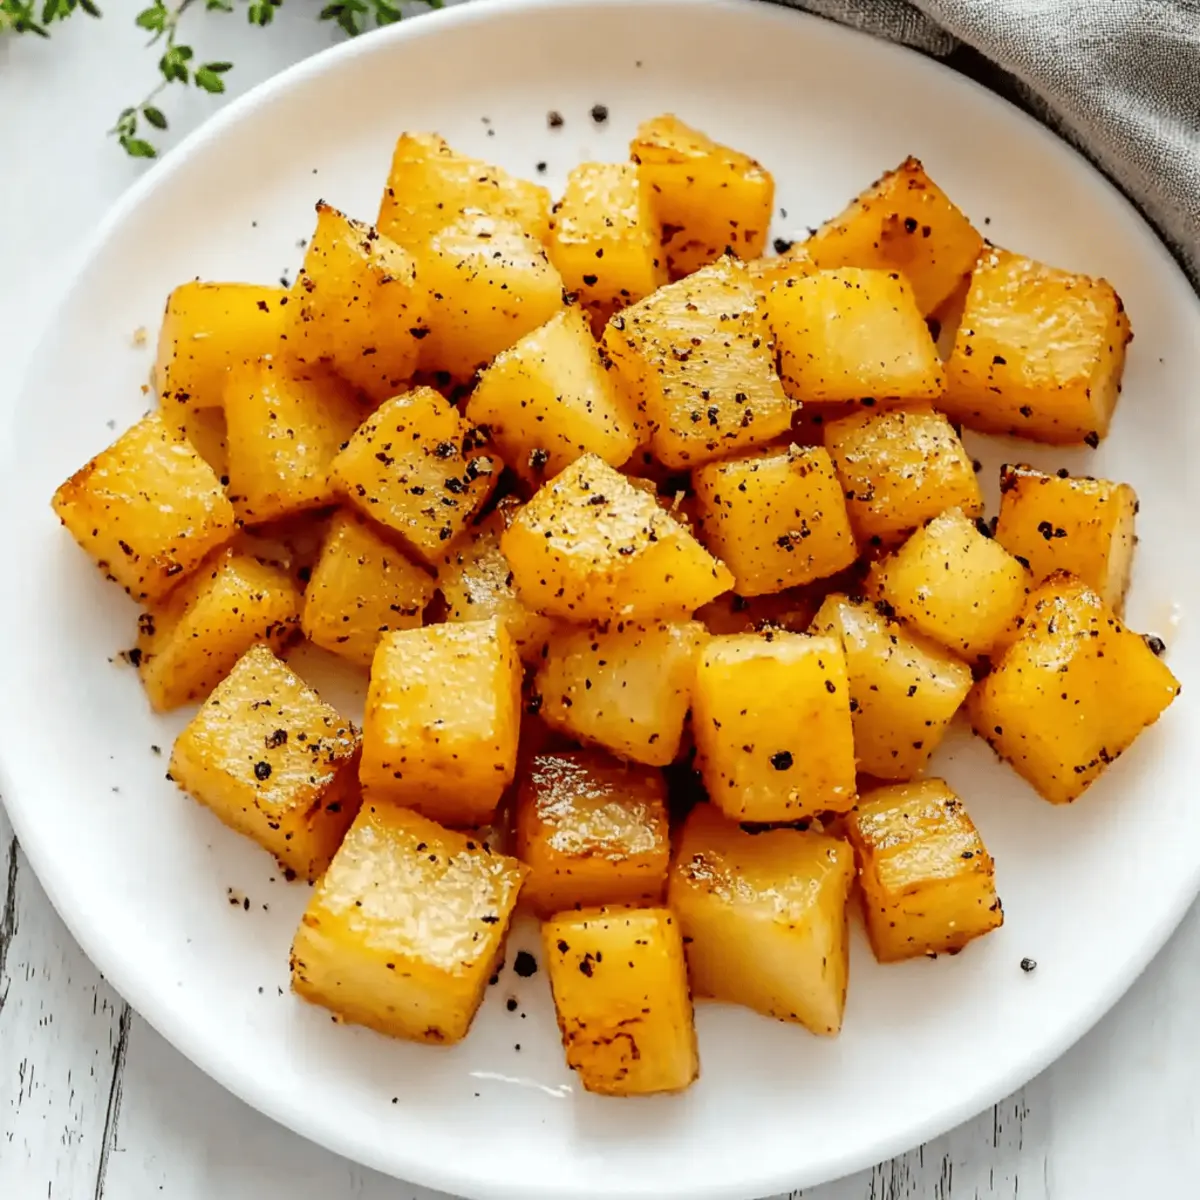
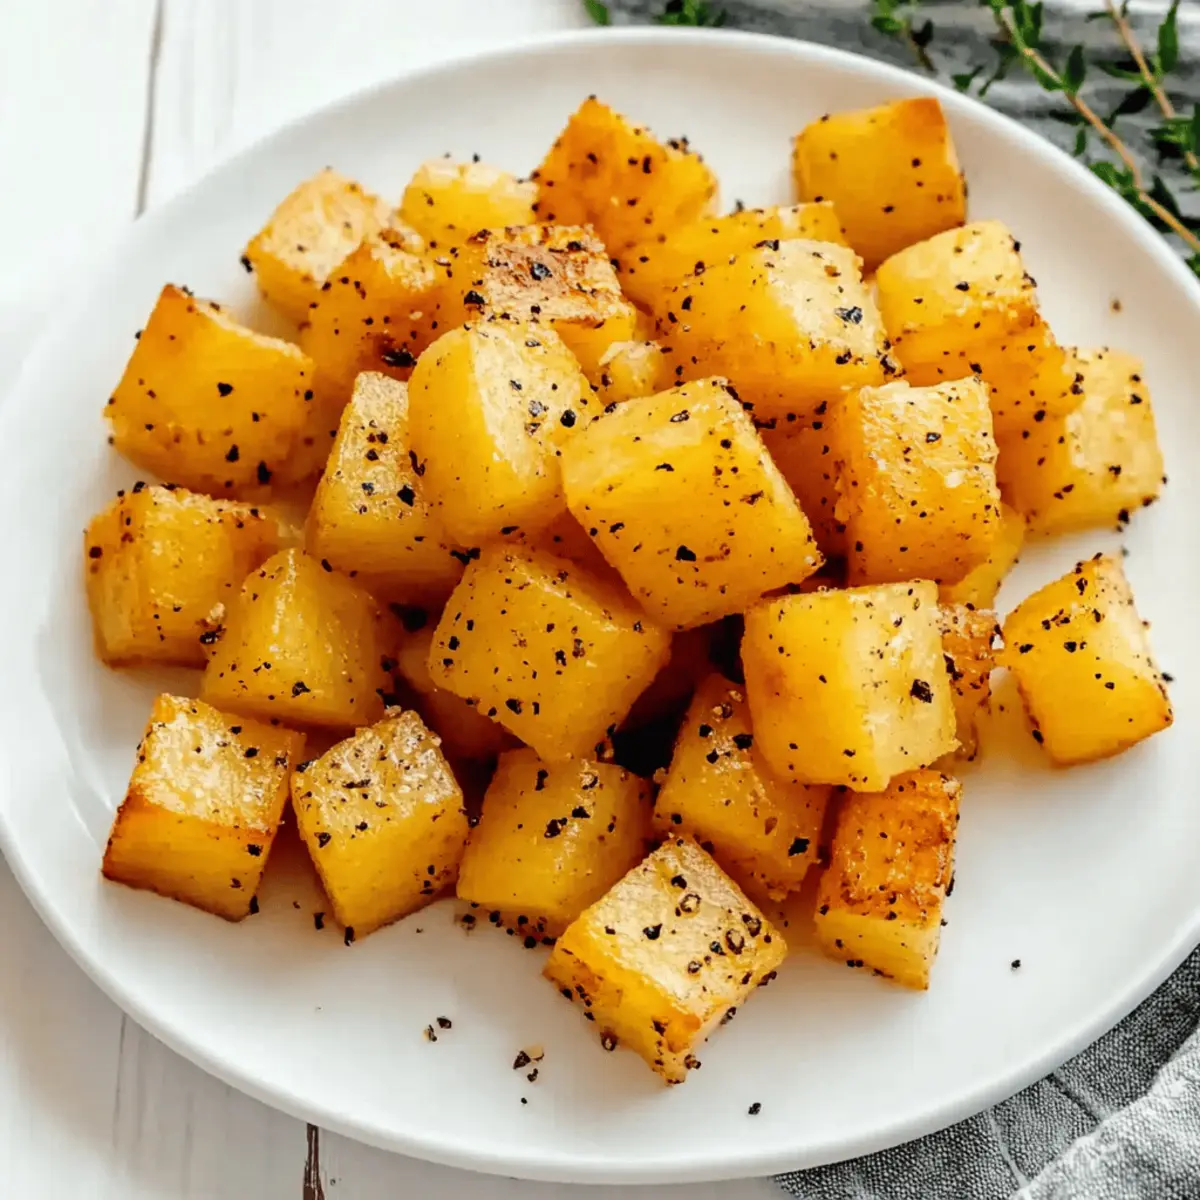
The first time I sliced into a rutabaga, I was struck by its brilliant purple and yellow hues, a root vegetable just waiting to shine. Now, preparing Crispy Baked Rutabaga has become one of my go-to side dishes, and for good reason: it’s not only simple to whip up but also a deliciously healthy alternative to traditional potatoes. With a golden crisp on the outside and a tender heart, this gluten-free, low-carb delight makes it perfect for those seeking wholesome choices without sacrificing flavor. I love serving it alongside everything from roasted chicken to hearty grain bowls, and trust me, your friends and family will be reaching for seconds. Are you ready to dive into this tasty twist on vegetable roasting? Let’s get started!
Why is Rutabaga Your New Favorite Vegetable?
Uniqueness: Crispy baked rutabaga offers a delicious alternative to classic sides, showcasing a unique flavor that stands out on any table.
Healthy Choice: This low-carb, gluten-free dish is perfect for those watching their carbs but still wanting comfort food.
Crowd-Pleaser: With its satisfying crunch, this dish is sure to impress family and friends, becoming a staple at gatherings.
Simplicity: Easy prep and roasting make it a great weeknight option, and it pairs beautifully with countless main dishes. Need more veggie inspiration? Check out my Crispy Air Fried Eggplant and Baked Gnocchi Mac for more exciting side options!
Crispy Baked Rutabaga Ingredients
• Discover the key components for this delicious side dish.
For the Rutabaga
- Rutabaga – This hearty vegetable is the star of the show, providing a mildly sweet flavor and unique texture; aim for firm pieces with no blemishes.
For the Seasoning
- Olive Oil – Essential for achieving that golden-brown crispness; feel free to swap with avocado oil for a different taste.
- Garlic Powder – This adds a savory kick to your dish; for a bolder flavor, use freshly minced garlic instead.
- Salt – A critical ingredient to enhance the overall taste; adjust according to your preference.
- Black Pepper – Adds just the right amount of warming spice to balance the sweetness of the rutabaga.
Incorporate these ingredients into your cooking to create the ultimate Crispy Baked Rutabaga that your family will love!
Step‑by‑Step Instructions for Crispy Baked Rutabaga
Step 1: Preheat Your Oven
Begin by preheating your oven to 400°F (204°C). While it warms up, prepare a baking sheet by lining it with parchment paper or lightly spraying it with cooking spray, ensuring an easy release for your roasted rutabaga later. This initial step is crucial for creating that beautiful golden-brown color and crispy texture.
Step 2: Prepare the Rutabaga
Peel the rutabaga using a vegetable peeler, then cut it into evenly sized cubes, roughly one inch each for consistent cooking. Place the cubed rutabaga into a large mixing bowl, and drizzle with olive oil. Sprinkle in garlic powder, salt, and black pepper, then toss everything together until the rutabaga pieces are fully coated in the flavorful seasoning.
Step 3: Arrange for Roasting
Spread the seasoned rutabaga cubes in a single layer on the prepared baking sheet. Leave space between them to prevent overcrowding, which could lead to steaming rather than roasting. This step is essential for achieving that crispiness you desire in your Crispy Baked Rutabaga.
Step 4: Roast to Perfection
Place the baking sheet in the preheated oven and roast the rutabaga for about 25 minutes. Halfway through, carefully flip the cubes using a spatula to ensure even browning on all sides. Keep an eye on them; they should be tender when pierced with a fork while still retaining their shape, displaying a lovely golden-brown hue.
Step 5: Serve and Enjoy
Once roasted to perfection, remove the baking sheet from the oven and let the rutabaga cool slightly. Transfer the crisp, golden rutabaga to a serving dish. This versatile and delicious side dish is perfect for pairing with roasted meats or as part of a vibrant vegetable medley.
How to Store and Freeze Crispy Baked Rutabaga
- Fridge: Store leftovers in an airtight container in the refrigerator for up to 3-4 days. This keeps your crispy baked rutabaga fresh and ready for quick meals.
- Freezer: For longer storage, freeze leftovers in a freezer-safe container, layering parchment paper between servings. They can be frozen for up to 2 months without losing too much texture.
- Reheating: When ready to enjoy, reheat in a preheated oven at 350°F (175°C) for 5-7 minutes until crispy again, or microwave for a faster option, though it may be less crispy.
- Prep Ahead: To save time, you can peel and cut rutabaga pieces up to two days in advance, storing them submerged in water in the fridge to prevent browning before baking.
What to Serve with Crispy Baked Rutabaga
Transform your delightful crispy baked rutabaga into a memorable feast with these creative pairings.
-
Roasted Chicken: Juicy, seasoned chicken complements the nutty sweetness of rutabaga, creating a comforting and satisfying meal.
-
Pork Tenderloin: Tender, herb-crusted pork elevates the dish with savory flavors, making it a perfect companion for your crispy vegetables.
-
Crispy Brussels Sprouts: Roasted to perfection, these greens add a crunchy contrast and earthiness that harmonizes beautifully with rutabaga.
-
Quinoa Salad: A fresh and nutritious salad loaded with veggies adds a light, fluffy texture, balancing the heartiness of baked rutabaga.
-
Garlic Parmesan Cauliflower: This rich, creamy side offers a satisfying indulgence, a delightful twist to elevate your vegetable game.
-
Lemon Herb Grilled Fish: The bright, zesty notes from the fish enhance the sweetness of the rutabaga, making for an energizing duo.
-
Chilled White Wine: A crisp Sauvignon Blanc refreshes the palate while echoing the dish’s natural flavors, perfect for a relaxed dinner.
-
Dark Chocolate Mousse: End your meal on a sweet note with this decadent dessert, pairing perfectly with the roasted root flavors, creating a memorable finale.
Make Ahead Options
These Crispy Baked Rutabaga are perfect for meal prep enthusiasts! You can peel and cube the rutabaga up to 2 days in advance, storing them in water in the refrigerator to prevent browning. Simply drain and pat dry before cooking. Additionally, you can mix the olive oil, garlic powder, salt, and pepper ahead of time, keeping it in an airtight container for up to 3 days. When you’re ready to serve, just coat the rutabaga pieces with the prepped seasoning, then roast them as directed. This way, you’ll have a delicious, healthy side dish ready in no time, making your busy weeknights more manageable!
Variations & Substitutions for Crispy Baked Rutabaga
Feel free to get creative and make this dish your own with these simple yet delightful twists!
- Turnip Swap: Substitute rutabaga with turnips for a slightly spicier flavor and similar texture. Both root vegetables offer unique culinary profiles.
- Sweet Potato Addition: Mix in sweet potato cubes for a colorful and naturally sweet medley. Their creamy texture contrasts beautifully with the crisp rutabaga.
- Herb Infusion: Add fresh herbs like rosemary or thyme for a fragrant twist. Some herbs roasted alongside the rutabaga can create an aromatic feast.
- Kick of Spice: Sprinkle in some cayenne pepper or chili powder for added heat. A little spice goes a long way in elevating the dish’s warmth and character.
- Savory Mix: Combine other root vegetables like carrots or parsnips in the mix for a vibrant veggie ensemble. Each adds its own distinct flavor while complementing the rutabaga.
- Parmesan Crunch: For a cheesy twist, sprinkle grated Parmesan cheese over the rutabaga before roasting. This will create a crispy, savory crust that will tantalize your taste buds.
- Smoky Flavor: Incorporate smoked paprika for a warm, smoky profile. This simple addition can transform your baked rutabaga into a gourmet delight, reminiscent of a cozy campfire meal.
With these variations, your Crispy Baked Rutabaga will never be boring! Looking for more comforting recipes? Try my Crispy Deep Fried Marshmallows for a sweet treat or revisit one of my favorites, Baked Gnocchi Mac, for ultimate comfort!
Expert Tips for Crispy Baked Rutabaga
- Even Pieces: Ensure all rutabaga cubes are similar in size for consistent cooking. Large chunks may remain hard, while small pieces can burn.
- Space It Out: Do not overcrowd the baking sheet, as this leads to steaming instead of the desired crispiness.
- Preheat Right: Proper oven temperature is key. If the oven isn’t hot enough, your rutabaga may turn out soggy rather than crispy.
- Season Generously: Don’t skimp on salt and pepper; these enhance the natural sweetness of the rutabaga beautifully. Adjust to taste for your perfect crispy baked rutabaga!
- Cool Before Serving: Let the roasted rutabaga cool slightly to maintain its texture and avoid steaming when served.

Crispy Baked Rutabaga Recipe FAQs
How do I choose the best rutabaga?
When selecting rutabagas, look for firm specimens that are heavy for their size with smooth skin. Ideally, you want rutabagas that are around 4-6 inches in diameter, avoiding those that appear wrinkled or have dark spots all over, as they can be woody and less flavorful.
What is the best way to store leftover crispy baked rutabaga?
Absolutely! Store your leftovers in an airtight container in the refrigerator for up to 3-4 days. This keeps them fresh and ready for a quick reheating. Remember to let them cool completely before sealing to avoid moisture buildup inside the container.
Can I freeze crispy baked rutabaga? If so, how?
Yes, you can freeze it! To do so, first allow the roasted rutabaga to cool completely. Then, layer the pieces in a freezer-safe container, using parchment paper between layers to prevent sticking. They can be frozen for about 2 months. When you’re ready to enjoy them, reheat from frozen at 350°F (175°C) for 10-15 minutes for the best texture.
What can I do if my rutabaga doesn’t crisp up in the oven?
If your crispy baked rutabaga isn’t turning out as crisp as you’d like, check if the pieces are crowded on the baking sheet. Overcrowding can prevent them from roasting properly. Make sure to spread them out in a single layer with some space in between. If they turn out soggy, also ensure your oven is adequately preheated to 400°F (204°C) before placing them in.
Are there any dietary considerations with crispy baked rutabaga?
Very much so! Rutabaga is naturally gluten-free and low in carbs, making it a great choice for those following gluten-free or low-carb diets. Just be mindful if you’re serving this dish to guests, as some people may be allergic to root vegetables. Always check if anyone has specific dietary restrictions beforehand.
Can I prepare the rutabaga ahead of time?
Certainly! To save time, you can peel and cut your rutabaga into cubes up to two days in advance. Store the cut pieces submerged in water in an airtight container in the fridge to prevent browning. When you’re ready to roast, just drain and proceed with the recipe as usual. This makes weeknight cooking a breeze!

Crispy Baked Rutabaga That Will Change Your Side Dish Game
Ingredients
Equipment
Method
- Preheat your oven to 400°F (204°C) and line a baking sheet with parchment paper.
- Peel the rutabaga, cut it into evenly sized cubes, and place them in a large mixing bowl with olive oil, garlic powder, salt, and black pepper.
- Spread the seasoned rutabaga cubes in a single layer on the prepared baking sheet, ensuring space between them.
- Roast the rutabaga for about 25 minutes, flipping halfway through for even browning until tender.
- Let the roasted rutabaga cool slightly and transfer to a serving dish.
Leave a Reply