
The scent of summer fills the air as I stand on my porch, a basket of freshly picked corn beside me. There’s something incredibly satisfying about preparing Boiled Corn on the Cob—a dish that perfectly captures the season’s sweetness. This recipe enhances simple corn with a buttery milk bath, aromatic garlic, and fresh herbs, transforming it into a tender, juicy side that’s quick to whip up in just 20 minutes. Imagine serving this delightful, gluten-free treat at your next cookout or family dinner, where it’s sure to steal the spotlight. Not only is it a crowd-pleaser, but it also offers a healthy alternative to heavier side dishes. Ready to elevate your summer meals with this delicious corn on the cob? Let’s dive into the recipe!
Why is Boiled Corn on the Cob Irresistible?
Sweetness Exploded: Each bite of corn is naturally sweet, enhanced by a buttery milk bath that elevates the flavor to new heights.
Quick Preparation: With only 20 minutes needed, you can enjoy this delicious side without spending too much time in the kitchen.
Gourmet Touch: The infusion of garlic and fresh herbs adds a surprising depth, transforming a humble vegetable into a gourmet dish!
Versatile Serving Options: Serve it alongside grilled meats or toss it in salads for an unexpected twist—it’s perfect for any occasion. For more side dish inspiration, try my Grilled Corn Salad or pair it with Honey Butter Cornbread for a delightful feast!
Low-Calorie Delight: At just 43 calories per serving, it’s a guilt-free addition to your summer meals, proving you can enjoy delicious food without the heaviness.
Family Favorite: This recipe is a guaranteed hit, appealing to both kids and adults alike, making it a staple at every family gathering!
Boiled Corn on the Cob Ingredients
For the Corn
• Sweet Corn – Fresh corn on the cob provides natural sweetness and delightful texture; look for plump, fresh ears.
• Water – Acts as the base for boiling, ensuring the corn cooks evenly.
For the Cooking Liquid
• Garlic – Infuses flavor into the cooking liquid, enhancing the overall taste and elevating your boiled corn on the cob experience.
• Unsalted Butter – Adds creaminess and richness; feel free to substitute with vegan butter for a dairy-free version.
• Fresh Thyme – Offers a fragrant herbal note that complements the corn beautifully.
• Whole Milk – Enhances the sweetness and tenderness of the corn; non-dairy milk can be used, but results may vary.
• Kosher Salt – Balances flavors wonderfully; sea salt or table salt can be used as alternatives.
• Granulated Sugar – Enhances natural sweetness; feel free to skip this for a savory version.
For Serving
• Softened Butter – Adds additional flavor and moisture to the cooked corn, making it irresistible.
• Freshly Grated Parmesan – Introduces a cheesy flavor and texture; omit for a dairy-free option.
• Chopped Herbs – Optional garnish for added freshness and color, making your dish visually stunning.
Step‑by‑Step Instructions for Tender and Juicy Butter Milk Boiled Corn on the Cob
Step 1: Prepare the Corn
Start by shucking the sweet corn, removing all the husks and silks until only the fresh, golden kernels remain. Rinse the corn under cool water to wash away any remaining debris. For easier serving, cut each ear of corn in half with a sharp knife, creating manageable pieces that are perfect for enjoying the summer flavors in your boiled corn on the cob.
Step 2: Create the Cooking Liquid
In a large pot, combine about 4-6 cups of water, 2-3 cloves of minced garlic, 2 tablespoons of unsalted butter, several sprigs of fresh thyme, 1-2 teaspoons of kosher salt, and 1 tablespoon of granulated sugar. Place the pot over medium heat, bringing the mixture to a gentle simmer. Let it simmer for about 5 minutes, allowing the flavors to meld beautifully before adding the milk.
Step 3: Add Milk and Corn
Once you’ve enjoyed that fragrant simmer, stir in 1 cup of whole milk into the pot. Carefully add the prepared corn on the cob pieces, ensuring they are submerged in the creamy, aromatic liquid. Increase the heat slightly to return the mixture to a gentle simmer. Watch as the corn brightens, indicating it’s on its way to tenderness—this should take about 8-10 minutes.
Step 4: Cook the Corn
Cook the corn for another 8-10 minutes, rotating the ears every few minutes with tongs. This ensures even cooking and helps to achieve the desired tenderness without becoming mushy. You’ll know the corn is ready when it turns a vibrant yellow and has a fresh, sweet aroma.
Step 5: Serve the Corn
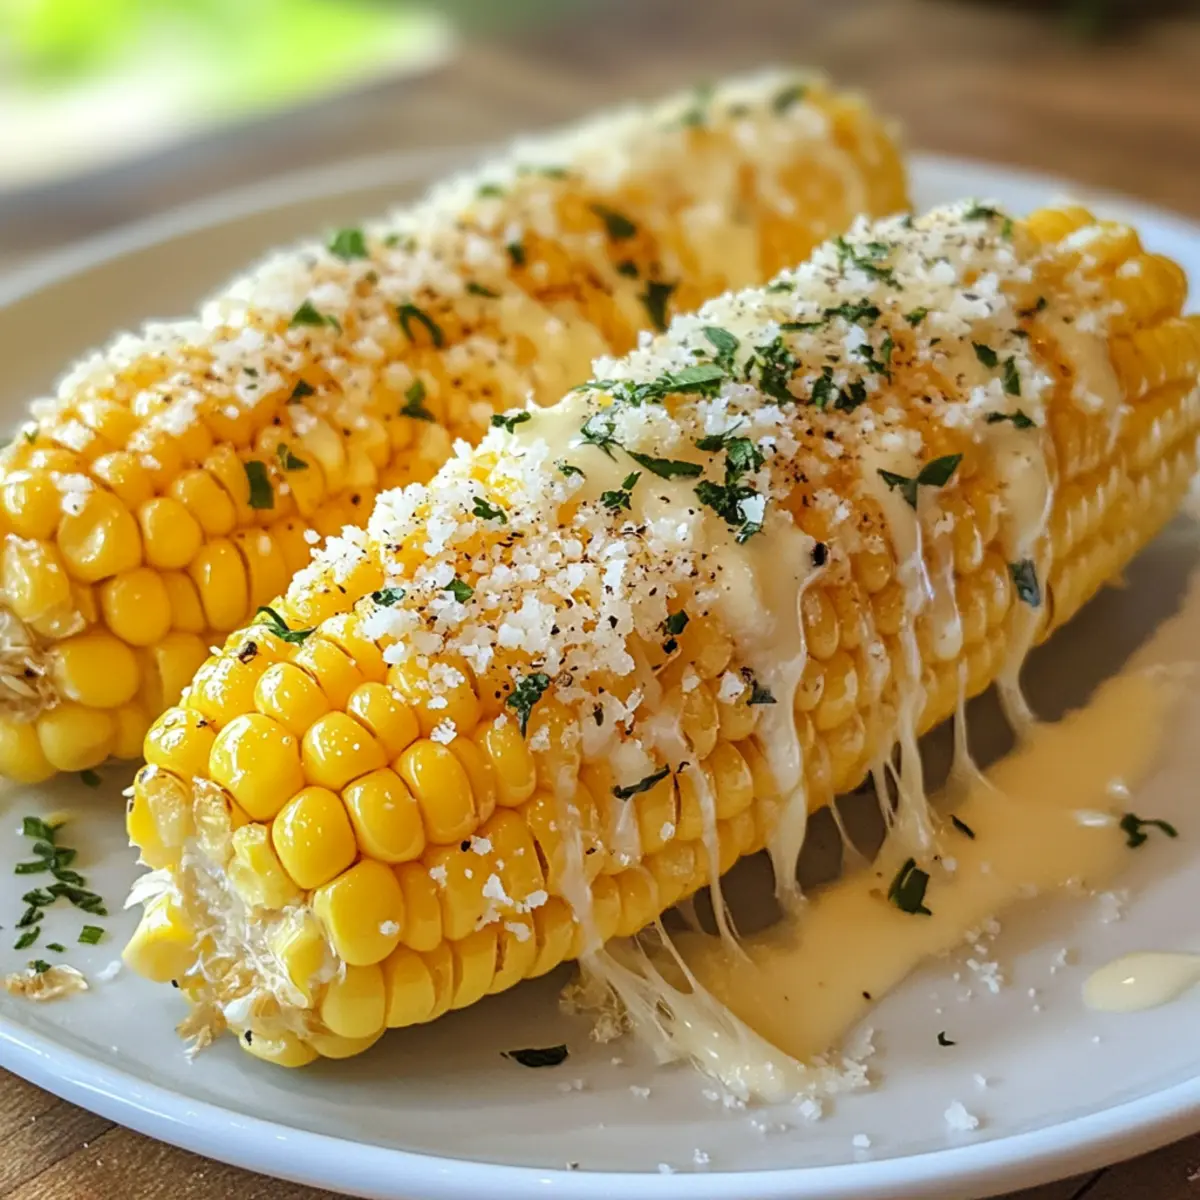
Once the corn on the cob is cooked to perfection, use tongs to carefully remove it from the pot, allowing any excess liquid to drain back into the pot. Arrange the warm corn pieces on a serving plate. For a delectable finish, spread softened butter across the hot corn and sprinkle with freshly grated Parmesan. Add chopped herbs and additional salt and pepper to taste, highlighting the irresistible flavors of your boiled corn on the cob.
What to Serve with Tender and Juicy Butter Milk Boiled Corn on the Cob
Indulging in a plate of sweet, buttery corn on the cob opens up a world of delicious pairings that complete your summer meal.
- Grilled Chicken Breasts: Juicy, marinated chicken enhances your meal’s savory depth while the grilled flavors perfectly complement the sweetness of the corn.
- Classic Coleslaw: A crunchy, tangy coleslaw adds freshness to your plate, with crisp cabbage balancing the richness of the corn and butter.
- Spicy Shrimp Tacos: The heat from the shrimp tacos livens up the meal, creating a vibrant juxtaposition to the buttery, tender corn.
- Tomato Salad: A refreshing tomato salad with basil makes a light and zesty side, highlighting summer flavors alongside the rich sweetness of the corn.
- Baked Beans: A hearty serving of sweet and smoky baked beans creates a comforting mood, making for an irresistible summer barbecue ensemble.
- Homemade Cornbread: The warm, fluffy texture of cornbread pairs beautifully, echoing the corn flavor while adding a delightful, buttery finish.
- Lemonade or Iced Tea: Cool, refreshing drinks like lemonade or iced tea cleanse the palate and enhance the overall dining experience, keeping it light and crisp.
- Peach Cobbler: Finish off with a warm peach cobbler topped with vanilla ice cream for an unforgettable, sweet end to your delightful meal.
Make Ahead Options
Preparing Boiled Corn on the Cob in advance is a fantastic way to save time on busy summer days. You can shuck and clean the corn, then store the ears in an airtight container in the refrigerator for up to 24 hours. Additionally, you can prepare the cooking liquid (water, garlic, butter, thyme, salt, and sugar) and keep it sealed in the fridge for the same timeframe—this prevents any loss of flavor. When you’re ready to serve, simply bring the cooking liquid to a simmer, add the corn, and cook it for about 8-10 minutes. This way, your corn will be just as delicious, and you’ll enjoy the convenience of a quick side dish without the last-minute rush!
Storage Tips for Boiled Corn on the Cob
-
Fridge: Store leftover boiled corn in an airtight container for up to 5 days. Make sure to let it cool completely before sealing to maintain freshness.
-
Freezer: If you want to keep boiled corn longer, place it in a freezer-safe bag, removing as much air as possible. It can be frozen for up to 3 months.
-
Reheating: To enjoy your delicious boiled corn on the cob, reheat in the microwave for 1-2 minutes or wrap in foil with a bit of butter and bake at 375°F for 5-7 minutes.
-
Serving Reminder: Try serving reheated corn with additional butter and your favorite herbs for a fresh taste, reminding you of that original flavor-packed delight.
Expert Tips for Boiled Corn on the Cob
-
Fresh Corn Choice: Always opt for the freshest sweet corn with plump kernels; this ensures maximum sweetness and tenderness in your boiled corn on the cob.
-
Avoid Overcooking: Keep an eye on the cooking time; overcooking can lead to mushy kernels. Aim for a bright yellow color to indicate doneness.
-
Flavor Boosting: For an extra flavor kick, consider adding a pinch of smoked paprika or a dash of chili powder to the cooking liquid.
-
Herb Substitutions: Feel free to swap thyme with other herbs like basil or rosemary based on your preference; this can offer a delightful twist to your boiled corn on the cob.
-
Serving Warm: Serve your corn immediately after cooking for the best texture and flavor. Corn that sits too long can lose its juiciness.
Boiled Corn on the Cob Variations
Feel free to give your boiled corn on the cob a personal twist with these delicious variations!
-
Herb Swap: Replace thyme with basil or rosemary to explore new flavor dimensions. Both herbs make for a fragrant alternative that’s equally inviting.
-
Spicy Kick: Add chili powder or smoked paprika to the cooking liquid for an extra burst of heat. This can turn your sweet, buttery corn into a spicy treat that’s sure to impress those who enjoy a little extra zest.
-
Cheese Alternatives: Try using feta or cotija cheese instead of parmesan for a richer flavor profile. These cheeses can introduce a delightful tanginess that elevates your corn experience to a whole new level.
-
Citrus Zing: Squeeze fresh lime or lemon juice over the cooked corn for a refreshing twist. The citrusy brightness can really enhance the sweetness of the corn.
-
Vegan Delight: Swap the milk and butter for non-dairy options like almond milk and vegan butter to enjoy a tasty dairy-free version. You won’t compromise on flavor while catering to dietary needs!
-
Creamy Variation: Mix in some cream cheese to the cooking liquid for an ultra-creamy, decadent result. This twist makes every bite feel indulgent and lush.
-
Sweet & Savory: Add a tablespoon of honey or maple syrup to the cooking liquid for a sweet-savory combination. The sweetness works beautifully with the corn, making it a real standout at any meal.
With these variations, your boiled corn can shine in many different ways! And if you’re looking for more delicious side dishes, consider complementing it with my Grilled Corn Salad or serve it alongside some Honey Butter Cornbread for a guaranteed crowd-pleaser!
Boiled Corn on the Cob Recipe FAQs
What should I look for when selecting fresh corn?
Absolutely! When choosing sweet corn, look for ears with plump, fresh kernels and moist, green husks. The silk should be brown and slightly sticky, indicating ripeness. Avoid ears with dark spots all over or dried-out silk as these indicate less-than-ideal freshness.
How do I store leftover boiled corn on the cob?
Very! Store leftover boiled corn in an airtight container in the refrigerator for up to 5 days. Make sure to let it cool completely before sealing to maintain its freshness and flavor. If you have more than you can eat, don’t worry; it’s easy to freeze!
Can I freeze boiled corn on the cob?
Absolutely! To freeze your boiled corn, start by allowing it to cool completely. Place the corn in a freezer-safe bag, removing as much air as possible to prevent freezer burn. You can freeze it for up to 3 months. When you’re ready to enjoy, simply reheat and savor that summer flavor!
What if my corn turns out mushy after boiling?
Don’t worry! If your corn turns mushy, it may have been overcooked. To prevent this in the future, keep an eye on the cooking time—8-10 minutes is key for tender, juicy kernels. Rotate the corn frequently while cooking to ensure even results and a vibrant yellow color.
Is this boiled corn safe for pets or people with allergies?
Yes, but with some considerations! Boiled corn on the cob is generally safe for dogs, but it’s best to remove the kernels and avoid giving them the cob due to choking hazards. For people with allergies, be mindful of the butter and cheese—use dairy-free alternatives to accommodate those with lactose intolerance or dairy allergies.
Can I use different herbs or spices in this recipe?
Very much so! Feel free to switch out the fresh thyme for other herbs such as basil or rosemary for a different flavor profile. You can also spice things up by adding chili powder or smoked paprika to the boiling liquid for a kick! The more the merrier when experimenting with flavors!

Irresistibly Juicy Boiled Corn on the Cob You’ll Love
Ingredients
Equipment
Method
- Start by shucking the sweet corn, removing all husks and silks. Rinse the corn under cool water.
- In a large pot, combine water, minced garlic, unsalted butter, fresh thyme, kosher salt, and granulated sugar. Bring to a gentle simmer.
- Stir in the whole milk. Carefully add the corn pieces and ensure they are submerged.
- Cook the corn for 8-10 minutes, rotating every few minutes for even cooking.
- Once cooked, use tongs to remove the corn and allow excess liquid to drain. Serve with butter, Parmesan, and herbs.
Leave a Reply