
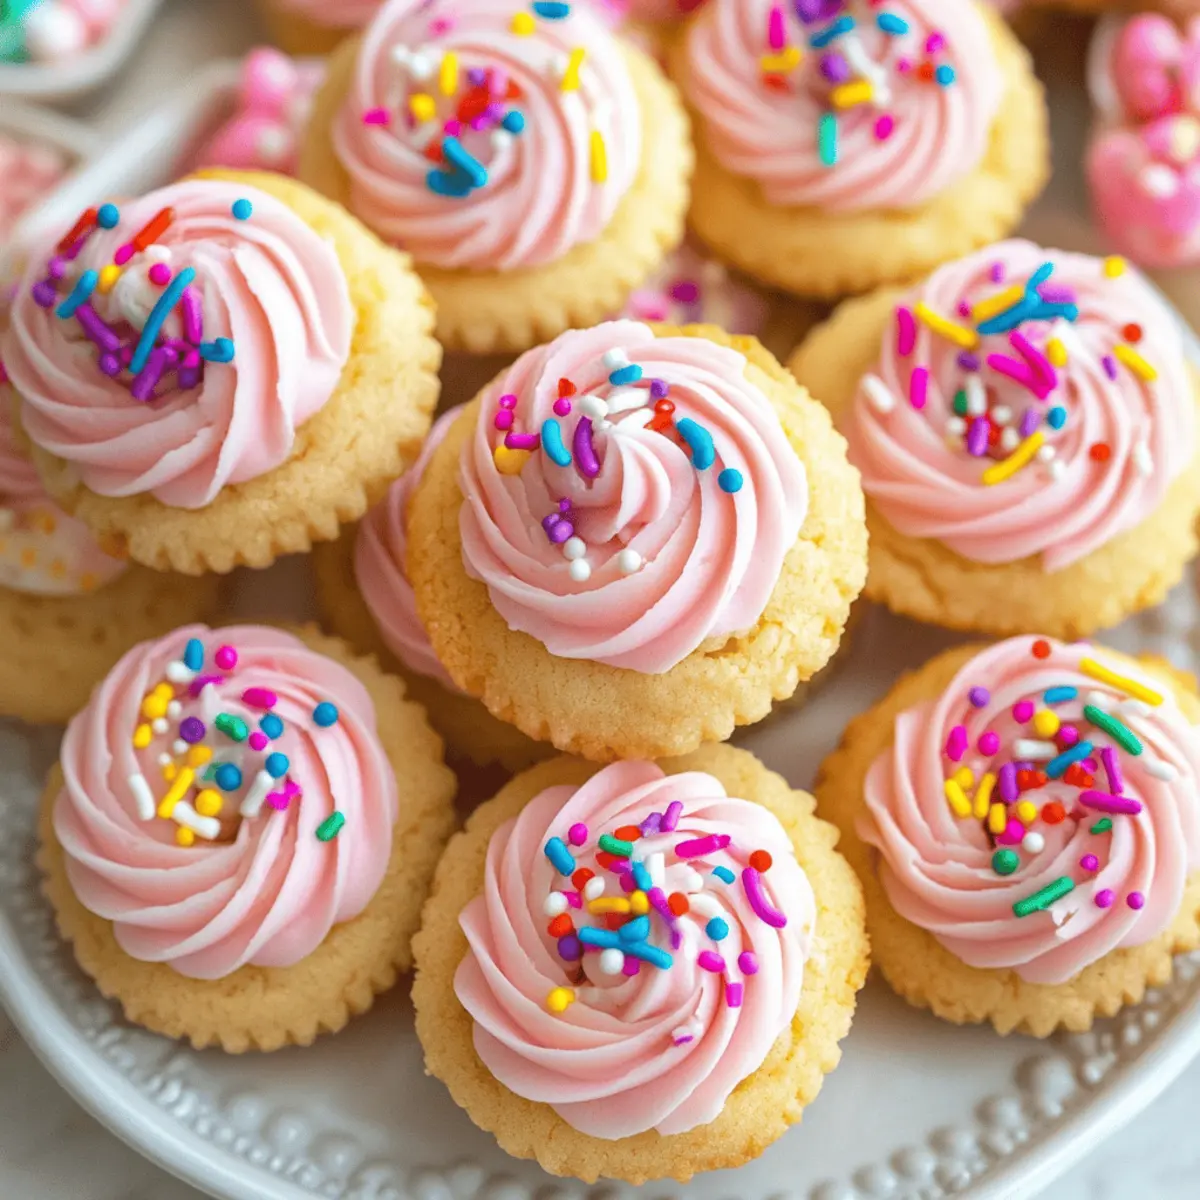
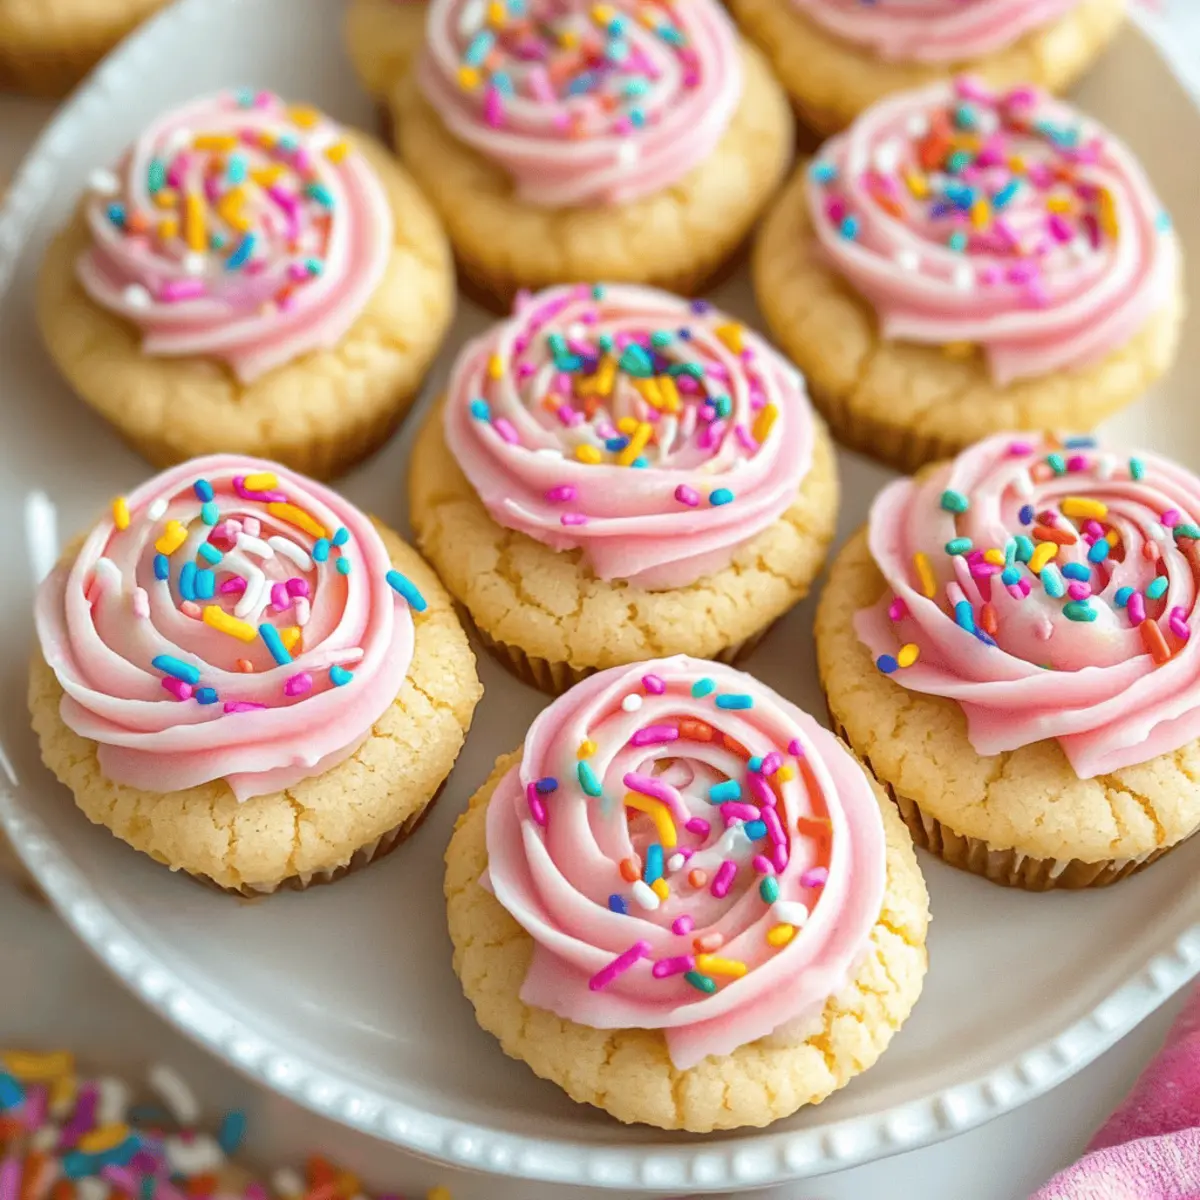
As I was reminiscing about holiday baking with my family, a sweet memory came rushing back: the joy of creating delightful Sugar Cookie Cups, each one a tiny masterpiece bursting with flavor. These whimsical little treats are not only soft and chewy but also a versatile canvas for your creativity—perfect for any festive occasion. The best part? You can whip them up in no time and customize the cream cheese buttercream frosting to fit any celebration, be it Christmas, Valentine’s Day, or just a cozy gathering with friends. Each bite is a whimsical escape into nostalgia, making them a real crowd-pleaser. Ready to learn how to make these adorable cookies that taste as good as they look? Let’s dive in together!

Why Try Sugar Cookie Cups?
Versatile Treat: Sugar Cookie Cups can be customized for any occasion with different frosting colors and themed sprinkles!
Delightful Texture: Experience the perfect combination of soft, chewy cookie bases paired with luscious cream cheese buttercream. Every bite is pure bliss!
Quick & Easy: These cookies come together in no time, making them an ideal choice for those busy holiday seasons or impromptu gatherings.
Crowd Favorite: With their charming presentation and delicious flavors, these cookie cups are sure to impress friends and family alike.
Perfect for Gifting: Package them up as sweet gifts for neighbors or party hosts; who wouldn’t love a box of these adorable treats?
Looking for more creative cookie ideas? Try my Apple Cider Cookies for a fall flavor or whip up some Homemade Thin Cookies for a nostalgic treat!
Sugar Cookie Cups Ingredients
• To create your delightful Sugar Cookie Cups, gather these key ingredients for a perfect bake!
For the Cookie Base
- All-purpose flour – Adds structure to the cookie cups. For gluten-free version, substitute with gluten-free flour.
- Baking soda & baking powder – Leavening agents that help the cookie cups rise.
- Butter (salted) – Provides richness and flavor. Can use unsalted butter, adding 1/4 teaspoon salt.
- Granulated sugar – Sweetens the cookies and contributes to a chewy texture.
- Vanilla extract – Enhances flavor profile. Vanilla bean extract can be used for a more intense flavor.
- Almond extract – Adds distinctive “sugar cookie” essence.
- Egg – Binds ingredients together; use large egg at room temperature for best results.
For the Cream Cheese Frosting
- Cream cheese – Base for the frosting, providing a tangy sweetness.
- Powdered sugar – Sweetens frosting and provides the right texture.
- Milk – Adjusts frosting consistency; allows for desired thickness.
- Sprinkles – Optional for decoration, can match specific themes or holidays.
Get excited to create these adorable Sugar Cookie Cups that will be the highlight of any gathering!
Step‑by‑Step Instructions for Sugar Cookie Cups
Step 1: Prepare the Muffin Pan
Begin by preheating your oven to 350°F (175°C). Next, take a nonstick cooking spray and generously grease each cavity of a muffin pan. This ensures that your delightful Sugar Cookie Cups will release easily once baked. Set the prepared pan aside as you mix the cookie dough.
Step 2: Mix Wet Ingredients
In a large mixing bowl, cream together 1 cup of softened butter and 1 cup of granulated sugar until the mixture becomes light and fluffy, about 3-5 minutes. Once well combined, add in one large egg along with 1 teaspoon of vanilla extract and 1/2 teaspoon of almond extract. Beat until the mixture is smooth and well incorporated, inviting sweet scents into your kitchen.
Step 3: Combine Dry Ingredients
In a separate bowl, whisk together 2 ½ cups of all-purpose flour, 1 teaspoon of baking soda, and 1 teaspoon of baking powder. This mixture is crucial as it provides the leavening needed for your Sugar Cookie Cups to rise perfectly. Gradually stir the dry mix into the wet ingredients until just combined to form a soft dough, being careful not to over-mix.
Step 4: Make the Dough
Take 2 tablespoons of your cookie dough and press it firmly into the bottom and halfway up the sides of each muffin pan cavity. You want your cookie cups to maintain a nice, cup-like shape after baking, so be sure to press evenly. Continue until all the cavities are filled, creating a charming base for your frosting.
Step 5: Bake
Place the filled muffin pan in your preheated oven and bake for about 12 minutes, or until the edges turn a light golden color. To ensure they hold their shape, allow them to cool in the pan for about 15 minutes. During this cooling time, gently press the center of each cookie to create a cup shape while they cool completely on a wire rack.
Step 6: Prepare the Frosting
In a clean mixing bowl, beat together 8 ounces of softened cream cheese and 1/2 cup of softened butter until smooth and creamy. Gradually add in 3-4 cups of powdered sugar, mixing until the frosting reaches your desired thickness. Add a splash of milk to achieve the perfect creamy consistency for piping, which will bring your Sugar Cookie Cups to life.
Step 7: Decorate
Once your Sugar Cookie Cups have completely cooled, it’s time to pipe in the luscious cream cheese frosting. Fill each cup generously with frosting, allowing it to swirl and peak for an eye-catching finish. If you desire, sprinkle some colorful decorations on top to make your treats even more festive and fun, perfect for any celebration!

What to Serve with Sugar Cookie Cups?
Indulging in these delightful treats opens the door to a world of delicious pairings that enhance their sweetness and charm.
-
Festive Fruit Salad: A colorful mix of seasonal fruits offers a refreshing contrast to the richness of the cookie cups. The vibrant colors are visually appealing and add a healthy touch to your dessert table.
-
Vanilla Ice Cream: The creaminess of vanilla ice cream beautifully complements the soft, chewy texture of the cookies. A scoop on the side makes every bite a delightful treat!
-
Hot Cocoa: Serve with a warm mug of hot cocoa for a cozy pairing. The rich chocolate flavor combined with the sweetness of the cookie cups creates a comforting experience perfect for chilly evenings.
-
Coffee or Tea: A warm beverage like coffee or herbal tea can balance the sweetness and enhance the flavors of the frosting. The different aromas create a delightful atmosphere for dessert.
-
Whipped Cream: Drizzling fresh whipped cream over the cookie cups adds lightness and a creamy texture that pairs wonderfully with the frosting. Feel free to add seasonal flavors like peppermint or pumpkin spice!
-
Chocolate Ganache: For a luxurious twist, drizzle some rich chocolate ganache over the cookie cups. The combination of chocolate and cream cheese frosting elevates the overall indulgence.
-
Mini Marshmallows: Sprinkling mini marshmallows on top of the frosting turns these treats into a whimsical delight. Kids and adults alike will love the added touch of fun!
-
Sparkling Lemonade: A light and bubbly lemonade can provide a perfect citrus contrast to the sugary sweetness, making it an inviting drink option that refreshes the palate.
With these delightful options, your Sugar Cookie Cups can shine in a magnificent culinary experience!
Make Ahead Options
These delightful Sugar Cookie Cups are perfect for meal prep! You can prepare the cookie cups up to 24 hours in advance: simply bake them as directed and allow them to cool completely before storing them in an airtight container at room temperature. The cream cheese buttercream frosting can be made up to 3 days ahead; store it in the fridge to maintain its freshness. When you’re ready to serve, simply pipe the frosting into the cooled cookie cups, add your favorite sprinkles, and enjoy! This way, you save precious time while still delivering a deliciously festive treat that’s just as delightful as if it were freshly made.
Sugar Cookie Cups Variations
Feel free to get creative with these delightful Sugar Cookie Cups, tailoring them to your tastes and occasions!
-
Frosting Swaps: Experiment with chocolate ganache or flavored frostings like strawberry cream for a fun twist. The versatility of frosting can elevate each bite, making it truly special.
-
Flavor Additions: Stir in mini chocolate chips or crushed candies into the dough for a sweet surprise in every cup. It’s a lovely way to add texture and keep things interesting!
-
Nutty Delight: Incorporate finely chopped nuts like pecans or walnuts for a crunchy texture that pairs beautifully with the soft cookie base. Each mouthful will offer a delightful contrast.
-
Themed Cups: Try adding seasonal spices like cinnamon or pumpkin spice to the dough—perfect for fall gatherings! You can even make them into a celebration of flavors fitting each holiday.
-
Mini Cookie Cups: Use a mini muffin pan for bite-sized treats, ensuring to adjust the baking time. These little cups are perfect for parties or as sweet additions to a dessert platter.
-
Gluten-Free Option: Substitute all-purpose flour with a gluten-free blend to create a delicious treat for everyone to enjoy. Don’t forget to check that your baking powder is gluten-free!
-
Colorful Swirls: For a fun visual effect, swirl different colors of frosting together before piping it into your cookie cups. It’s an eye-catching treat that’s sure to delight!
Looking for more inspiration? Don’t forget to check out my Milk Chocolate Cookies or get cozy with some delightful Green Tea Cookies.
Storage Tips for Sugar Cookie Cups
-
Room Temperature: Keep the Sugar Cookie Cups in an airtight container at room temperature for up to 3 days to maintain freshness; avoid direct sunlight.
-
Fridge: If not consuming immediately, store the cookie cups in the fridge for up to 1 week. Allow them to come to room temperature before serving for the best flavor.
-
Freezer: Freeze unbaked dough in individual balls; wrap tightly in plastic wrap and store in a freezer bag for up to 3 months. Bake them straight from the freezer when you’re ready to enjoy!
-
Reheating: If you prefer warm cookie cups, gently reheat them in the microwave for 15-20 seconds before frosting, ensuring they stay soft and chewy.
Expert Tips for Sugar Cookie Cups
-
Room Temperature Ingredients: Ensure your butter and egg are at room temperature for the smoothest dough and optimal results.
-
Don’t Over-Mix: Be careful not to over-mix your dough when combining wet and dry ingredients; this keeps your Sugar Cookie Cups tender.
-
Check for Doneness: Bake until the edges are lightly golden; if you bake too long, the cookie cups can become hard instead of soft and chewy.
-
Cooling Method: Allow the cookie cups to cool completely in the pan to maintain their shape; pressing during cooling creates that perfect cup form.
-
Frosting Consistency: Adjust the milk you add to your frosting to achieve your desired thickness; too runny can lead to puddles instead of peaks.
-
Creative Decorating: Use themed sprinkles or colored frosting to customize your Sugar Cookie Cups for any occasion, adding a festive touch!
Sugar Cookie Cups Recipe FAQs
How can I tell if my ingredients are ripe or fresh enough for this recipe?
Absolutely! For the best results, make sure your butter is softened but still cool to the touch and not greasy. This is key for that light and fluffy texture. Your egg should be at room temperature, which improves the mixing process. As for flour, check for any dark spots or moisture. It should be dry and free from clumps.
What is the best way to store leftover Sugar Cookie Cups?
I recommend storing your Sugar Cookie Cups in an airtight container at room temperature for up to 3 days. If you want to keep them longer, you can refrigerate them where they will stay fresh for about a week. Just be sure to allow them to come to room temperature before serving to enhance their flavor and texture.
Can I freeze Sugar Cookie Cups, and if so, how?
Yes, you can! To freeze the unbaked dough, scoop your cookie dough into individual balls and wrap them tightly in plastic wrap. Then, place them in a freezer bag, squeezing out as much air as possible. They can be stored for up to 3 months. When you’re ready to bake, you can bake them straight from the freezer, just adding a couple of extra minutes to the baking time.
What should I do if my cookie cups are hard after baking?
Very often, this happens from over-baking or using too much flour. To prevent hard cookie cups, watch them closely as they bake and remove them as soon as the edges are lightly golden. If they do turn out hard, consider serving them warm and topped with frosting, as the creaminess can help balance the texture. For a future attempt, try measuring flour with a light hand to avoid excess.
Are there any dietary considerations I should be aware of?
Definitely! If you’re making these for a crowd, keep in mind that the recipe contains gluten and dairy. For a gluten-free version, substitute the all-purpose flour with a gluten-free blend. Additionally, make sure to check that your cream cheese is free from any allergens if serving to those with dairy allergies. You can also consider using a non-dairy alternative for the frosting if needed.
Irresistible Sugar Cookie Cups with Creamy Frosting Delight
Ingredients
Equipment
Method
- Preheat your oven to 350°F (175°C) and grease each cavity of a muffin pan with nonstick cooking spray.
- Cream together 1 cup of softened butter and 1 cup of granulated sugar until light and fluffy, about 3-5 minutes. Add in one large egg, 1 teaspoon of vanilla extract, and 1/2 teaspoon of almond extract. Beat until smooth.
- In a separate bowl, whisk together 2 ½ cups of all-purpose flour, 1 teaspoon of baking soda, and 1 teaspoon of baking powder. Stir the dry mix into the wet ingredients until just combined to form a soft dough.
- Press 2 tablespoons of cookie dough into the bottom and halfway up the sides of each muffin pan cavity.
- Bake for about 12 minutes, or until the edges turn a light golden color. Allow to cool in the pan for about 15 minutes, gently pressing the center to create a cup shape.
- Beat together 8 ounces of softened cream cheese and 1/2 cup of softened butter until smooth. Gradually add 3-4 cups of powdered sugar, mixing until desired thickness. Add milk for creaminess.
- Pipe frosting into the cooled cookie cups and decorate with sprinkles as desired.
Leave a Reply