
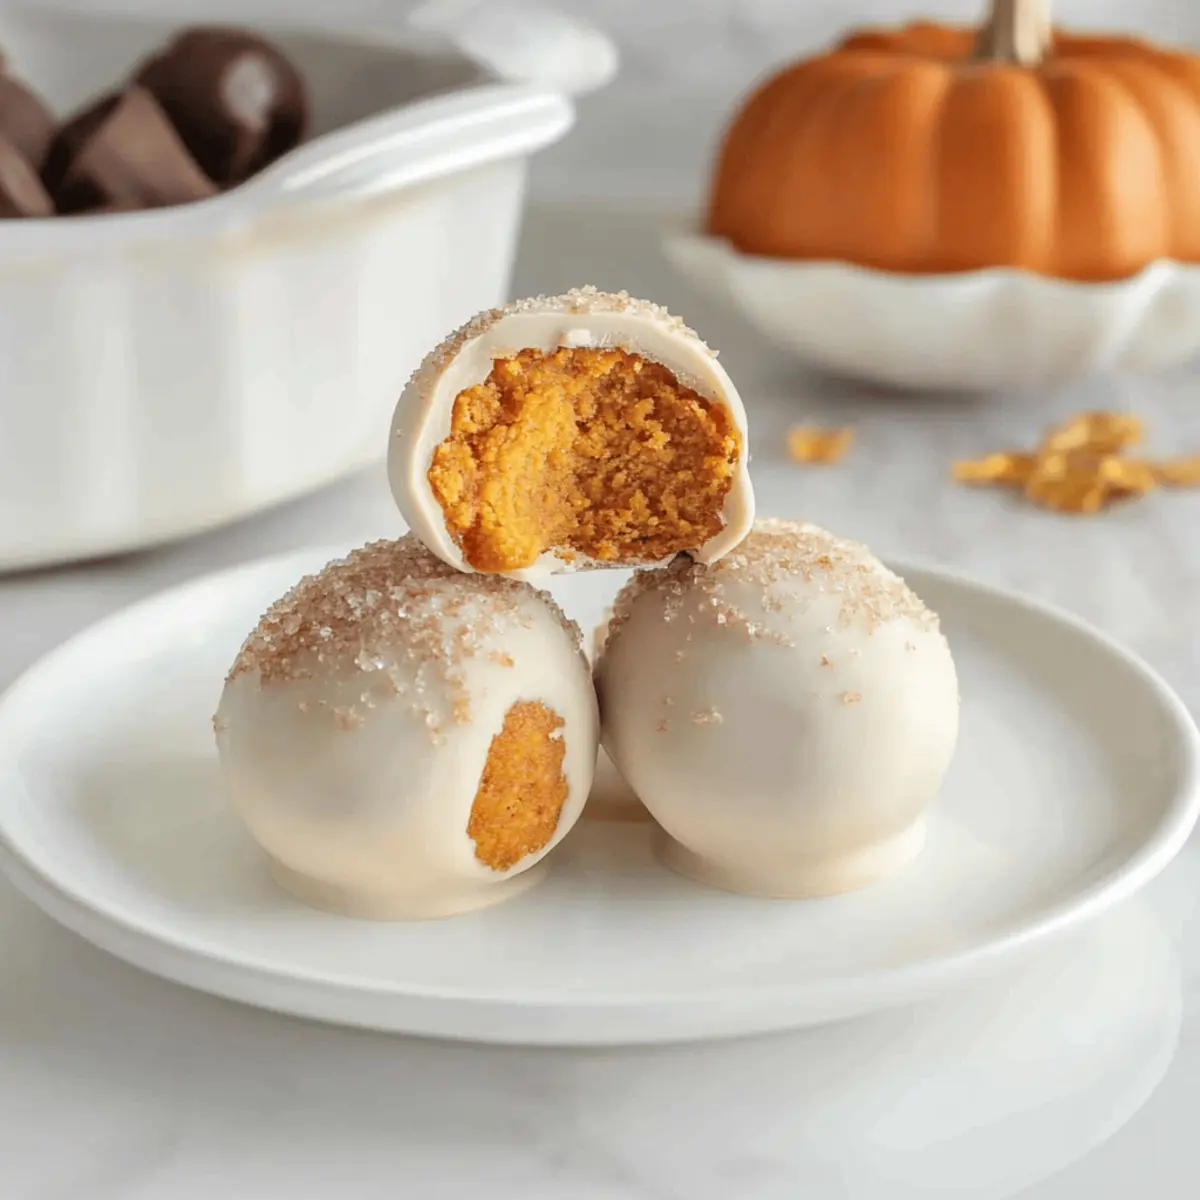
As I rummaged through the refrigerator the other day, a small container caught my eye—leftover pumpkin pie just waiting to be transformed. I couldn’t help but think about how often we let our favorite holiday treats go to waste. Enter the No-Bake Pumpkin Pie Balls! These little bite-sized delights turn yesterday’s dessert into a fun, no-bake treat that captures the cozy essence of fall. Not only are they a perfect way to use what you have, but they also come together quickly, making them an easy crowd-pleaser for your next gathering. Just picture these creamy monsters, lovingly coated in your choice of candy, delivering the nostalgic flavors of pumpkin pie and making every bite feel like a celebration. Are you curious to see how simple it is to whip up these seasonal goodies? Let’s dive right in!
Why Will You Love These No-Bake Balls?
Simplicity at its Best: With no baking required, these delightful treats come together effortlessly, perfect even for novice cooks!
Endless Variations: Feel free to swap in cream cheese for a cheesecake twist or explore flavors by using sweet potato pie—your creativity knows no bounds!
Festive Appeal: Ideal for holiday gatherings, these bite-sized goodies not only recycle leftovers but also capture the warm, inviting flavors of Thanksgiving.
Crowd-Pleasing Flavor: The combination of creamy pumpkin and sweet candy coating delivers a nostalgic taste sensation that everyone will love.
Quick & Easy: This recipe can be made in under 30 minutes, making it your go-to solution for surprise guests or last-minute dessert cravings.
Pair these scrumptious bites with a warm drink or check out other delightful options like Pumpkin Cream Cheese to elevate your festive spread!
No-Bake Pumpkin Pie Balls Ingredients
For the Base
- Leftover Pumpkin Pie – This is the heart of your treat, providing sweetness and all that pumpkin flavor.
- Optional Cream Cheese – Adds an extra layer of creaminess; consider using softened cream cheese for a cheesecake-like taste!
For the Coating
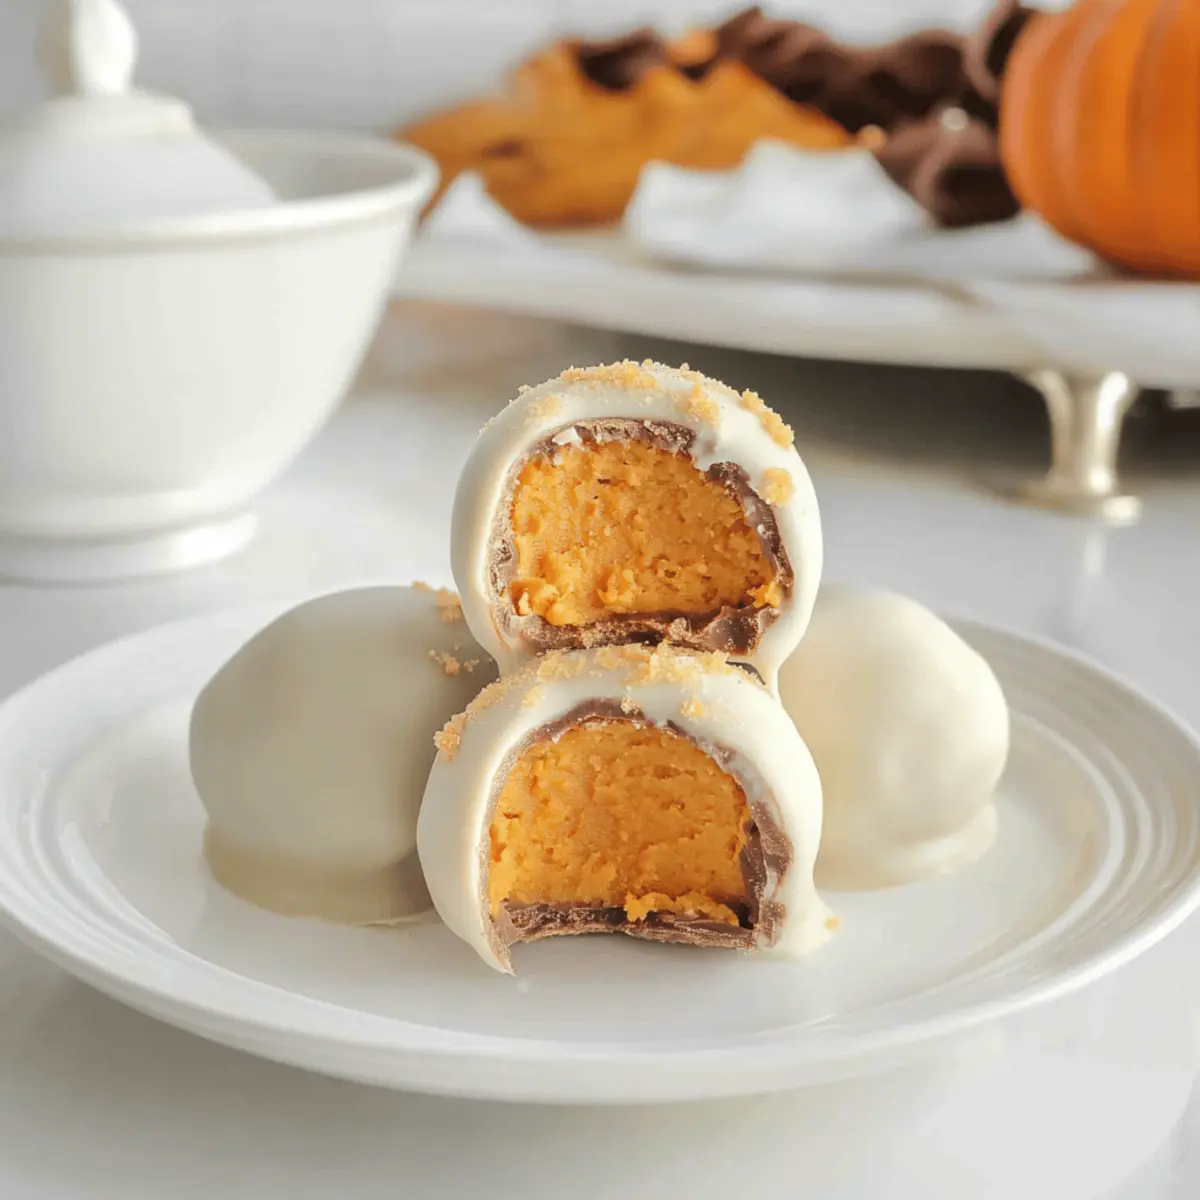
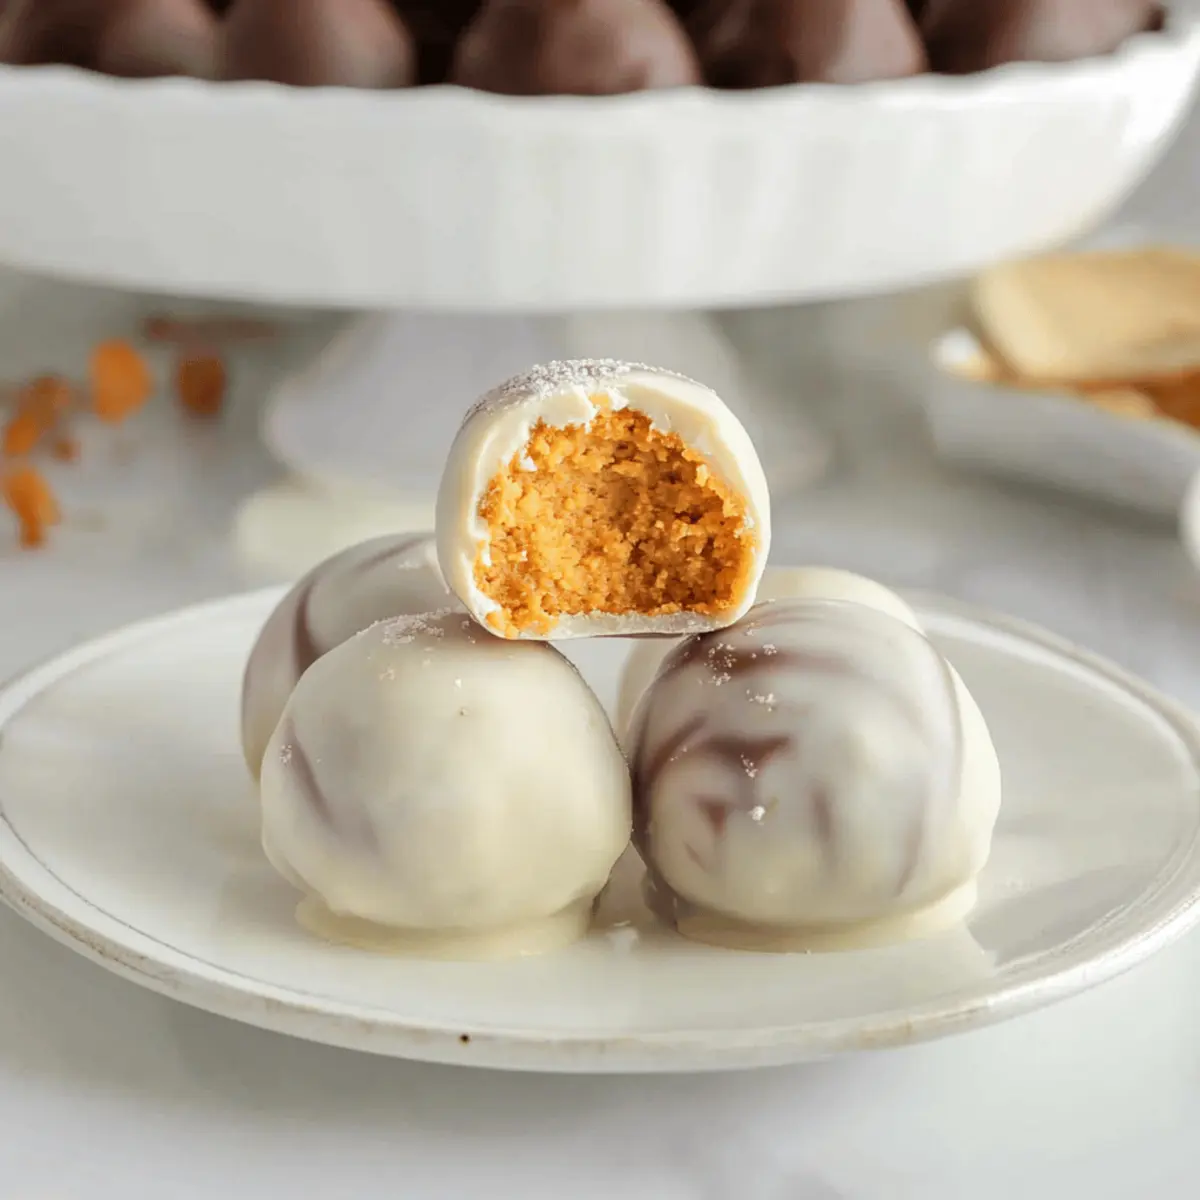
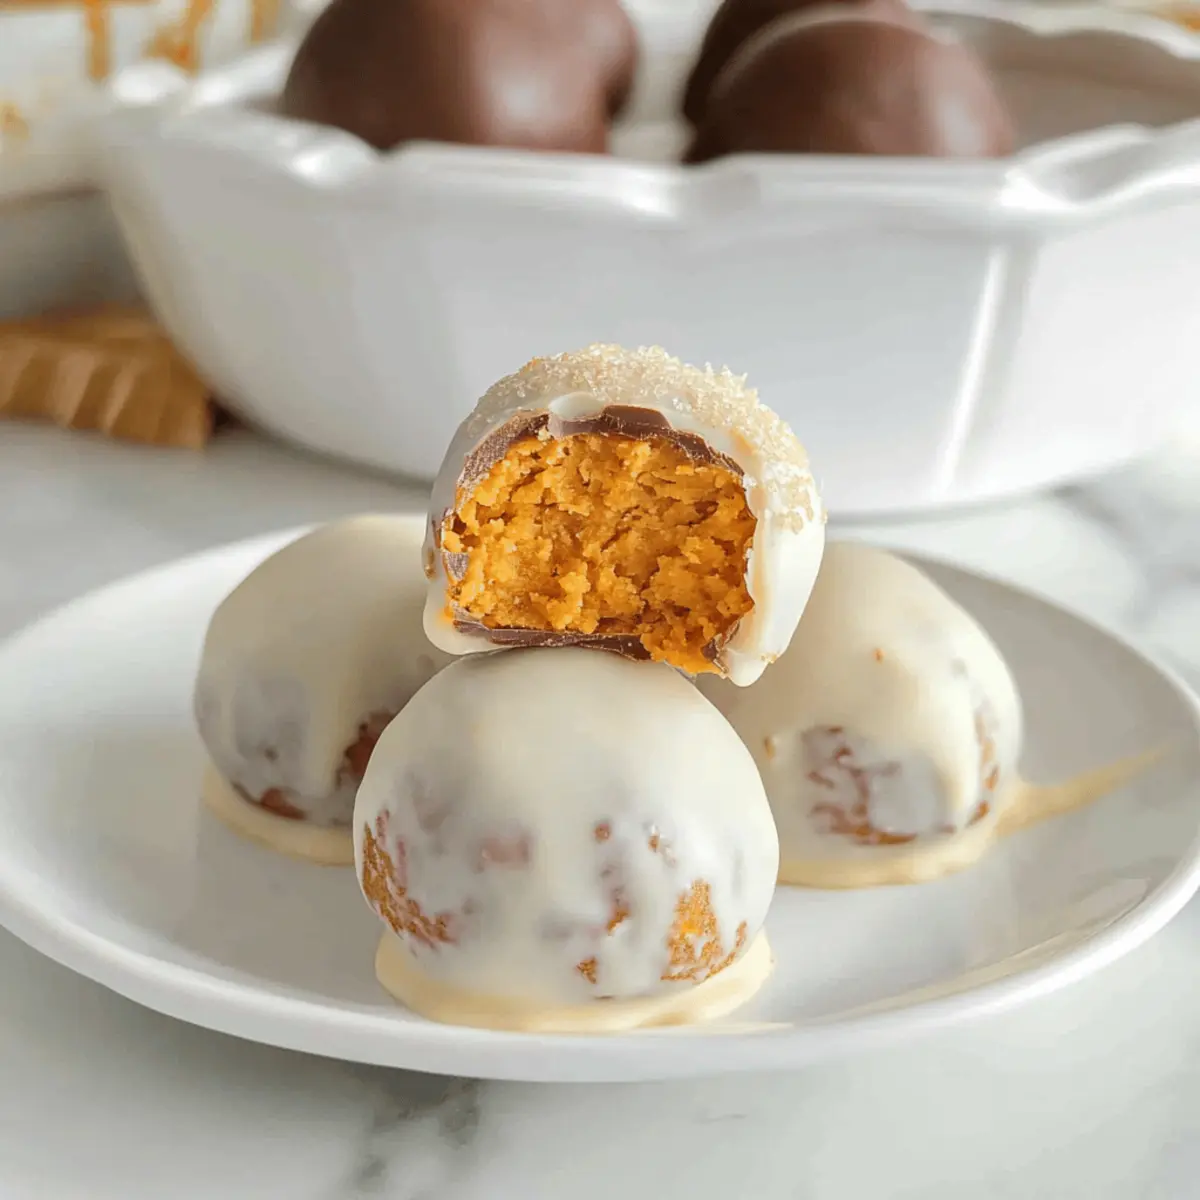
- Candy Coating (Chocolates or Coatings) – Envelops your pumpkin balls in delicious sweetness; try chocolate, almond bark, or white chocolate for variety.
- Chopped Nuts (Optional) – Adds a delightful crunch; walnuts or pecans complement the pumpkin flavor beautifully.
Transforming your Thanksgiving leftovers into No-Bake Pumpkin Pie Balls has never been easier!
Step‑by‑Step Instructions for No-Bake Pumpkin Pie Balls
Step 1: Crumble the Pumpkin Pie
Begin by taking your leftover pumpkin pie and crumbling it into a large mixing bowl. Use clean hands or a fork to break the pie into fine pieces, ensuring there are no large chunks remaining. This process should take about 5 minutes. You want a texture similar to moist cake crumbs, which will help the No-Bake Pumpkin Pie Balls hold together perfectly.
Step 2: Incorporate Cream Cheese (Optional)
If you’re looking to enhance creaminess, add softened cream cheese to the crumbled pumpkin pie. Using a spatula or your hands, mix until the cream cheese is fully integrated, resulting in a smooth, cohesive mixture. This step should take around 3-4 minutes. The final texture should be pliable and easy to shape into balls, ensuring a delightful bite-sized treat.
Step 3: Shape the Mixture
Next, scoop out about one tablespoon of the mixture and roll it between your palms to form small balls, approximately 1 inch in diameter. Continue this process until all the mixture has been shaped. This should take about 10 minutes. As you create the No-Bake Pumpkin Pie Balls, admire their warm, inviting color that hints at the deliciousness to come!
Step 4: Prepare the Candy Coating
Melt your choice of candy coating using either a microwave or a double boiler. If using a microwave, heat in 30-second intervals, stirring between each to avoid burning. Aim for a smooth, pourable consistency, which should take about 2-4 minutes. Once melted, prepare a workspace with parchment paper ready for the dipping action to follow.
Step 5: Dip the Pumpkin Balls
Carefully dip each ball into the melted candy coating, ensuring it is completely covered. Use a fork to lift the ball out, allowing excess coating to drip back into the bowl. This should take about 10-15 seconds per ball. Place the coated No-Bake Pumpkin Pie Balls on the prepared parchment paper, creating a festive display of treats that beckon for a chilly bite.
Step 6: Chill Until Set
Once all the pumpkin balls are coated, transfer the tray to the refrigerator. Chill for about 30 minutes, or until the candy coating is fully set and firm to the touch. This cooling time allows the flavors to meld beautifully, making the No-Bake Pumpkin Pie Balls even more enjoyable. Check for a glossy, smooth exterior before serving!
Step 7: Serve and Store
After the pumpkin balls have set, transfer them to an airtight container and store them in the refrigerator. They can be served chilled or at room temperature, making them a versatile treat for gatherings. Feel free to enjoy these delightful No-Bake Pumpkin Pie Balls within a week for the best flavor and texture.
Make Ahead Options
These No-Bake Pumpkin Pie Balls are perfect for meal prep, allowing you to enjoy a festive treat with minimal last-minute effort. You can shape the mixture into balls and refrigerate them for up to 24 hours before dipping them in the candy coating. This not only saves you time but also helps the flavors meld beautifully. To maintain the quality, ensure the pumpkin balls are placed in an airtight container while chilling. When it’s time to finish, simply melt your candy coating and dip the pre-shaped balls—this will take just a few minutes! These time-saving strategies make these No-Bake Pumpkin Pie Balls an ideal option for busy cooks during the holiday season.
Expert Tips for No-Bake Pumpkin Pie Balls
-
Perfectly Crumbled Base: Ensure your leftover pumpkin pie is crumbled finely; large chunks can affect the cohesion of the No-Bake Pumpkin Pie Balls.
-
Smooth Melting: For the candy coating, melt gradually in the microwave or double boiler to avoid burning. Stir regularly for a silky consistency.
-
Chill for Best Flavor: Allow the formed balls to chill thoroughly in the refrigerator; this helps the flavors develop and ensures a lovely texture.
-
Uniform Size: Use a cookie scoop to form evenly sized balls, ensuring consistent coating and presentation for that professional touch.
-
Add Texture: Consider mixing in chopped nuts or spices to your pumpkin mixture; this adds delightful crunch and richness to every bite!
What to Serve with No-Bake Pumpkin Pie Balls
Indulging in these creamy delights opens the door to a delightful array of pairings that enhance every bite.
- Hot Apple Cider: Its warm, spiced notes complement the pumpkin flavor perfectly, creating a cozy fall experience.
- Whipped Cream: A dollop of freshly whipped cream adds a light, airy texture that brings out the pie-like essence.
Pairing these pumpkin pie balls with warm drinks like cider or hot chocolate can transform your dessert spread into a heartwarming experience. Just imagine dim lighting, cozy blankets, and delicious treats—ideal for creating lasting memories around the table.
- Chocolate Coffee: A rich cup of chocolate coffee pairs beautifully, enhancing the sweetness of the pumpkin with a deep cocoa flavor.
- Nutty Biscotti: The crunchy texture and nutty flavors of biscotti add a delightful contrast to the creamy bites.
- Pumpkin Spice Latte: Elevate your fall vibes with a classic pumpkin spice latte that mirrors the flavors of your dessert.
- Caramel Drizzle: A drizzle of warm caramel brings an extra layer of richness, perfectly balancing the candy coating.
- Vanilla Ice Cream: Serve alongside a scoop of creamy vanilla ice cream for a classic and indulgent pairing.
- Maple Syrup: A light drizzle of maple syrup adds natural sweetness that complements the pumpkin essence beautifully.
No-Bake Pumpkin Pie Balls Variations
Feel free to get creative with these delightful no-bake treats and tailor them to your taste buds!
-
Sweet Potato Swap: Replace pumpkin pie with sweet potato pie for a slightly different flavor that’s equally comforting.
This simple switch can introduce a new depth of sweetness and lushness. -
Cream Cheese Dream: Mix in softened cream cheese for a richer, cheesecake-like filling.
This twist transforms your treats into indulgent bites that everyone will adore. -
Seasonal Coatings: Try peppermint-flavored or dark chocolate coatings for a festive twist on traditional flavors.
Elevating the chocolate element adds a new layer of excitement to these bites. -
Nutty Addition: Stir in chopped walnuts or pecans for a satisfying crunch.
The nutty texture combines beautifully with the creamy filling, enhancing every bite. -
Spice it Up: Add a pinch of nutmeg or cinnamon to the mixture for an extra flavor kick.
These spices not only amplify the fall essence but also give a warm hug in every bite. -
Fruity Fusion: Mix in dried cranberries or raisins for a chewy surprise in each ball.
This fruity addition elevates the taste profile and adds a delightful texture contrast. -
Chili Chocolate: For an adventurous twist, drizzle with chili-infused chocolate for a spicy kick.
The heat of the chili offers a surprising balance to the sweetness of the pumpkin.
For more delicious ideas, consider exploring my recipes for Pumpkin Protein Balls or try some Pumpkin Cheesecake Muffins to elevate your autumn baking!
How to Store and Freeze No-Bake Pumpkin Pie Balls
Fridge: Store your No-Bake Pumpkin Pie Balls in an airtight container in the refrigerator for up to 1 week. They retain their deliciousness and creamy texture when kept chilled.
Freezer: For longer storage, freeze the pumpkin balls on a parchment-lined tray for about 1-2 hours until solid, then transfer them to a freezer-safe bag for up to 3 months.
Thawing: To enjoy frozen pumpkin balls, simply transfer them to the fridge overnight to thaw. They can also be enjoyed straight from the freezer for a refreshing treat!
Reheating: These tasty bites are best served chilled or at room temperature. There’s no need to heat them! Enjoy their lovely flavor just as they are.
No-Bake Pumpkin Pie Balls Recipe FAQs
What type of leftover pumpkin pie should I use?
Absolutely! You can use any variety of leftover pumpkin pie, whether it’s homemade or store-bought. Just ensure it’s not too dry, as you want the natural moisture to help hold the No-Bake Pumpkin Pie Balls together.
How should I store No-Bake Pumpkin Pie Balls?
Store the No-Bake Pumpkin Pie Balls in an airtight container in your refrigerator for up to one week. Keeping them chilled will help maintain their creamy texture and delightful flavor. I often place a small piece of parchment paper between layers to prevent them from sticking together.
Can I freeze No-Bake Pumpkin Pie Balls?
Yes! For longer storage, freeze your No-Bake Pumpkin Pie Balls by placing them on a parchment-lined tray and letting them freeze for about 1-2 hours until solid. After that, transfer them to a freezer-safe bag or container, and they’ll keep well for up to three months. Just be sure to label them with a date, so you know when to enjoy them!
What if my candy coating is clumping?
Very! If you notice your candy coating is clumping, try reheating it gently in the microwave in 10-15 second intervals, stirring between each heating. Alternatively, adding a teaspoon of vegetable oil to the melted coating can help achieve a smooth, pourable consistency. This will ensure an even coating for your No-Bake Pumpkin Pie Balls.
Can I make these No-Bake Pumpkin Pie Balls if I have nut allergies?
Certainly! If you’re managing nut allergies, simply omit any added nuts from the recipe. The base and the candy coating still deliver the delightful flavors you crave. If you’re using a store-bought pumpkin pie, be sure to double-check the ingredients for any potential allergens.
How long do No-Bake Pumpkin Pie Balls stay good in the fridge?
These delightful treats can stay fresh in the refrigerator for up to one week when stored in an airtight container. Just remember, like most desserts, they taste best when enjoyed within the first few days, as the flavors meld beautifully during this time. Enjoy your cozy bites!
No-Bake Pumpkin Pie Balls: A Festive Treat for Fall Bliss
Ingredients
Equipment
Method
- Crumble the leftover pumpkin pie into a large mixing bowl using clean hands or a fork.
- Incorporate softened cream cheese into the crumbled pumpkin pie until fully integrated.
- Scoop out about one tablespoon of the mixture and roll it into small balls, approximately 1 inch in diameter.
- Melt your choice of candy coating, stirring regularly to avoid burning, until smooth.
- Dip each ball into the melted candy coating, ensuring it is completely covered, then place on parchment paper.
- Chill the coated pumpkin balls in the refrigerator for about 30 minutes until set.
- Store the pumpkin balls in an airtight container in the refrigerator or serve immediately.
Leave a Reply