
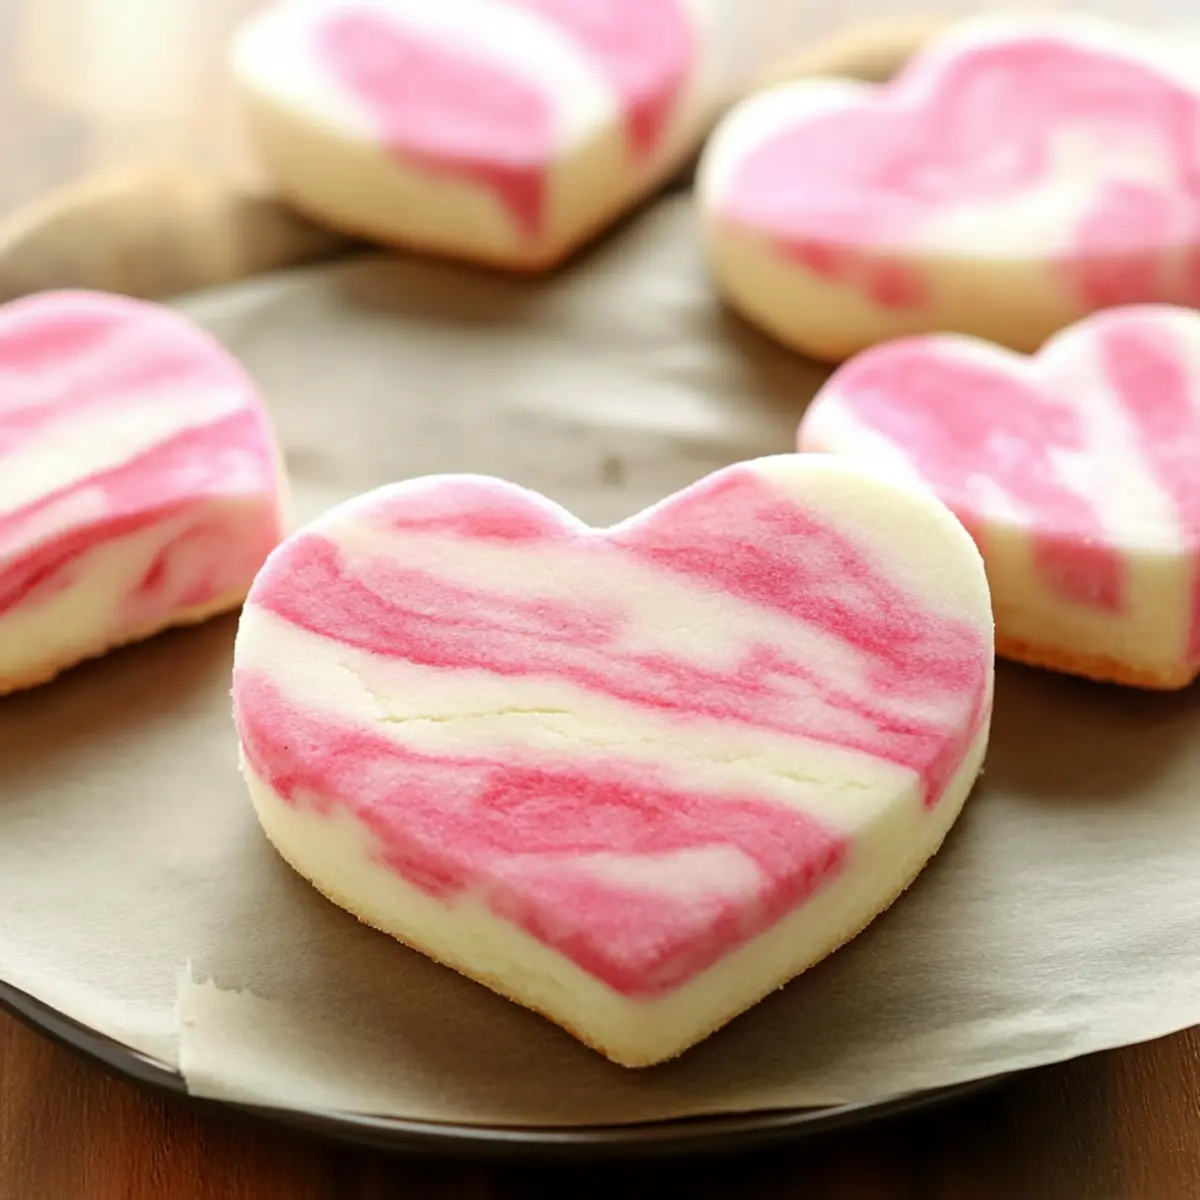
As I stood in my kitchen, the air filled with the sweet scent of butter and sugar, I realized that Valentine’s Day wasn’t just about love; it was about sharing joy through homemade treats. That’s when I stumbled upon the delightful Marbled Pink Valentine’s Day Sugar Cookies—no-spread cut-out wonders that not only look stunning but are also incredibly easy to make. The enchanting swirling pattern mirrors the playful spirit of the holiday, making these cookies a perfect centerpiece for your celebration. Plus, they’re a fantastic option for impressing friends and family without spending hours in the kitchen. Curious about how to create this dazzling treat that marries both style and taste? Let’s dive into this cookie adventure together!

Why Are These Cookies So Special?
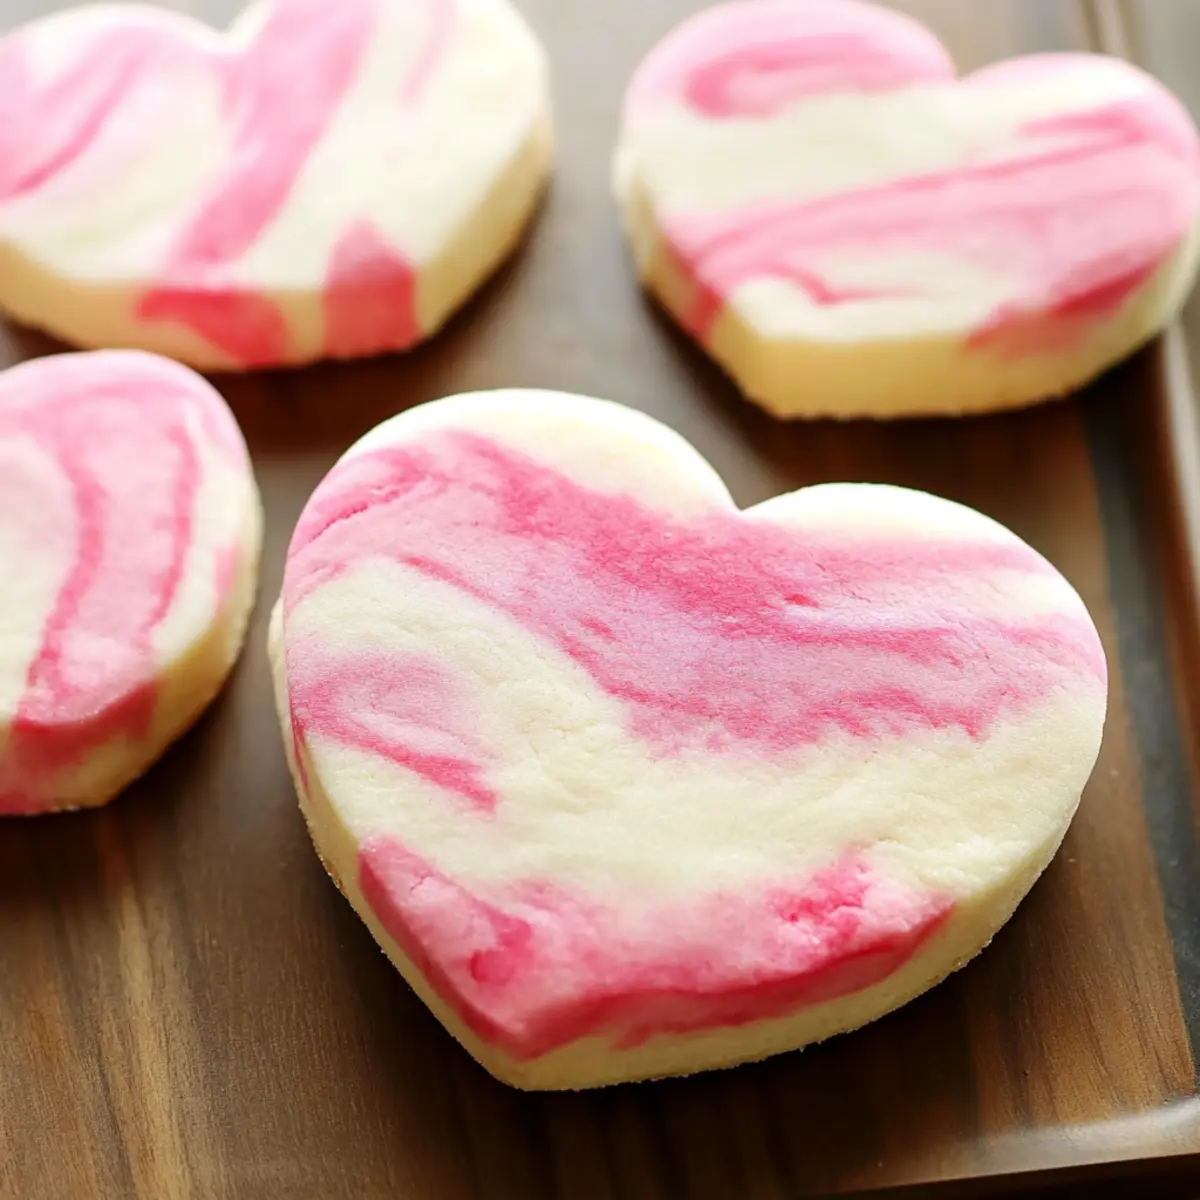
Visual Appeal: The marbled effect creates enchanting cookies that are sure to impress your loved ones. Perfect for Valentine’s, they look as delightful as they taste!
No-Spread Perfection: Enjoy beautifully shaped cookies with this unique no-spread technique, ensuring your creations hold their stunning form while baking.
Easy to Make: With simple steps that require minimal advanced baking skills, these cookies can be whipped up in no time! Plus, they’re a fantastic alternative to fast food treats.
Versatile Colors: Feel free to experiment with gel colors for different occasions—think red and white for holidays or your favorite hues for birthdays!
Crowd-Pleaser: These cookies are soft, buttery, and delicious, making them a hit at any gathering. Serve them alongside Apple Cider Cookies for even more sweetness!
Stress-Free Storage: Easily store your cookies in an airtight container, allowing you to bake ahead for busy days and always have a homemade treat on hand!
Marbled Pink Valentine’s Day Sugar Cookies Ingredients
You’re just a few ingredients away from baking these charming treats!
For the Cookies
- Unsalted Butter – provides richness; ensure it’s softened for the best texture.
- Granulated Sugar – delivers sweetness and structure; no substitutions recommended.
- Large Egg – binds the ingredients together; use at room temperature for better mixing.
- Vanilla Extract – enhances flavor; opt for pure vanilla for a richer taste.
- Salt – balances sweetness; don’t skip this essential ingredient for a well-rounded flavor.
- Baking Powder – adds leavening; make sure it’s fresh for proper cookie rising.
- All-Purpose Flour – forms the main structure of the cookie; avoid substitutions for ideal results.
- Pink or Red Gel Food Coloring – used to tint the dough vibrantly; gel minimizes moisture to prevent spreading.
These Marbled Pink Valentine’s Day Sugar Cookies will not only delight the eyes but also satisfy your sweet tooth!
Step‑by‑Step Instructions for Marbled Pink Valentine’s Day Sugar Cookies
Step 1: Cream Butter and Sugar
In a large mixing bowl, beat 1 cup of softened unsalted butter with 1 cup of granulated sugar using an electric mixer on medium speed for about 3-4 minutes. The mixture should become light and fluffy, turning a pale yellow color. This step creates a perfect base for your Marbled Pink Valentine’s Day Sugar Cookies.
Step 2: Mix Wet Ingredients
Add 1 large egg, 1 teaspoon of vanilla extract, and a pinch of salt to the butter-sugar mixture. Continue to mix on low speed until fully combined, about 1-2 minutes. You want to ensure that everything is smoothly integrated, which will help create a tender cookie texture.
Step 3: Combine Dry Ingredients
In a separate bowl, whisk together 2 ½ cups of all-purpose flour and 1 teaspoon of baking powder. Gradually add this dry mixture to the wet ingredients, mixing on low speed until a smooth dough forms, which should take about 2-3 minutes. The dough should be soft yet slightly firm, ready to take on its marbled transformation.
Step 4: Dough Division
Divide the dough into two equal halves—leave one half plain and transfer the other half to a new bowl. Add pink or red gel food coloring to the second half, mixing by hand until you achieve a vibrant hue, ensuring the color is evenly distributed without overmixing to keep the marbled look.
Step 5: Marble Effect
Pinch off small amounts of the plain and colored dough, combining them in a new bowl. Gently knead the dough with your hands for just a few moments to create beautiful swirls—aim for a marbled appearance without completely blending the colors. This unique dough will bring your Marbled Pink Valentine’s Day Sugar Cookies to life!
Step 6: Chill Dough
Shape the marbled dough into a disc and wrap it in plastic wrap. Refrigerate for at least 30 minutes to 1 hour to firm up. This chilling step is essential for keeping the cookie shape intact while baking, ensuring you have delightful no-spread cookies.
Step 7: Cut Shapes
Once chilled, roll the dough out on a lightly floured surface to a thickness of about 1/4 inch. Using heart-shaped cookie cutters, carefully cut out shapes from the dough. The vibrant marbling will create stunning visual interest that’s perfect for Valentine’s Day treats.
Step 8: Freeze Cut-Outs
Place the cut-out cookies on a parchment-lined baking sheet, ensuring they’re spaced apart. Freeze the cookies for 15 minutes before baking. This step helps to maintain their shape and prevents any spreading in the oven—key for achieving those perfect Marbled Pink Valentine’s Day Sugar Cookies.
Step 9: Bake
Preheat your oven to 350°F (175°C). Bake the frozen cut-outs for 12-14 minutes or until the edges are set but the centers are still soft. Keep an eye on them—when the edges are just beginning to turn golden, they’re ready! Allow the cookies to cool for 2 minutes on the baking sheet before transferring them to a wire rack to cool completely.
Make Ahead Options
These Marbled Pink Valentine’s Day Sugar Cookies are perfect for meal prep enthusiasts! You can make the cookie dough up to 24 hours in advance; simply follow all the mixing steps and chill the dough as directed. To maintain quality, wrap the formed disc tightly in plastic wrap to prevent it from drying out. You can also freeze the cut-out shapes for up to 3 months. Just expedite your baking process by placing the frozen shapes directly into the preheated oven—there’s no need to thaw. When you’re ready to serve, bake them straight from the freezer for charming cookies that are just as delicious and visually appealing!
Expert Tips for Marbled Pink Valentine’s Day Sugar Cookies
-
Butter Temperature: Use softened butter, not melted, to achieve the perfect cookie texture and ensure they hold their shape during baking.
-
Chill Dough: Don’t skip chilling the dough for at least 30 minutes. This will prevent your cookies from spreading and help you achieve beautiful no-spread results.
-
Gentle Kneading: When creating the marbled effect, avoid overkneading the dough. A few gentle folds will create beautiful swirls without completely blending the colors.
-
Proper Freezing: Freeze cut-out cookies for at least 15 minutes before baking. This crucial step helps maintain their shape and results in stunning Marbled Pink Valentine’s Day Sugar Cookies.
-
Watch the Bake Time: Keep a close eye on the cookies as they bake. They’re done when the edges are set, but the centers are still soft for that delightful texture!
-
Decorate with Care: After baking, consider adding a light glaze or sprinkles to enhance the festive presentation. Make your cookies even more irresistible!
How to Store and Freeze Marbled Pink Valentine’s Day Sugar Cookies
Room Temperature: Store cookies in an airtight container at room temperature for up to 1 week to maintain their delicious softness and flavor.
Fridge: For even longer freshness, keep the cookies in the refrigerator for up to 2 weeks. Ensure they’re in a sealable container to prevent absorbing odors.
Freezer: Freeze cookies in a single layer on a baking sheet for about 1 hour, then transfer to an airtight container or freezer bag for up to 3 months.
Reheating: To enjoy your frozen Marbled Pink Valentine’s Day Sugar Cookies, simply thaw at room temperature for about 30 minutes, or warm briefly in the oven at 300°F (150°C) for a few minutes.
What to Serve with Marbled Pink Valentine’s Day Sugar Cookies
A treat that’s as charming as it is delicious deserves delightful companions at your Valentine’s gathering.
-
Rich Hot Chocolate: The creamy texture of hot chocolate contrasts beautifully with the buttery sweetness of the cookies, creating a cozy pairing for chilly evenings.
-
Strawberry Shortcake: The fresh strawberries and whipped cream enhance the cookie’s sweetness, providing a light and fruity balance that’s perfect for Valentine’s celebrations.
-
Sparkling Pink Lemonade: This refreshing, bubbly drink adds a festive touch and its tangy sweetness complements the richer flavors of the cookies beautifully.
-
Heart-Shaped Fruit Platter: A colorful assortment of mixed berries and melon not only brings a pop of freshness but also makes for an appealing, healthful side that pairs wonderfully.
-
Vanilla Ice Cream: Silky, smooth ice cream offers a delightful contrast to the crisp cookie edges, making it a heavenly match that’s hard to resist.
-
Decadent Cheesecake: Creamy and rich, a slice of cheesecake, especially in fruity flavors, creates an indulgent balance to sweet cookies, elevating your dessert spread.
-
Rose Petal Tea: This fragrant tea, with its delicate floral notes, aligns beautifully with the cookies’ sugar and vanilla flavors, creating a charming afternoon treat.
Marbled Pink Valentine’s Day Sugar Cookies Variations
Feel free to unleash your creativity and customize these charming cookies for your taste and occasions!
-
Citrus Zest: Add the zest of an orange or lemon to the dough for a refreshing twist. The bright citrus flavor beautifully complements the sweetness of the cookies.
-
Almond Extract: Swap vanilla extract for almond extract to introduce a delightful nutty flavor. This small change elevates the taste profile, offering a unique touch.
-
Chocolate Chips: Add mini chocolate chips to the plain dough for an extra dose of sweetness and texture. These little bursts of chocolate make every bite a delightful surprise.
-
Sprinkles Galore: Top the unbaked cutouts with colorful sprinkles before freezing for an added festive flair. Once baked, they’ll give your cookies a joyful crunch!
-
Matcha Marbling: Incorporate matcha green tea powder into one half of the dough for a beautiful color contrast and a hint of green tea flavor. Not only does this make for stunning cookies, but the earthy taste is a calming delight.
-
Different Occasions: Use different gel colors to suit various holidays—think red and white for Christmas or pastel shades for Easter gatherings. It’s a simple way to adapt these cookies for any celebration!
-
Texture Variations: For a softer bite, reduce the baking time slightly, or for a crunchier texture, roll the dough thinner before cutting out shapes. Both methods yield delightful results!
These variations ensure your Marbled Pink Valentine’s Day Sugar Cookies remain a show-stopper while appealing to different taste preferences. Consider pairing them with Milk Chocolate Cookies for an indulgent dessert spread!

Marbled Pink Valentine’s Day Sugar Cookies Recipe FAQs
What is the best way to select unsalted butter for these cookies?
Absolutely! When choosing unsalted butter, look for a brand that has a fresh smell and a uniform color, ideally with a creamy texture. Avoid any packages that have dark spots or are excessively soft, which can indicate over-processing or age. For the best results, it’s crucial to ensure it’s at room temperature for easy creaming with sugar.
How should I store Marbled Pink Valentine’s Day Sugar Cookies?
For optimal freshness, store your cookies in an airtight container at room temperature for up to 1 week. To keep them soft, you could also place a slice of bread within the container, as it helps maintain moisture. If you’re looking to store them longer, keep your cookies in the fridge for up to 2 weeks, ensuring they’re sealed tightly to avoid absorbing other flavors.
Can I freeze these cookies for later enjoyment?
Absolutely! To freeze Marbled Pink Valentine’s Day Sugar Cookies, first arrange them in a single layer on a baking sheet and freeze for about 1 hour. Once they’ve hardened, transfer the cookies into an airtight container or freezer bag, separating layers with parchment paper to prevent sticking. They can be kept in the freezer for up to 3 months. When ready to enjoy, just thaw at room temperature for about 30 minutes, or warm them slightly in the oven at 300°F (150°C) for a few minutes.
What should I do if my cookie dough is too sticky?
If your dough is feeling overly sticky, don’t fret! Simply add a bit more flour, a tablespoon at a time, mixing until you reach the desired consistency. A soft dough is needed for marbling, but it should also be manageable enough to roll out without sticking. Always remember to flour your work surface lightly when rolling out, and chilling the dough can help make it easier to handle.
Are these cookies safe for kids or those with allergies?
Very! These Marbled Pink Valentine’s Day Sugar Cookies contain standard baking ingredients like butter, eggs, and flour. However, if you’re making them for someone with allergies, always check the ingredient labels for possible cross-contamination, particularly with the food coloring. You can swap in gluten-free flour if necessary, and for an egg-free version, consider using a flaxseed or applesauce substitute to bind the dough together.
Marbled Pink Valentine’s Day Sugar Cookies for Sweet Moments
Ingredients
Equipment
Method
- Cream 1 cup of unsalted butter with 1 cup of granulated sugar using an electric mixer on medium speed for 3-4 minutes until light and fluffy.
- Add 1 large egg, 1 teaspoon of vanilla extract, and a pinch of salt to the mixture and mix on low speed until fully combined for 1-2 minutes.
- Whisk together 2 ½ cups of all-purpose flour and 1 teaspoon of baking powder in a separate bowl, then gradually add to the wet ingredients, mixing until a smooth dough forms.
- Divide the dough in half; keep one half plain and color the other half with gel food coloring, mixing until the color is evenly distributed.
- Combine small amounts of plain and colored dough in a bowl and gently knead to create swirls, achieving a marbled effect.
- Shape the marbled dough into a disc, wrap in plastic wrap, and refrigerate for at least 30 minutes to 1 hour.
- Roll the chilled dough to 1/4 inch thickness on a floured surface and cut out shapes with heart-shaped cookie cutters.
- Place the cut-out cookies on a parchment-lined baking sheet and freeze for 15 minutes before baking.
- Preheat oven to 350°F (175°C) and bake cookies for 12-14 minutes until edges are set, allowing to cool before transferring to a wire rack.
Leave a Reply