
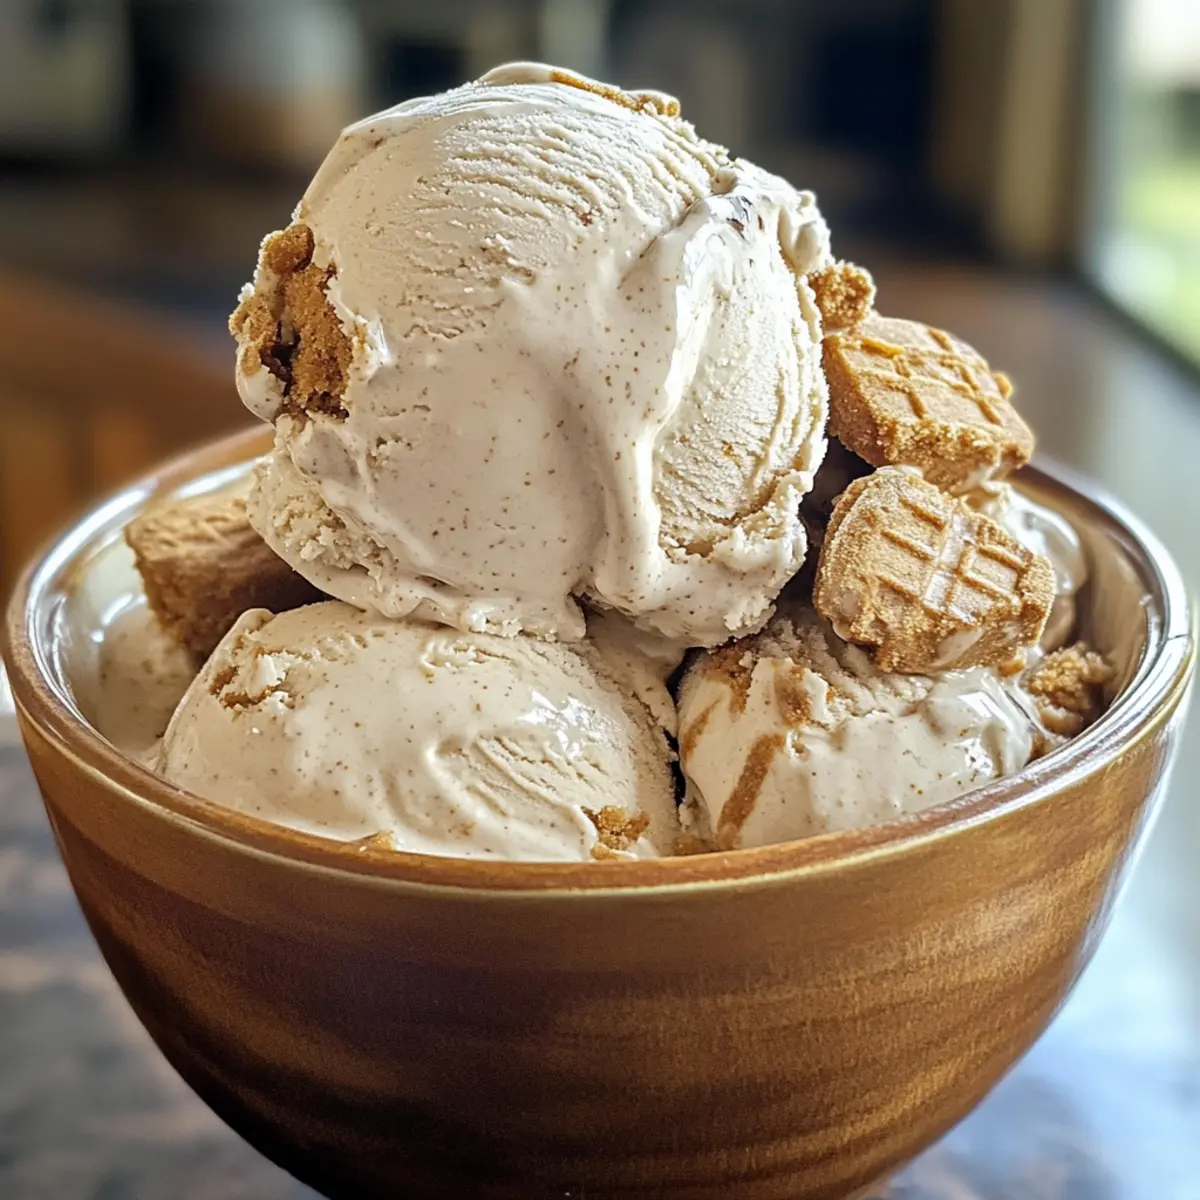
As the sun sets on a warm summer day, nothing beats that first scoop of ice cream—especially when it’s my homemade no-churn Biscoff Ice Cream. The creamy blend of sweetened condensed milk and airy whipped cream creates a luscious base, while swirls of cookie butter and crispy bits of Biscoff cookies offer delightful surprises in every bite. Best of all? This easy recipe comes together in just 15 minutes and doesn’t require an ice cream machine, making it a breeze for any home chef. Imagine indulging in this rich, buttery treat while sharing sweet moments with family and friends. Who else is ready to dive into a scoop of this unique flavor sensation?
Why is Biscoff Ice Cream so special?
Irresistible flavors: The combination of Biscoff cookie butter and pieces of Biscoff cookies brings a uniquely rich, caramelized taste that’s hard to resist.
Quick and easy: This no-churn recipe makes it accessible for everyone, allowing you to enjoy homemade ice cream without the need for fancy equipment.
Perfect for gatherings: Impress friends and family with a dessert that’s sure to be a hit at any gathering—this ice cream pairs beautifully with cookies or a drizzle of chocolate sauce.
Endless variations: Don’t hesitate to customize! You can easily add your favorite flavors or toppings, like Pumpkin Cream Cheese or even swirl in some caramel.
Texture delight: Each scoop boasts a creamy base with crunchy cookie bites, delivering a delightful contrast that makes every bite an experience.
Get ready to savor the magic of this Homemade Biscoff Ice Cream!
Homemade Biscoff Ice Cream Ingredients
For the Ice Cream Base
• Sweetened Condensed Milk – This provides a luscious sweetness and creamy texture; for a lower sugar option, you can substitute it with evaporated milk.
• Biscoff Cookie Butter – It gives the ice cream its signature flavor; feel free to choose between creamy or crunchy varieties based on your texture preference.
• Heavy Whipping Cream – Essential for that airy, light consistency; if you need a dairy-free version, coconut cream is a great substitute.
• Vanilla Extract – Adds depth and enhances the flavor profile; opt for pure vanilla extract to elevate the taste.
For the Crunch
• Chopped Biscoff Cookies – These add delightful texture and bursts of flavor; if you’re feeling adventurous, you can swap them for other crunchy cookies.
For the Swirl
• Melted Biscoff Cookie Butter – Use this for drizzling between layers, creating delicious ribbons of flavor throughout the ice cream; it’s the perfect finishing touch for your Homemade Biscoff Ice Cream.
Step‑by‑Step Instructions for Homemade Biscoff Ice Cream
Step 1: Whisk the Base
In a large mixing bowl, combine one can of sweetened condensed milk with half a cup of Biscoff cookie butter. Using a whisk, blend the mixture until it reaches a smooth and even consistency—about 2 minutes. This creamy base will serve as the foundation of your irresistible Homemade Biscoff Ice Cream.
Step 2: Melt Cookie Butter
Next, melt the remaining Biscoff cookie butter in a microwave-safe bowl. Heat it for about 30 seconds, or until it becomes liquid, ensuring it’s warm but not boiling. Stir well to eliminate any lumps, as this melted cookie butter will create delightful swirls within your ice cream mixture.
Step 3: Whip the Cream
In a separate mixing bowl, pour in one cup of heavy whipping cream along with one teaspoon of vanilla extract. Using an electric mixer, whip the cream on medium-high speed until stiff peaks form, which typically takes about 3-5 minutes. This light and airy whipped cream is crucial for giving your Homemade Biscoff Ice Cream its coveted fluffy texture.
Step 4: Combine Mixtures
With care, fold the whipped cream into the Biscoff mixture using a spatula. Work gently to maintain the airy consistency; it should take about 2 minutes to fully incorporate. The goal is a light, combined mixture free from any visible lumps, perfect for your creamy ice cream base.
Step 5: Add Cookie Crunch
Now, take one cup of chopped Biscoff cookies and fold them into the ice cream mixture gently. This step adds delightful texture and flavor bits that will surprise you in every scoop. Be careful not to overmix, so the cookie pieces remain intact and provide that satisfying crunch throughout your Homemade Biscoff Ice Cream.
Step 6: Layer in the Pan
Pour one-third of the ice cream mixture into a 9×5 inch loaf pan. Use a spatula to spread it evenly across the bottom. This initial layer creates a base for the delightful swirls and will help keep everything structured as your ice cream freezes beautifully.
Step 7: Drizzle Cookie Butter
Using your melted cookie butter, drizzle a few drops over the base layer in the pan. Aim for an even distribution without overdoing it—this sticky layer enhances flavor with every bite while also emphasizing the signature Biscoff taste of your ice cream.
Step 8: Repeat Layering
Continue the layering process by adding another third of the ice cream mixture on top of the chocolate drizzle, spreading it evenly again. Follow this with another drizzle of melted cookie butter, repeating until all your mixtures are used up. This method ensures that each scoop will be laced with both creamy and crunchy elements.
Step 9: Create Swirls
With your final layer in place, take a skewer or a knife to gently swirl the remaining melted cookie butter through the mixture. Do this lightly to avoid mixing too deeply, creating beautiful ribbons of flavor that make your Homemade Biscoff Ice Cream visually appealing and delicious.
Step 10: Freeze the Ice Cream
Cover the loaf pan with plastic wrap or a lid and place it in the freezer. Allow the ice cream to freeze for at least eight hours, or until it is solid. After this time, it will be ready for scooping, serving, and enjoying as a delightful treat on warm days.
How to Store and Freeze Homemade Biscoff Ice Cream
Fridge: Store in the fridge for up to 3 days if needed, but for the best texture and flavor, it’s best to keep it in the freezer.
Freezer: Freeze in an airtight container for up to two weeks to preserve freshness. Make sure the container is well-sealed to avoid freezer burn.
Serving: To serve, allow the ice cream to sit at room temperature for 5-10 minutes before scooping. This will help it soften perfectly for enjoyable servings of your delicious Homemade Biscoff Ice Cream.
Reheating: There’s no need to reheat, but if you find it too hard, just let it thaw slightly for easier scooping!
Expert Tips for Homemade Biscoff Ice Cream
-
Stiff Peaks: Ensure your whipped cream reaches stiff peaks for the perfect airy texture in your ice cream. This is crucial for that creamy consistency.
-
Gentle Folding: Be gentle when folding the whipped cream into the Biscoff mixture. Overmixing can deflate the whipped cream, making your ice cream less fluffy.
-
Room Temperature: Let your ice cream sit at room temperature for a few minutes before scooping. This will make serving easier and more enjoyable.
-
Customize Flavors: Feel free to customize this recipe by incorporating other mix-ins or swirls, but ensure they complement the rich flavor of the homemade Biscoff ice cream.
-
Airtight Storage: For best results, store the ice cream in an airtight container to maintain freshness and prevent ice crystals from forming during freezing.
What to Serve with Homemade Biscoff Ice Cream
As you savor this creamy delight, let’s explore the perfect accompaniments to elevate your dessert experience.
-
Warm Chocolate Brownies: The rich, fudgy texture pairs wonderfully with the creamy ice cream, bringing a decadent contrast to each bite. Imagine sinking your spoon into a warm brownie topped with a scoop of chilled Biscoff goodness.
-
Ginger Snap Cookies: Their spicy crunch complements the sweet caramel notes of the Biscoff ice cream, creating a delightful flavor harmony. These cookies add an unexpected zing that enhances the overall experience—perfect for those who enjoy a hint of spice!
-
Caramel Sauce Drizzle: A warm drizzle of homemade caramel amplifies the buttery richness of the ice cream. This luscious addition not only tantalizes your taste buds but also creates an inviting visual appeal to your dessert presentation.
-
Roasted Nuts: A sprinkle of toasted almonds or pecans introduces a delightful crunch and nutty flavor that contrasts beautifully with the creamy base. Their warmth and texture elevate the overall experience, making every scoop exciting.
-
Fresh Berries: Juicy strawberries, raspberries, or blueberries provide a refreshing burst of acidity that balances the sweetness of the ice cream. The vibrant colors and natural flavors brighten the dish, making for an irresistible summer treat.
-
Iced Coffee or Espresso: A chilled cup of coffee enhances the rich, caramel notes of the Biscoff, offering a refreshing sip alongside each scoop. This pairing creates a comforting atmosphere reminiscent of your favorite café, perfect for afternoon indulgence.
-
Chocolate Chip Pancakes: For a fun twist, serve alongside fluffy pancakes drizzled with maple syrup. This creates a delightful breakfast-for-dessert experience, combining warm and cold textures in an exciting way.
-
Exotic Fruit Sorbet: Pair with a tropical fruit sorbet for a refreshing contrast that excites the palate. The fruity sweetness and chill bring a vibrant twist to each spoonful of creamy Biscoff indulgence.
Homemade Biscoff Ice Cream Variations
Feel free to get creative and make this delightful recipe your own—let’s explore some tasty ideas!
- Dairy-Free: Swap heavy whipping cream with coconut cream for a creamy, vegan-friendly delight.
- Crunchy Twist: Add chopped toasted nuts like pecans or almonds for an exciting texture boost alongside the cookie bits.
- Chocolate Swirl: Drizzle some chocolate syrup between layers for a rich and decadent chocolatey flavor that complements the Biscoff perfectly.
- Mix-in Magic: Experiment with different cookie butters, such as peanut butter or Nutella, to create a unique flavor profile you’ll adore.
- Spicy Kick: Sprinkle in some cinnamon or ginger for a warm, spicy note that beautifully contrasts with the sweetness of the ice cream.
- Layered Sundae: Serve scoops on top of Homemade Thin Mints or brownie pieces for a sumptuous sundae experience that’ll wow your guests.
- Fruity Flavor: Mix in pieces of caramelized bananas or strawberries for a fruity burst that’s delightful when paired with the creamy Biscoff undertones.
- Cajun Cream Sauce: For an unexpected twist, drizzle with a bit of Cajun Cream Sauce over your final serving to excite your taste buds!
Feel inspired? Dive into these variations and enjoy your delightful journey with Homemade Biscoff Ice Cream!
Make Ahead Options
These Homemade Biscoff Ice Cream preparations are perfect for busy weeknights and make your dessert planning a breeze! You can prepare the ice cream base (steps 1-5) and refrigerate it up to 24 hours before you’re ready to serve. This means you can whip it together the day before and let the flavors meld. When you’re ready to finish, simply layer the mixture into the loaf pan and swirl in the melted cookie butter (steps 6-9), then freeze for 8 hours until solid. To ensure every scoop is just as delicious when serving, allow the ice cream to soften at room temperature for a few minutes before scooping. Happy meal prep!
Homemade No-Churn Biscoff Ice Cream Recipe FAQs
How do I choose the right ripeness of bananas for this recipe?
I don’t use bananas in this recipe, but if you consider adding a banana flavor, select ones with small brown spots—these are perfectly ripe and sweet!
What’s the best way to store leftover ice cream?
Absolutely! Store your Homemade Biscoff Ice Cream in an airtight container in the freezer for up to two weeks for optimal freshness. Be sure to seal it tightly to avoid freezer burn.
Can I freeze this ice cream for longer than two weeks?
While you can technically freeze it for up to three months, I recommend consuming it within two weeks for the best flavor and texture. If you decide to freeze it longer, it might develop ice crystals and lose that creamy delight.
What if my ice cream is too hard to scoop?
Very! Let your Homemade Biscoff Ice Cream sit at room temperature for about 5-10 minutes before scooping. This little trick will soften it just enough for easy serving while still keeping that creamy texture.
Can I make this ice cream dairy-free?
Of course! Substitute heavy whipping cream with coconut cream to create a dairy-free version of your Homemade Biscoff Ice Cream. Just make sure the Biscoff cookie butter you use is also dairy-free to keep it compliant with your dietary needs.
Are there any allergies I should be aware of?
Indeed! If you’re serving this ice cream to guests, be mindful that Biscoff cookies contain wheat and may have traces of nuts, so always check the packaging if you have guests with allergies.
Creamy Homemade Biscoff Ice Cream: No Churn Delight
Ingredients
Equipment
Method
- In a large mixing bowl, combine one can of sweetened condensed milk with half a cup of Biscoff cookie butter. Whisk until smooth, about 2 minutes.
- Melt the remaining Biscoff cookie butter for about 30 seconds until liquid, avoiding boiling. Stir to eliminate lumps.
- In a separate bowl, whip one cup of heavy whipping cream and one teaspoon of vanilla extract until stiff peaks form, about 3-5 minutes.
- Gently fold the whipped cream into the Biscoff mixture until combined and free from lumps, about 2 minutes.
- Fold in one cup of chopped Biscoff cookies gently, preserving their texture.
- Pour one-third of the ice cream mixture into a 9x5 inch loaf pan and spread evenly for the base layer.
- Drizzle melted cookie butter over the first layer in the pan for flavor enhancement.
- Repeat the layering process until all mixtures are used up, ensuring drizzles in between layers.
- Swirl the remaining melted cookie butter lightly through the top layer.
- Cover with plastic wrap or a lid and freeze for at least eight hours, until solid.
Leave a Reply