
As I strolled through the vibrant farmers’ market, the aroma of warm spices wafting through the air instantly transported me to cozy autumn afternoons. That’s when I knew it was time to make my Creamy Pumpkin Cheesecake Bars! This fall-inspired dessert not only satisfies those pumpkin cravings but also comes together in a snap, making it the perfect crowd-pleaser for seasonal gatherings. With a velvety cream cheese topping that complements the moist spiciness of the pumpkin base, every bite feels like a warm hug on a chilly day. Whether you serve these bars at a Halloween party or enjoy them with your morning coffee, they are sure to elevate any occasion. Curious about how to bring this delightful dish to your table? Let’s dive into the recipe and make some magic happen in your kitchen!
Why are these Pumpkin Bars irresistible?
Comforting warmth: Each bite of these Creamy Pumpkin Cheesecake Bars envelops you in the cozy spices of fall, making them the perfect nostalgic treat for chilly days.
Quick and easy: With simple ingredients and straightforward instructions, you can whip these up in no time, even on a busy day.
Versatile serving options: Serve them warm with a dollop of whipped cream, or savor them alongside your favorite coffee for the ultimate comfort snack.
Crowd-pleaser: These bars are perfect for sharing, whether at a family gathering, Halloween party, or Thanksgiving dinner; they disappear faster than you can say “pumpkin spice”!
Delightful twist: The luscious cream cheese topping adds a decadent touch that elevates this dessert above ordinary pumpkin treats. Give them a try, and don’t forget to check out the delightful Pumpkin Cheesecake Muffins for even more pumpkin magic!
Creamy Pumpkin Cheesecake Bars Ingredients
• Get ready to savor the delightful flavors of fall!
For the Pumpkin Base
- Eggs – Provides structure and moisture; use large eggs for the best results.
- Sugar – Adds sweetness and promotes caramelization; feel free to adjust to suit your taste.
- Vegetable Oil – Ensures moistness and tender texture; can be substituted with melted coconut oil for a healthier option.
- Pumpkin Puree – The star ingredient delivering rich flavor and moisture; canned pumpkin is convenient for this recipe.
- Vanilla Extract – Enhances the flavor profile; using pure vanilla gives a more nuanced taste.
- All-Purpose Flour – Creates the base structure; whole wheat flour can replace it for a healthier option, though this may affect texture.
- Baking Powder – Provides leavening to ensure fluffy bars; ensure it’s fresh for optimal results.
- Baking Soda – Works with the acidity of pumpkin to help your bars rise.
- Ground Cinnamon – Adds warmth and spice; substitute with pumpkin pie spice for a different flavor kick.
- Ground Nutmeg – Contributes depth; freshly grated nutmeg adds an extra layer of flavor.
- Ground Ginger – Enhances the spiciness; adjust to your flavor preference.
For the Cream Cheese Topping
- Cream Cheese – Adds a sweet, rich texture; soften before mixing to achieve better incorporation.
- Cornstarch – Stabilizes the mixture; can be omitted if you’re out.
- Additional Sugar – Balances the tartness of the cream cheese; feel free to adjust based on how sweet you want it.
Enjoy crafting these Creamy Pumpkin Cheesecake Bars that will surely become a favorite as the leaves change and the air turns crisp!
Step‑by‑Step Instructions for Creamy Pumpkin Cheesecake Bars
Step 1: Preheat and Prepare the Pan
Begin by preheating your oven to 350°F (175°C) and greasing a 10 x 15-inch jelly roll pan with cooking spray or butter. This step ensures that your Creamy Pumpkin Cheesecake Bars will come out easily once baked. Keep your pan at the ready as you mix your ingredients to create a seamless flow in your baking process.
Step 2: Mix the Wet Ingredients
In a large mixing bowl, beat together 4 large eggs and 1 ⅔ cups of sugar using an electric mixer on medium speed until the mixture is well combined and slightly frothy. Then, pour in 1 cup of vegetable oil, 1 ¾ cups of pumpkin puree, and 1 teaspoon of vanilla extract, continuing to mix until all ingredients are incorporated, creating a smooth, vibrant batter.
Step 3: Combine the Dry Ingredients
In a separate bowl, whisk together 2 cups of all-purpose flour, 2 teaspoons of baking powder, 1 teaspoon of baking soda, 2 teaspoons of ground cinnamon, ¼ teaspoon of ground nutmeg, and ¼ teaspoon of ground ginger. Make sure the dry ingredients are evenly mixed before gradually folding them into the pumpkin mixture, being careful not to overmix; you want a slightly lumpy batter for optimal texture in your bars.
Step 4: Spread the Batter
Pour the pumpkin batter into the prepared jelly roll pan, using a spatula to spread it evenly across the surface. Aim for a smooth layer that covers the entire pan, reducing any thicker spots. Once it looks even and inviting, it’s time to prepare the creamy topping that will elevate these delicious Creamy Pumpkin Cheesecake Bars.
Step 5: Prepare the Cream Cheese Mixture
In another bowl, beat together 16 ounces of softened cream cheese, 1 ½ tablespoons of sugar, 1 teaspoon of vanilla extract, and 1 tablespoon of cornstarch until velvety smooth. Make sure there are no lumps. This cream cheese mixture will add a delightful, rich layer on top of the pumpkin batter, so transfer it into a piping bag to make decorating easier.
Step 6: Create the Creamy Topping
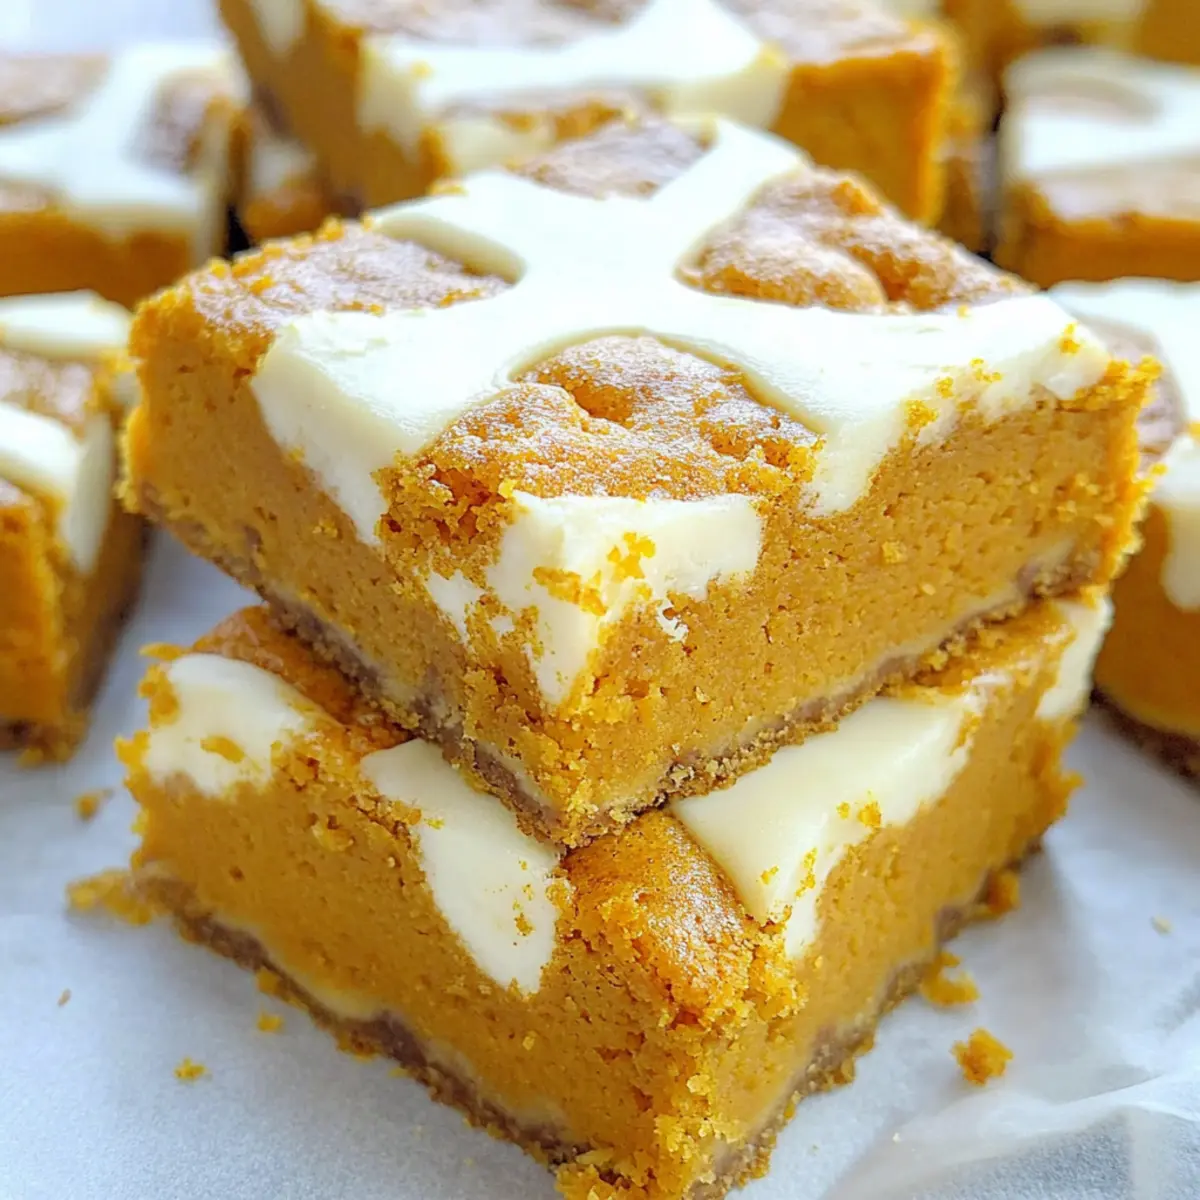
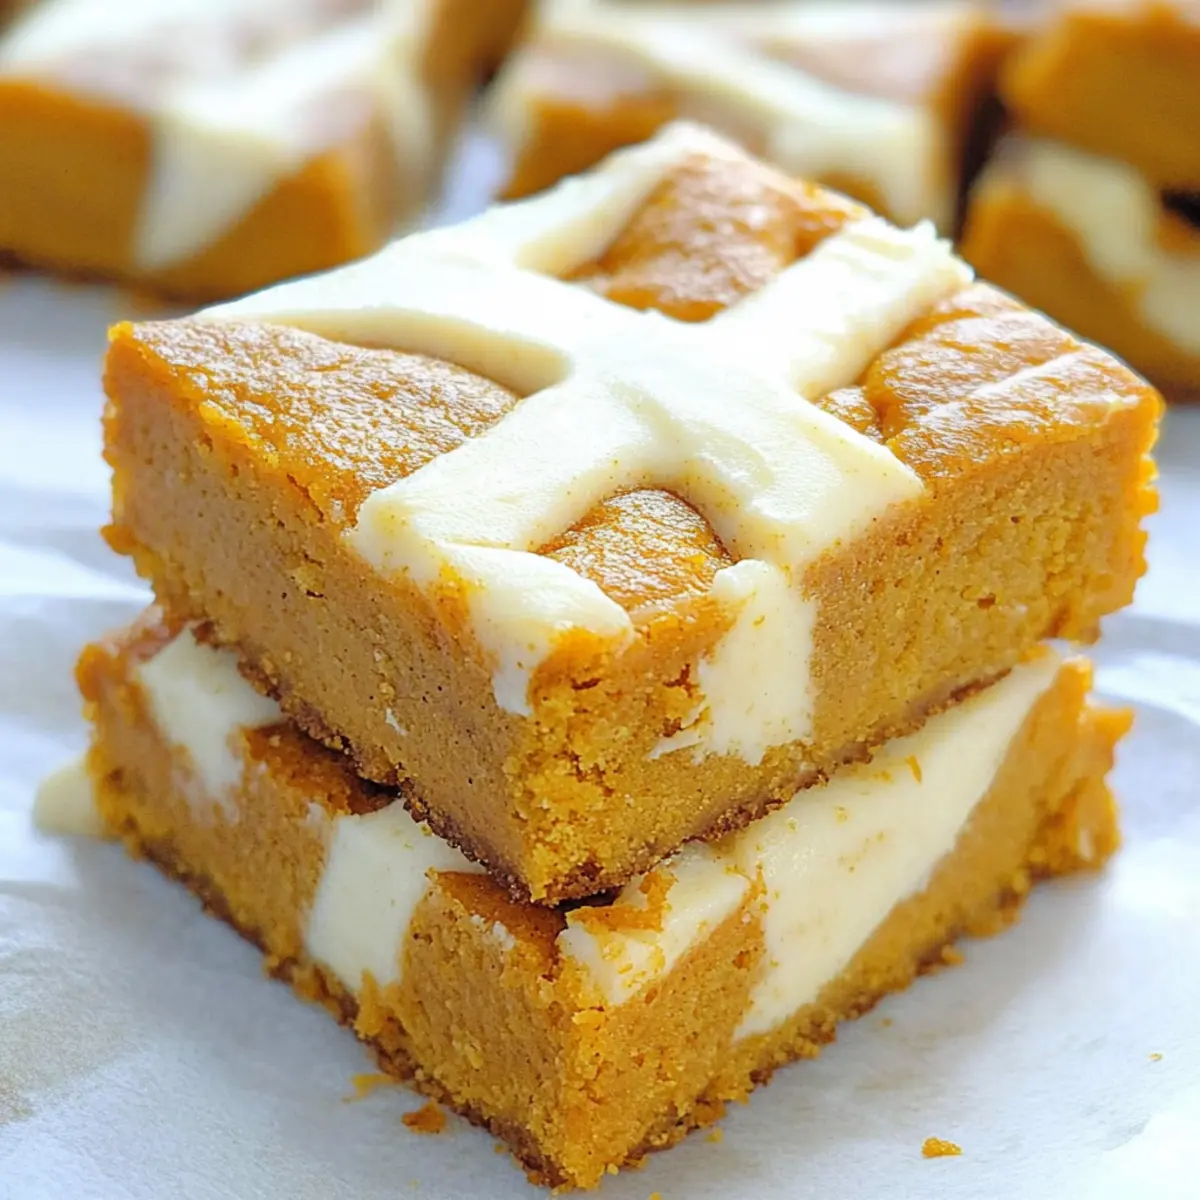
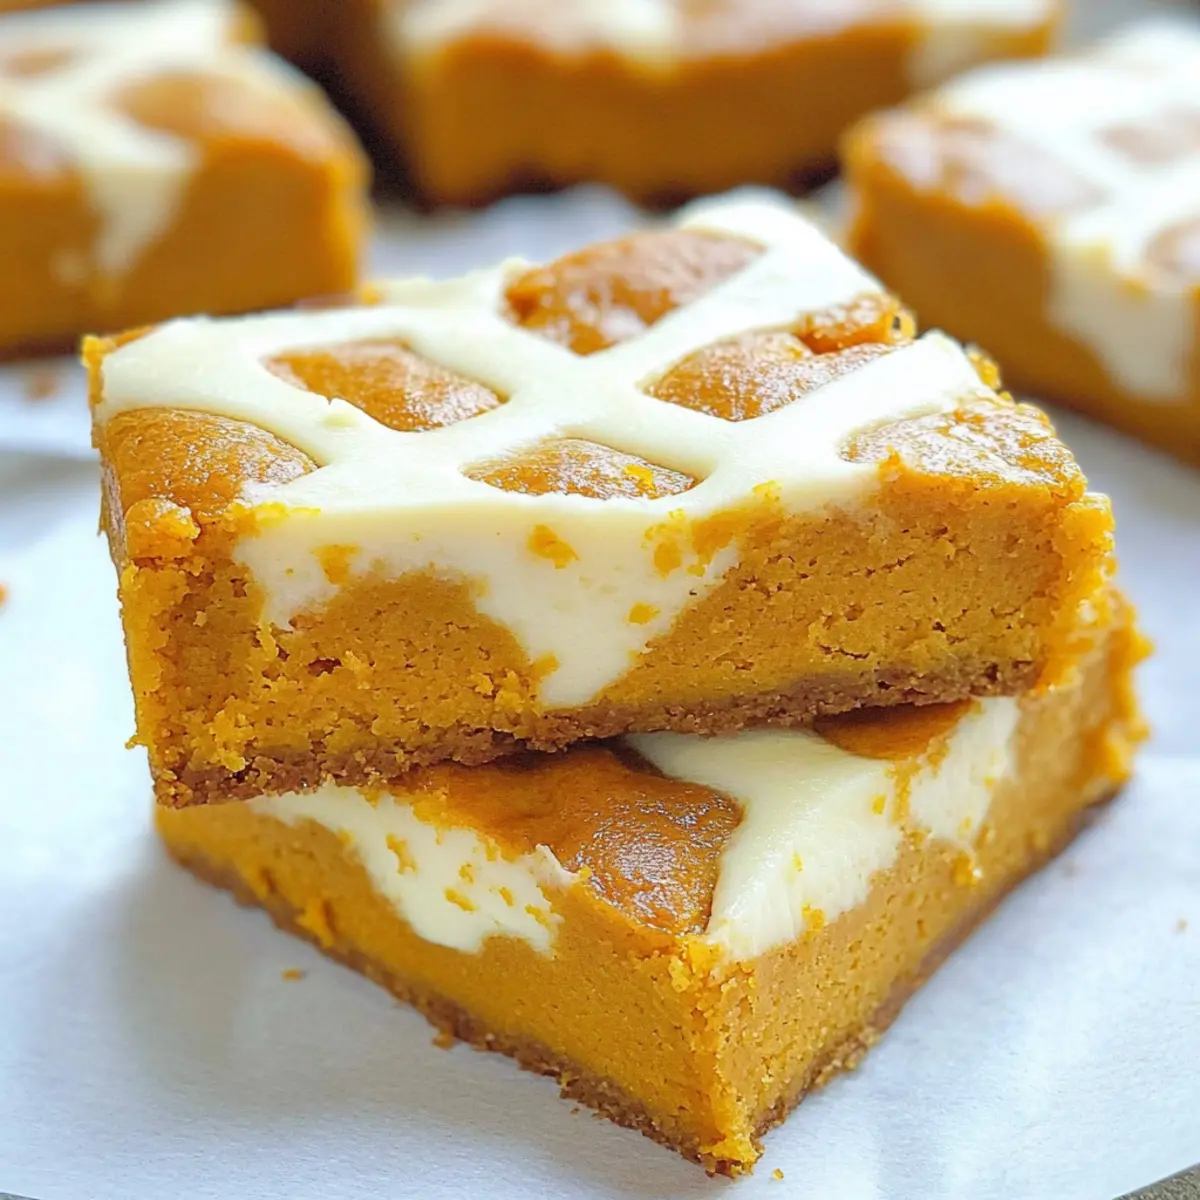
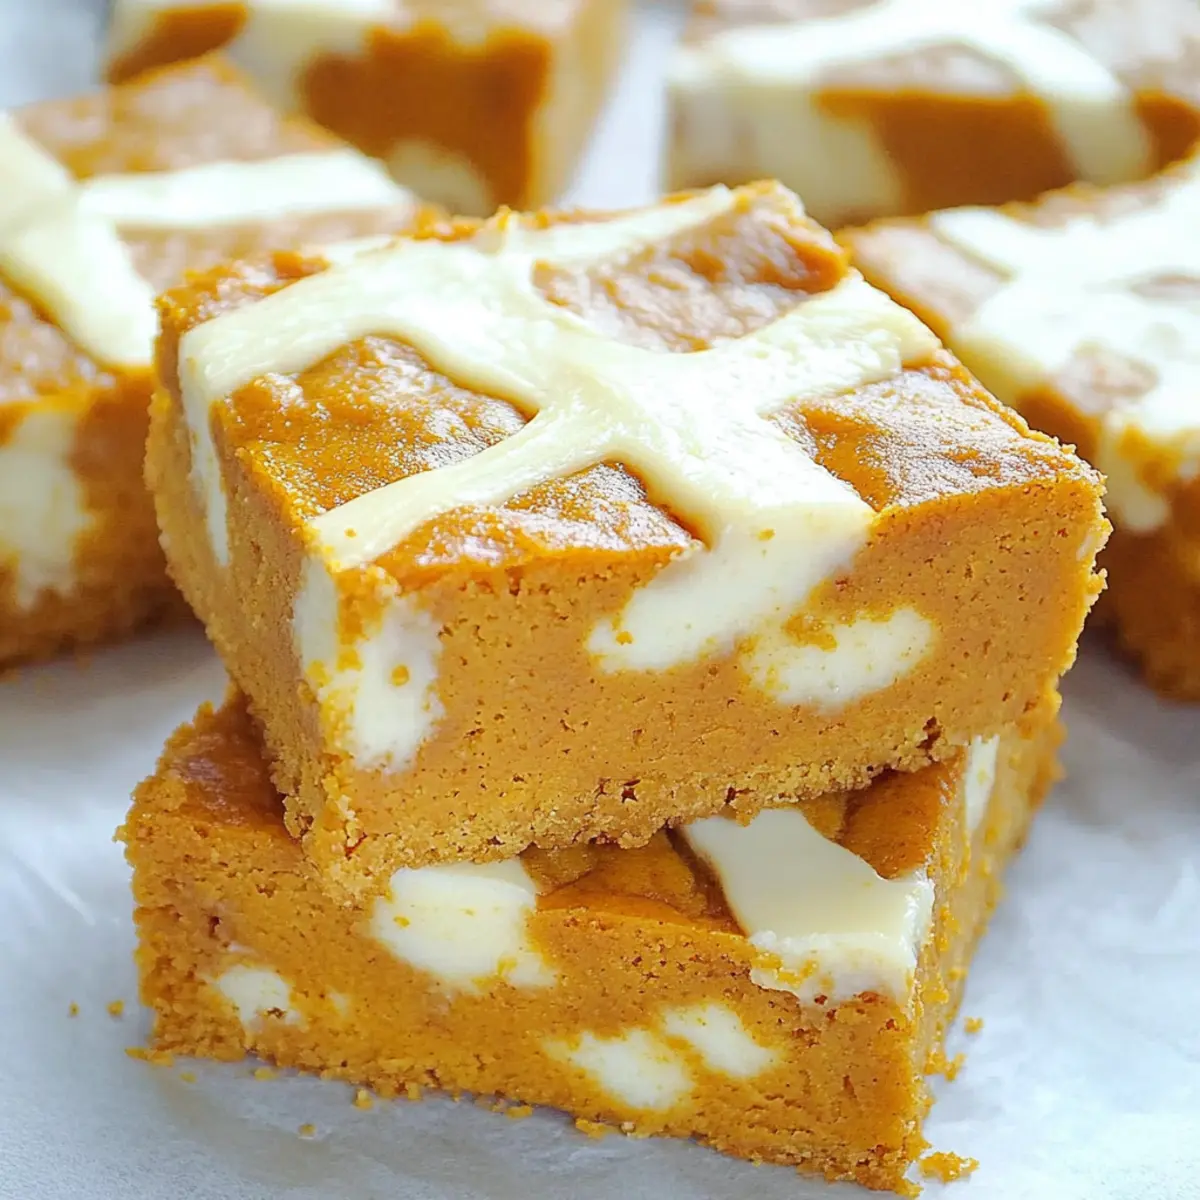
Unleash your creative side by carefully piping the cream cheese mixture in a crisscross pattern over the pumpkin batter. You can also simply dollop it and then swirl it around with a knife for a marbled effect if you prefer. The contrast of colors will make your Creamy Pumpkin Cheesecake Bars even more enticing as they bake.
Step 7: Bake to Perfection
Place the pan in the preheated oven and bake for 25-30 minutes. You’ll know the bars are done when a toothpick inserted in the center comes out clean or with just a few crumbs clinging to it. As they bake, your kitchen will fill with an irresistible aroma of spiced pumpkin!
Step 8: Cool and Serve
Once baked, remove your pumpkin bars from the oven and allow them to cool completely in the pan on a wire rack. This is an essential step, as cooling helps the bars set. Once they’ve cooled to room temperature, slice them into squares, serve, and enjoy the delightful flavors of your Creamy Pumpkin Cheesecake Bars!
Expert Tips for Creamy Pumpkin Cheesecake Bars
• Fresh Ingredients: Use fresh eggs and ensure your baking powder is active for the best lift and texture in your Creamy Pumpkin Cheesecake Bars.
• Avoid Overmixing: When combining wet and dry ingredients, mix just until combined. Overmixing can lead to dense bars instead of the light, fluffy texture you desire.
• Cool Properly: Let the bars cool completely in the pan before cutting; this helps them set properly and prevents them from falling apart when serving.
• Swirling Techniques: If you prefer a marbled look, don’t stress! Simply dollop the cream cheese mixture and swirl with a knife—beauty lies in imperfection!
• Adjust Flavor to Taste: Feel free to experiment with spices. A little extra cinnamon or a pinch of clove can personalize your Creamy Pumpkin Cheesecake Bars to match your taste!
Make Ahead Options
These Creamy Pumpkin Cheesecake Bars are perfect for busy weeknights or festive gatherings, as you can prep several components in advance. Begin by mixing the pumpkin batter and cream cheese topping, then refrigerate them separately for up to 24 hours. This allows the flavors to meld beautifully while saving you precious time on the day of serving. When you’re ready to bake, simply spread the chilled pumpkin batter into your greased pan, pipe the cream cheese mixture on top as directed, and bake. Rest assured, the bars will be just as delicious and moist, ensuring a delightful treat that impresses without the last-minute rush!
How to Store and Freeze Creamy Pumpkin Cheesecake Bars
Fridge: Store in an airtight container to keep your Creamy Pumpkin Cheesecake Bars fresh. They’ll last up to one week, perfect for snacking or sharing!
Freezer: For longer storage, wrap the bars tightly in plastic wrap and then in aluminum foil. They can be frozen for up to three months, maintaining their delicious flavor.
Reheating: Thaw in the refrigerator overnight before enjoying. You can warm individual bars in the microwave for a few seconds to regain that fresh-baked warmth.
Serving Suggestions: Try serving them chilled directly from the fridge or warm after a quick reheat, topped with whipped cream for that extra touch of indulgence!
What to Serve with Creamy Pumpkin Cheesecake Bars?
Elevate your fall gatherings by pairing these delightful treats with complementary dishes that enhance their cozy flavors.
- Spiced Hot Cider: The warm, fragrant spices in the cider create a beautiful harmony with the pumpkin bars, enhancing the overall fall experience.
- Whipped Cream: A dollop of freshly whipped cream adds a light, airy contrast to the creamy texture, making every bite indulgently enjoyable.
- Creamy Mashed Potatoes: For a savory touch, serve alongside creamy mashed potatoes, balancing sweet and savory flavors beautifully. These potatoes add a wonderful comforting element.
- Candied Pecans: Sweet, crunchy candied pecans provide a delightful textural contrast, bringing an extra layer of flavor that complements the pumpkin perfectly.
- Vanilla Ice Cream: A scoop of vanilla ice cream melting over warm pumpkin bars creates a heavenly combination, building a comforting dessert experience.
- Pumpkin Spice Lattes: Match the fall vibes by pairing your bars with a pumpkin spice latte, enhancing that cozy, autumnal feeling with every sip and bite!
Creamy Pumpkin Cheesecake Bars Variations
Feel free to let your creativity shine by customizing your pumpkin bars with these delightful twists!
-
Applesauce Swap: Substitute half of the pumpkin puree with unsweetened applesauce for a lighter texture and added sweetness.
-
Nutty Addition: Stir in 1 cup of chopped walnuts or pecans for a crunchy surprise that complements the soft pumpkin base beautifully. Nuts add a lovely texture and depth to each bite.
-
Chocolate Lover’s Dreams: Mix in 1 cup of chocolate chips into the batter for a decadent indulgence that pairs surprisingly well with pumpkin.
-
Gluten-Free Version: Swap all-purpose flour for a 1:1 gluten-free flour blend, ensuring everyone can enjoy these tasty bars without worry.
-
Maple Sweetness: Replace granulated sugar with 1 cup of maple syrup for a unique flavor and a natural sweetener that adds a touch of fall.
-
Spice It Up: Enhance the warmth by adding a pinch of cloves or cardamom to the spice mix. Just remember, a little goes a long way!
-
Cream Cheese Twist: For a fruity topping, mix in ½ cup of canned pumpkin into the cream cheese mixture, adding a new layer of flavor.
-
Chili Kick: If you’re adventurous, sprinkle a dash of cayenne pepper into the batter for a surprising flavor twist that kicks up the heat.
Baking these bars is all about sharing love through food, just like how I adore serving my Pumpkin Protein Balls to my family. Don’t forget to explore more seasonal flavors, like our Savory Pumpkin Pizza or the luscious Pumpkin Cheesecake Muffins for added excitement in your fall baking adventures!
Creamy Pumpkin Cheesecake Bars Recipe FAQs
How should I select the pumpkin puree?
Absolutely! When choosing pumpkin puree, I recommend going for 100% pure canned pumpkin without any additives. Look for brands that specify “100% pumpkin” to ensure you’re getting the rich flavor and moisture you need for these Creamy Pumpkin Cheesecake Bars. Fresh pumpkin can also be used, but it will require cooking and mashing, so keep that in mind for convenience.
What’s the best way to store leftover bars?
To keep your Creamy Pumpkin Cheesecake Bars fresh, store them in an airtight container in the refrigerator for up to one week. This ensures they retain their delicious flavor and moist texture! For longer storage, you can also freeze the bars.
Can I freeze Creamy Pumpkin Cheesecake Bars?
Yes! To freeze them, wrap the bars tightly in plastic wrap and then in aluminum foil to prevent freezer burn. Label them with the date and they can be stored for up to three months. When you’re ready to enjoy, simply thaw them in the refrigerator overnight. For a warm treat, microwave individual bars for a few seconds!
What if my bars turn out too dense or compact?
Very! If your Creamy Pumpkin Cheesecake Bars are denser than expected, it might be due to overmixing the batter. To achieve that light, fluffy texture, mix just until the dry ingredients are incorporated. Additionally, make sure your baking powder is fresh—this is essential for proper leavening!
Are these pumpkin bars safe for those with allergies?
Great question! Keep in mind that these bars contain common allergens such as eggs and cream cheese. If you’re serving guests with allergies, make sure to check for any specific dietary restrictions. For a dairy-free version, you can experiment with dairy-free cream cheese alternatives available in stores. Always consult with anyone who may have food sensitivities to ensure everyone’s safety and enjoyment!
Can I make adjustments to the recipe for a healthier option?
Absolutely! If you’re looking to lighten up your Creamy Pumpkin Cheesecake Bars, you might consider substituting half of the sugar with unsweetened applesauce or using whole wheat flour instead of all-purpose flour. Also, reducing the amount of cream cheese topping or using a low-fat version can help cut down calories while still delivering that delicious flavor!
Delicious Creamy Pumpkin Cheesecake Bars to Savor This Fall
Ingredients
Equipment
Method
- Preheat your oven to 350°F (175°C) and grease a 10 x 15-inch jelly roll pan.
- In a large bowl, beat together the eggs and sugar until frothy. Add vegetable oil, pumpkin puree, and vanilla extract; mix until smooth.
- In a separate bowl, whisk together flour, baking powder, baking soda, cinnamon, nutmeg, and ginger. Gradually fold into the wet mixture.
- Pour the batter into the prepared pan and spread evenly.
- In another bowl, beat cream cheese, sugar, vanilla, and cornstarch until smooth; transfer to a piping bag.
- Pipe the cream cheese mixture over the pumpkin batter in a crisscross pattern.
- Bake for 25-30 minutes or until a toothpick comes out clean.
- Cool completely in the pan before slicing into squares.
Leave a Reply