
The sweet, tangy scent of fresh oranges invites delightful memories of sunny afternoons and cherished childhood moments. Today, I’m excited to share a recipe for Classic Homemade Orange Candy that not only brings that nostalgia to life but also adds a burst of citrus joy to your day. This chewy treat is incredibly versatile, allowing you to customize the sweetness and even explore a vegan option with agar-agar. Whether you’re looking for a fun kitchen project or a heartfelt gift, this recipe is perfect for igniting your inner candy maker. So, who’s ready to savor the cheerful taste of homemade orange candies? Let’s dive into this citrus wonder!
Why is homemade candy so special?
Nostalgic Taste: Each piece takes you back to carefree childhood days, offering that same delightful burst of citrus flavor we all adore.
Customizable Options: Make it your own by adjusting the sweetness or experimenting with flavors like lemon or lime, just like in my Homemade Thin Mints.
Easy to Make: With straightforward steps and minimal ingredients, you’ll find candy-making is easier than you think!
Vegan-Friendly: Swap out gelatin for agar-agar and enjoy a delicious vegan treat that doesn’t compromise on flavor.
Perfect Gift: Wrapping these cheerful candies in a lovely package makes for a thoughtful and tasty gift that won’t go unnoticed.
Crowd Pleaser: Whether at a party or a cozy gathering, this orange candy is sure to bring smiles and compliments from family and friends.
Classic Homemade Orange Candy Ingredients
For the Candy Base
- Granulated Sugar – Provides sweetness and structure; can be reduced for a less sweet result.
- Corn Syrup – Adds sweetness and helps maintain a chewy texture; honey or agave syrup works as a substitute.
- Water – Necessary for dissolving the sugar during syrup preparation.
- Unflavored Gelatin – Creates the chewy consistency of the candy; replace with agar-agar for a vegan-friendly option.
- Fresh Oranges (zest & juice) – Essential for flavor, contributing vibrant citrus notes; fresh, organic navel oranges are recommended.
- Unsalted Butter – Adds richness to the candy; omit for a dairy-free variant.
Optional Variation Ingredients
- Lemon or Lime Zest & Juice – For a tangy twist that brightens every bite.
- Chopped Nuts or Shredded Coconut – Adds delightful texture and nutty flavor.
- Dried Fruit or Pomegranate Seeds – Infuses extra flavor dimensions.
- Cayenne Pepper or Chili Powder – For those who like a hint of heat with their sweet.
This recipe for Classic Homemade Orange Candy is not just about making candy; it’s about creating joy and sharing delightful memories! Enjoy your candy-making adventure!
Step‑by‑Step Instructions for Classic Homemade Orange Candy for a Citrus Burst of Joy
Step 1: Prep Zest and Juice
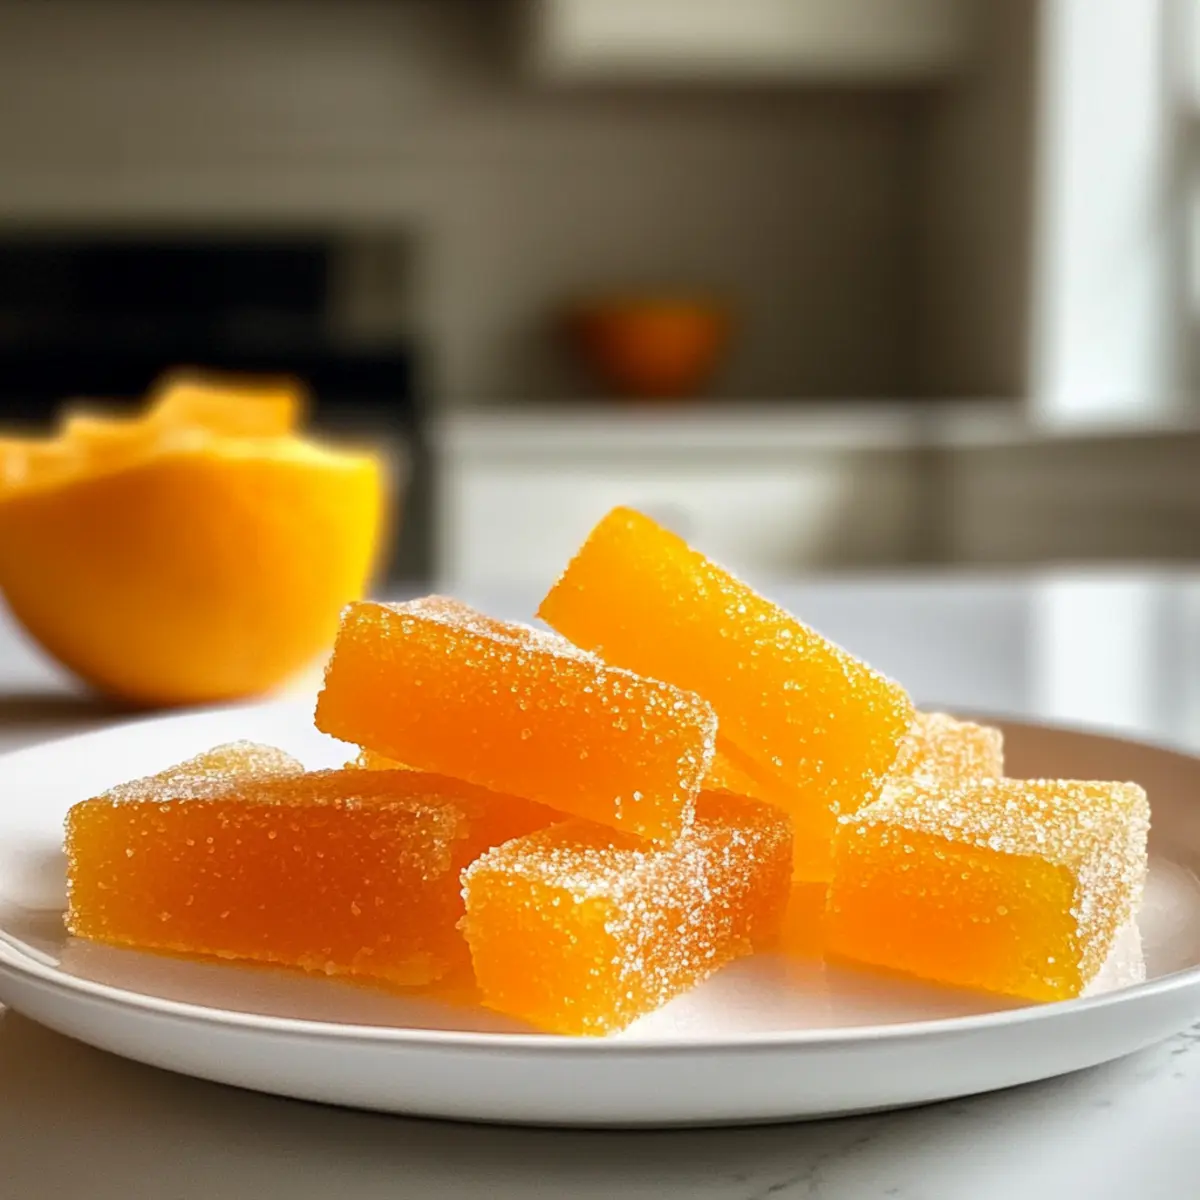
Begin by washing three fresh organic navel oranges thoroughly. Use a fine grater to zest the oranges until you have about 2 tablespoons of vibrant zest, being careful to avoid the bitter white pith underneath. Next, cut the oranges in half and juice them to yield approximately 3/4 cup of fresh orange juice. Set both the zest and juice aside for later use.
Step 2: Make Syrup
In a medium saucepan, combine the previously collected orange juice, 1/4 cup of water, 2 cups of granulated sugar, and 1/4 cup of corn syrup. Heat this mixture over medium heat, stirring gently until the sugar has completely dissolved, which should take about 3-5 minutes. Once dissolved, lower the heat and let the syrup simmer for 10 minutes until it thickens slightly and takes on a honey-like consistency, then remove from heat.
Step 3: Prepare Gelatin
While the syrup cools slightly, take a small bowl and sprinkle 2 tablespoons of unflavored gelatin over 1/4 cup of cold water. Allow it to sit undisturbed for about 5 minutes, letting the gelatin bloom and absorb the water. This step is crucial for achieving the chewy texture in your Classic Homemade Orange Candy.
Step 4: Combine Ingredients
Once your syrup is thickened, stir the bloomed gelatin into the warm syrup mixture. Continue to mix until the gelatin is completely dissolved. Afterward, add the reserved orange zest and 1 tablespoon of unsalted butter to the mixture, stirring until the butter melts and the ingredients are well incorporated. This will add richness to your candy base.
Step 5: Cool Mixture
After mixing, allow the candy mixture to cool at room temperature for about 1-2 hours. You want it to thicken slightly but not set completely. A good indication that it’s at the right stage is when the mixture is viscous enough to hold its shape when drizzled back into the bowl.
Step 6: Set Candy
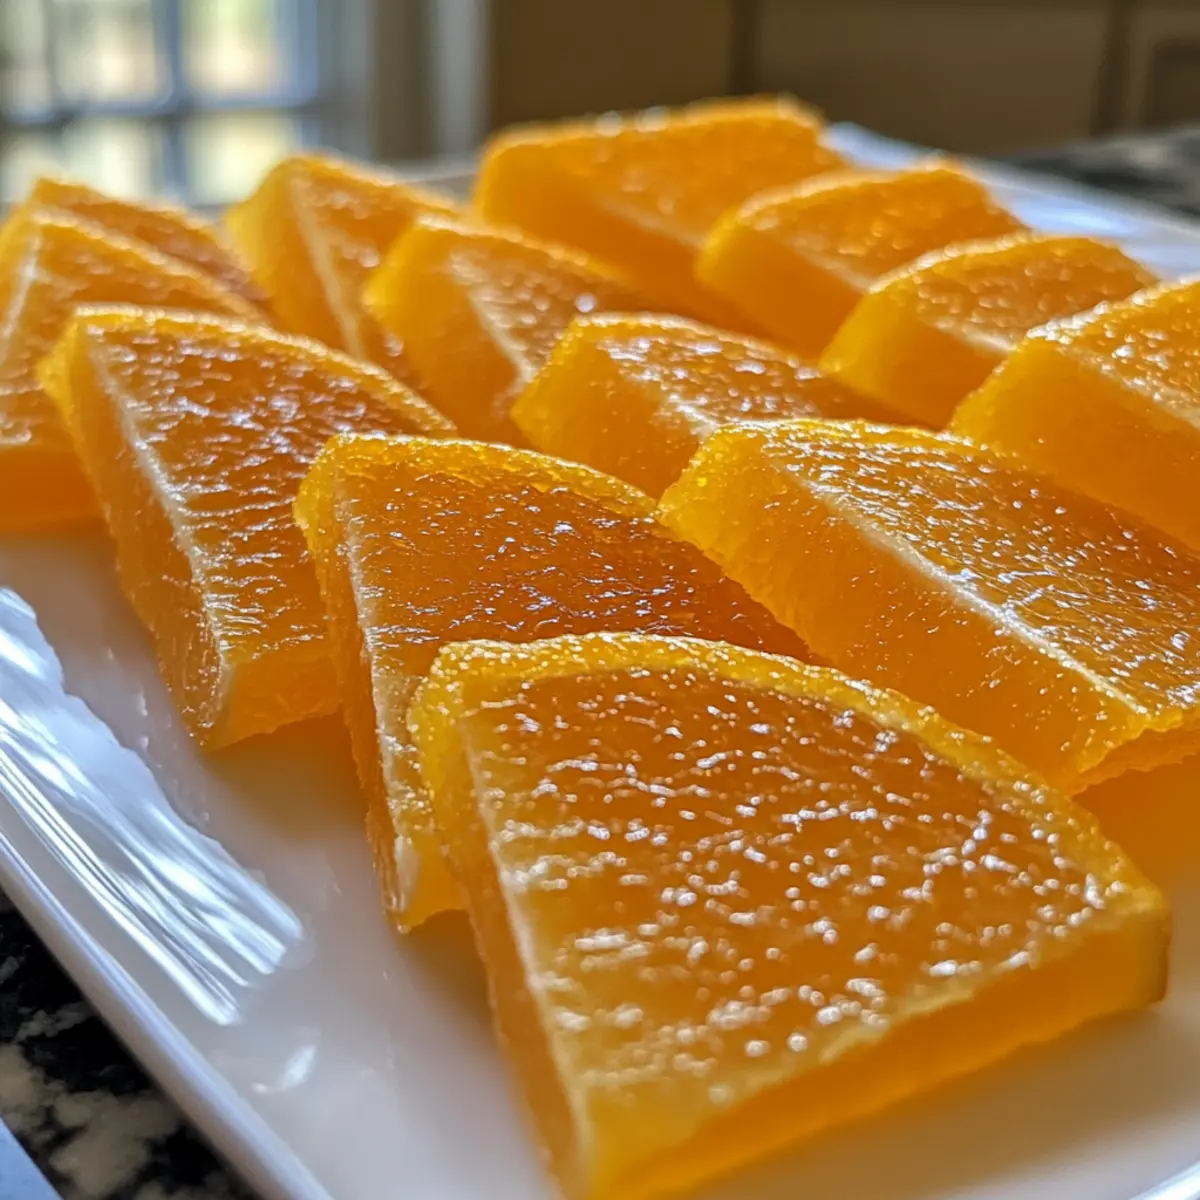
Once the mixture has cooled sufficiently, pour it into a greased 8-inch square dish or silicone candy molds. Use a spatula to smooth out the top, ensuring an even surface. Let it set at room temperature for another 1-2 hours. For a firmer texture, move the dish to the refrigerator and chill for an additional 4-6 hours or overnight.
Step 7: Cut and Serve
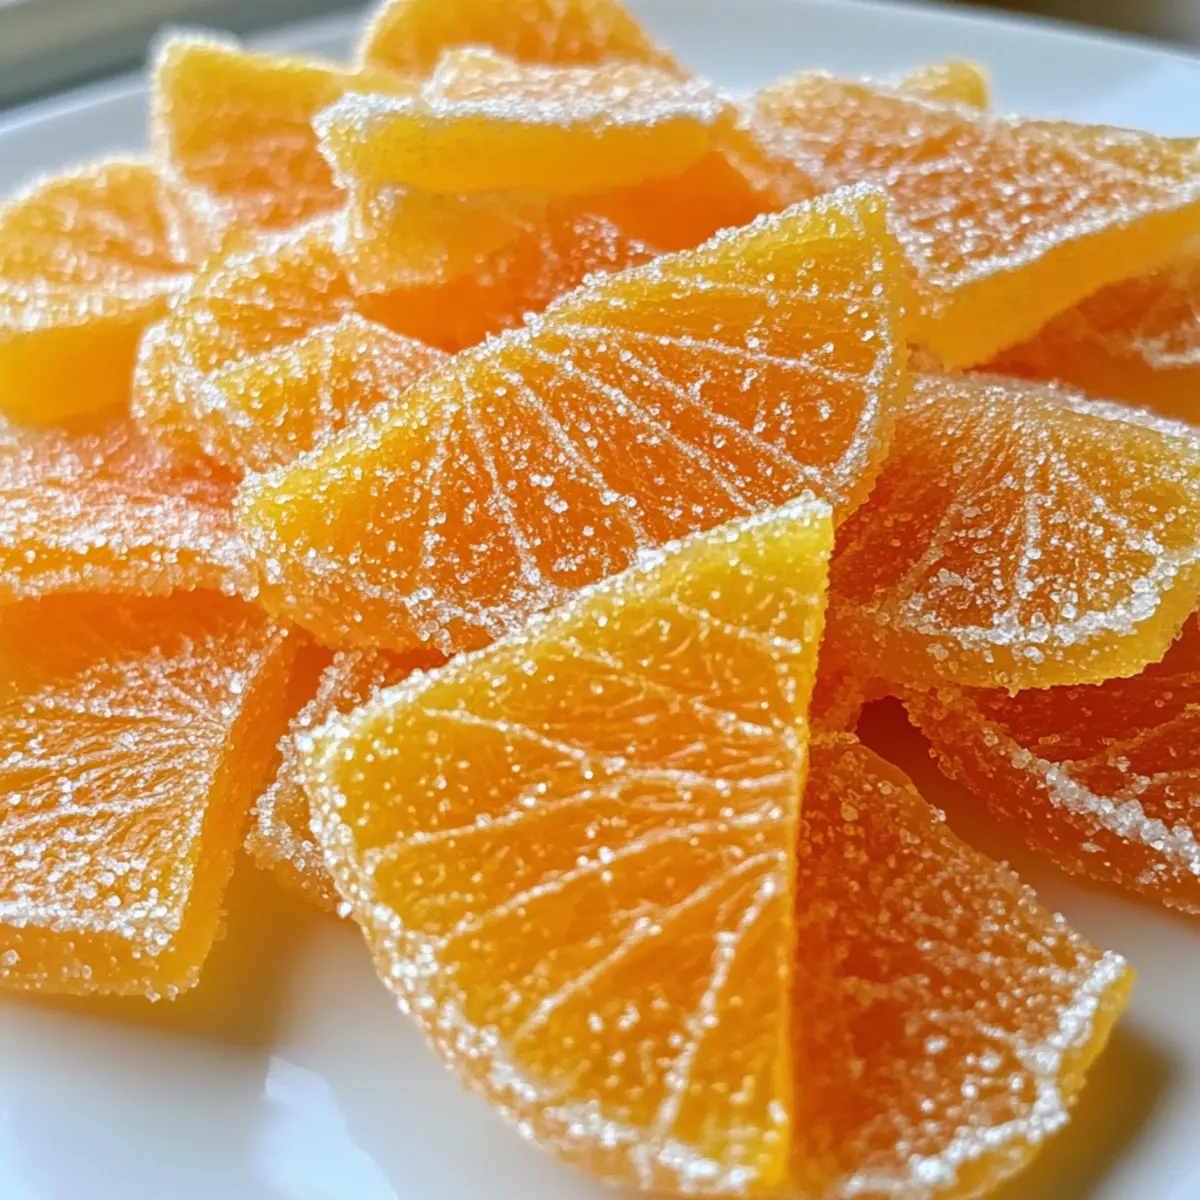
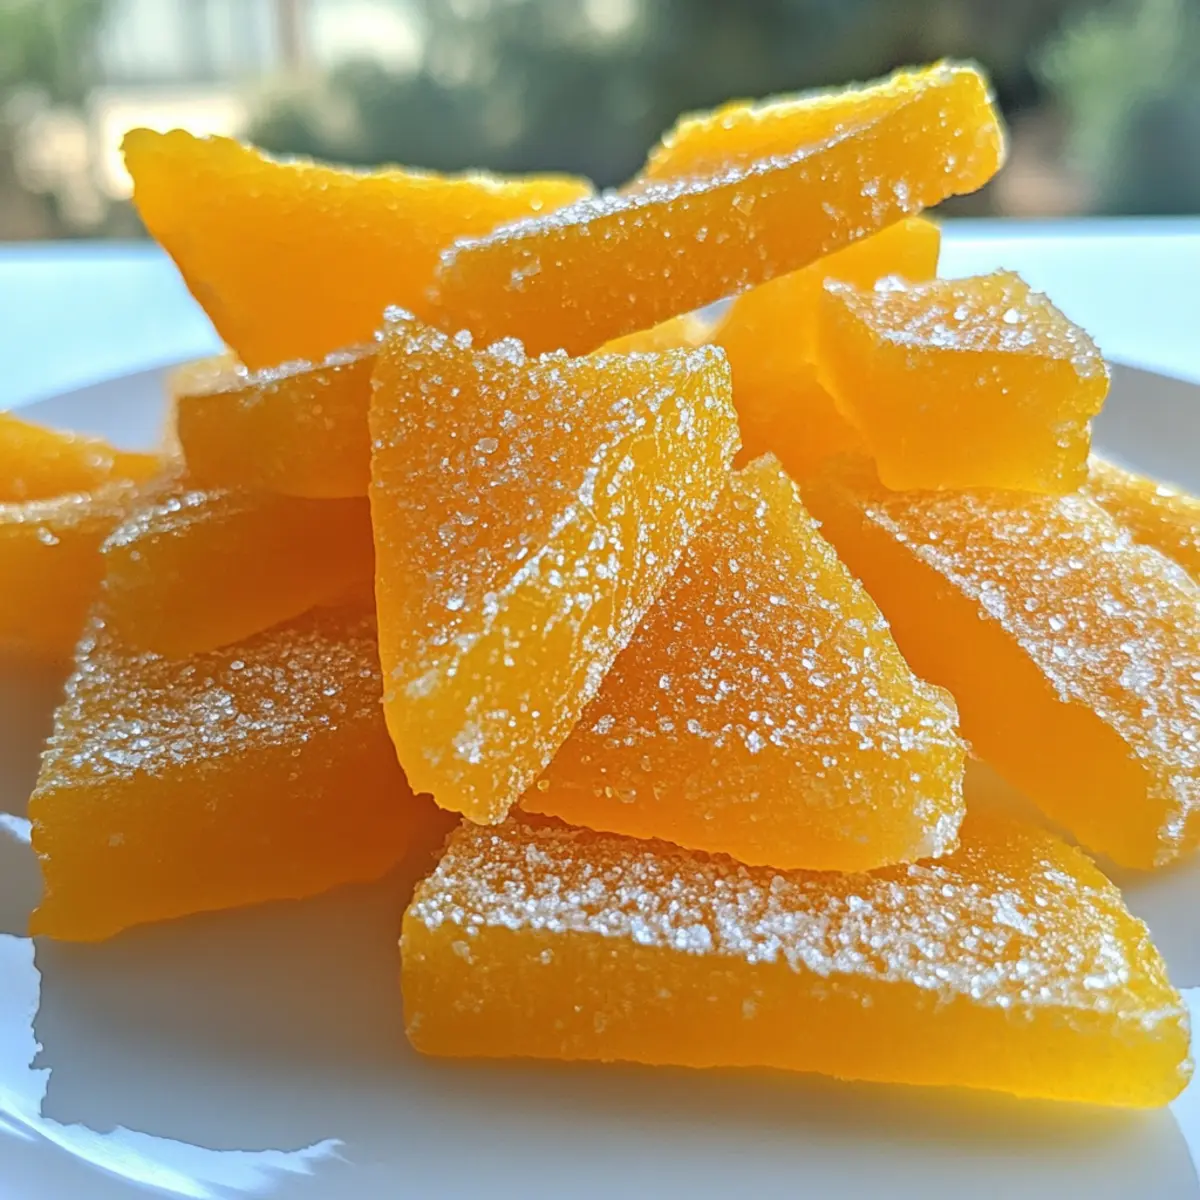
When the candy is fully set, carefully remove it from the dish or molds. Use a sharp knife to cut it into bite-sized pieces, square or rectangular. For an extra touch, you may choose to roll each piece in powdered sugar to prevent sticking and add a delightful sweetness. Your Classic Homemade Orange Candy is now ready to be savored or beautifully packaged as a gift!
Expert Tips for Classic Homemade Orange Candy
- Zest with Care: Zest carefully to avoid the bitter white pith. It’s the zest that brings that vibrant citrus flavor to your candy!
- Perfect Syrup Consistency: Ensure the syrup reaches a honey-thick consistency for optimal texture. If too thin, your candy may not set correctly.
- Patience is Key: Allow your mixture to cool and thicken properly before pouring into molds. Rushing this step can lead to a less chewy final product.
- Grease that Dish: Use a generous amount of cooking spray or butter on your dish or molds to avoid any sticking when it’s time to remove the candy.
- Creative Variations: Don’t hesitate to explore flavor additions! Adding lemon or lime will give you another delicious layer in your Classic Homemade Orange Candy.
What to Serve with Classic Homemade Orange Candy
Pairing delicious accompaniments enhances the brightness and sweetness of your candy, creating a joyful experience.
-
Herbal Tea: A soothing chamomile or mint tea perfectly balances the candy’s sweetness, offering a refreshing contrast.
-
Cheese Platter: Pair sweet orange candies with a selection of creamy cheeses like brie and goat cheese for a delightful sweet-and-savory experience that will impress your guests.
-
Fresh Fruit Salad: Brighten your day with a colorful fruit salad featuring berries and melon that complements the citrus notes of the candy. The textures and flavors mesh beautifully!
-
Chocolate Dipping Sauce: A rich chocolate sauce provides a decadent twist, allowing you to dip and savor each bite for a luxurious treat that’s hard to resist.
-
Homemade Whipped Cream: Serve alongside a dollop of lightly sweetened whipped cream for a delightful contrast, enhancing the homemade charm of your candy.
-
Sparkling Water with Lime: Refresh your palate with bubbly sparkling water infused with lime, complementing the citrus flavor and uplifting your taste buds.
-
Almonds or Cashews: Crunchy nuts add texture and a nutty flavor that pairs wonderfully with the candy’s sweetness—a perfect snack for gatherings.
-
Vanilla Ice Cream: For a delightful dessert, scoop some vanilla ice cream alongside your candy for a creamy, dreamy finish with bright citrus bursts.
Indulging in these pairings will elevate your candy experience, creating memorable moments with every sweet bite!
Make Ahead Options
These Classic Homemade Orange Candy delights are perfect for busy home cooks looking to save time! You can prepare the orange zest and juice up to 24 hours in advance, allowing the flavors to meld beautifully. You can also make the syrup and allow it to cool before incorporating the bloomed gelatin, which can be done up to 3 days ahead. Just store the syrup covered in the refrigerator to maintain its quality. When you’re ready to finish the candy, simply mix in the gelatin, let it set for 1-2 hours at room temperature, and chill for 4-6 hours before cutting into pieces. This make-ahead option ensures you have a delicious treat ready to enjoy or share without the last-minute rush!
How to Store and Freeze Classic Homemade Orange Candy
Airtight Container: Store your classic homemade orange candy in an airtight container at room temperature for up to 1 week to retain its chewy texture.
Refrigeration: For extended freshness, refrigerate the candy, where it can last up to 2 weeks while still preserving its delightful citrus flavor.
Freezing: If you’d like to keep your classic homemade orange candy for longer, freeze the pieces in a single layer on a baking sheet, then transfer to a freezer-safe bag. They can last up to 2 months.
Thawing: When ready to enjoy, thaw the candies in the fridge overnight or at room temperature for about an hour—no need to worry about texture!
Classic Homemade Orange Candy: Endless Variations
Feeling adventurous in the kitchen? Let’s explore fun ways to customize your candy and make it your own!
- Vegan Option: Substitute gelatin for agar-agar, making this treat entirely plant-based and just as chewy. It’s a great way for everyone to enjoy!
- Citrus Infusion: Add lemon or lime juice and zest for a tangy twist that’ll brighten up your candy while offering an exciting flavor contrast.
- Sweetness Control: Experiment with sugar levels by reducing them for a less sweet candy. A bit of honey or agave syrup can also enhance flavors!
- Crunchy Texture: Fold in chopped nuts like almonds or walnuts, or toss in some shredded coconut for an extra bite and delightful flavor.
- Fruity Fusion: Infuse the mix with pomegranate seeds or your favorite dried fruits. The added sweetness and texture create a lovely candy experience.
- Heat Lovers’ Treat: For a surprising kick, add a pinch of cayenne pepper or chili powder. Sweet meets spicy for the perfect adventurous palate!
- Chocolate Coating: Melt some dark or milk chocolate, dip each piece, and let them set for a rich chocolatey layer. A luxurious spin on a classic!
As you’re getting creative with these variations, consider pairing your candies with a refreshing tea or delightful cheese platter to elevate your experience, just like I do with my White Chocolate Orange Mousse or serve them alongside a fruit salad for a sweet treat. You’ll find that the result is not just candy, but a delightful piece of art made with love!
Classic Homemade Orange Candy Recipe FAQs
How do I select the right oranges for this recipe?
Absolutely! For the best flavor and zest, I recommend using fresh, organic navel oranges. Look for ones that are firm, with a vibrant color and feel heavy for their size. Avoid any that have dark spots or wrinkles, as these may indicate overripeness.
What is the best way to store my orange candy?
To keep your classic homemade orange candy fresh, store it in an airtight container at room temperature for up to 1 week. If you want it to last longer, refrigerate it for up to 2 weeks. Just remember to let it come to room temperature before serving for that perfect chewy texture!
Can I freeze this candy for later use?
Very! To freeze your classic homemade orange candy, start by cutting it into pieces. Lay the pieces in a single layer on a baking sheet and freeze for about 1-2 hours until firm. Then, transfer the candies into a freezer-safe bag or container. They can be stored in the freezer for up to 2 months. Thaw them in the fridge overnight, and enjoy!
What if my candy doesn’t set properly?
No worries! If your candy doesn’t set, it might be because the syrup didn’t reach the right thickness during cooking. To troubleshoot, here’s what you can do: First, reheat the mixture gently until it liquefies. Then, make a new batch of gelatin by blooming it again in water. Stir the bloomed gelatin into the warm syrup and let it cool and set again. It’s all part of the candy-making adventure!
Are there any dietary considerations for this recipe?
Yes! This recipe can easily cater to various dietary needs. You can swap out the unflavored gelatin for agar-agar to create a vegan option. If anyone has nut allergies, be cautious when adding optional ingredients like nuts or coconut. Always check labels on ingredients you use to ensure they align with dietary restrictions.
Classic Homemade Orange Candy for a Citrus Burst of Joy
Ingredients
Equipment
Method
- Wash three fresh organic navel oranges thoroughly. Zest to yield about 2 tablespoons of zest, avoiding the bitter white pith. Juice the oranges to yield approximately 3/4 cup of juice.
- In a medium saucepan, combine the orange juice, 1/4 cup of water, 2 cups of granulated sugar, and 1/4 cup of corn syrup. Heat until the sugar dissolves, about 3-5 minutes, then simmer for 10 minutes.
- Sprinkle 2 tablespoons of unflavored gelatin over 1/4 cup of cold water in a small bowl. Allow to sit for about 5 minutes to bloom.
- Stir the bloomed gelatin into the warm syrup until completely dissolved. Add the reserved orange zest and 1 tablespoon of unsalted butter, mixing until well incorporated.
- Allow the mixture to cool at room temperature for about 1-2 hours until thickened slightly.
- Pour the mixture into a greased 8-inch square dish or silicone molds. Smooth the top and let it set for another 1-2 hours. Refrigerate for 4-6 hours for a firmer texture.
- Once set, remove from the dish and cut into bite-sized pieces. Optionally roll each piece in powdered sugar.
Leave a Reply